> ## Documentation Index
> Fetch the complete documentation index at: https://docs.genfuseai.com/llms.txt
> Use this file to discover all available pages before exploring further.
# Quickstart
> Build your first AI agent that performs in-depth research about any company and emails you a comprehensive report - in under 5 minutes.
## Creating an agent workflow
Agent workflows allow you to connect multiple AI agents and tools to create powerful automations.
Use our simple drag and drop editor to design and deploy your custom workflow in minutes.
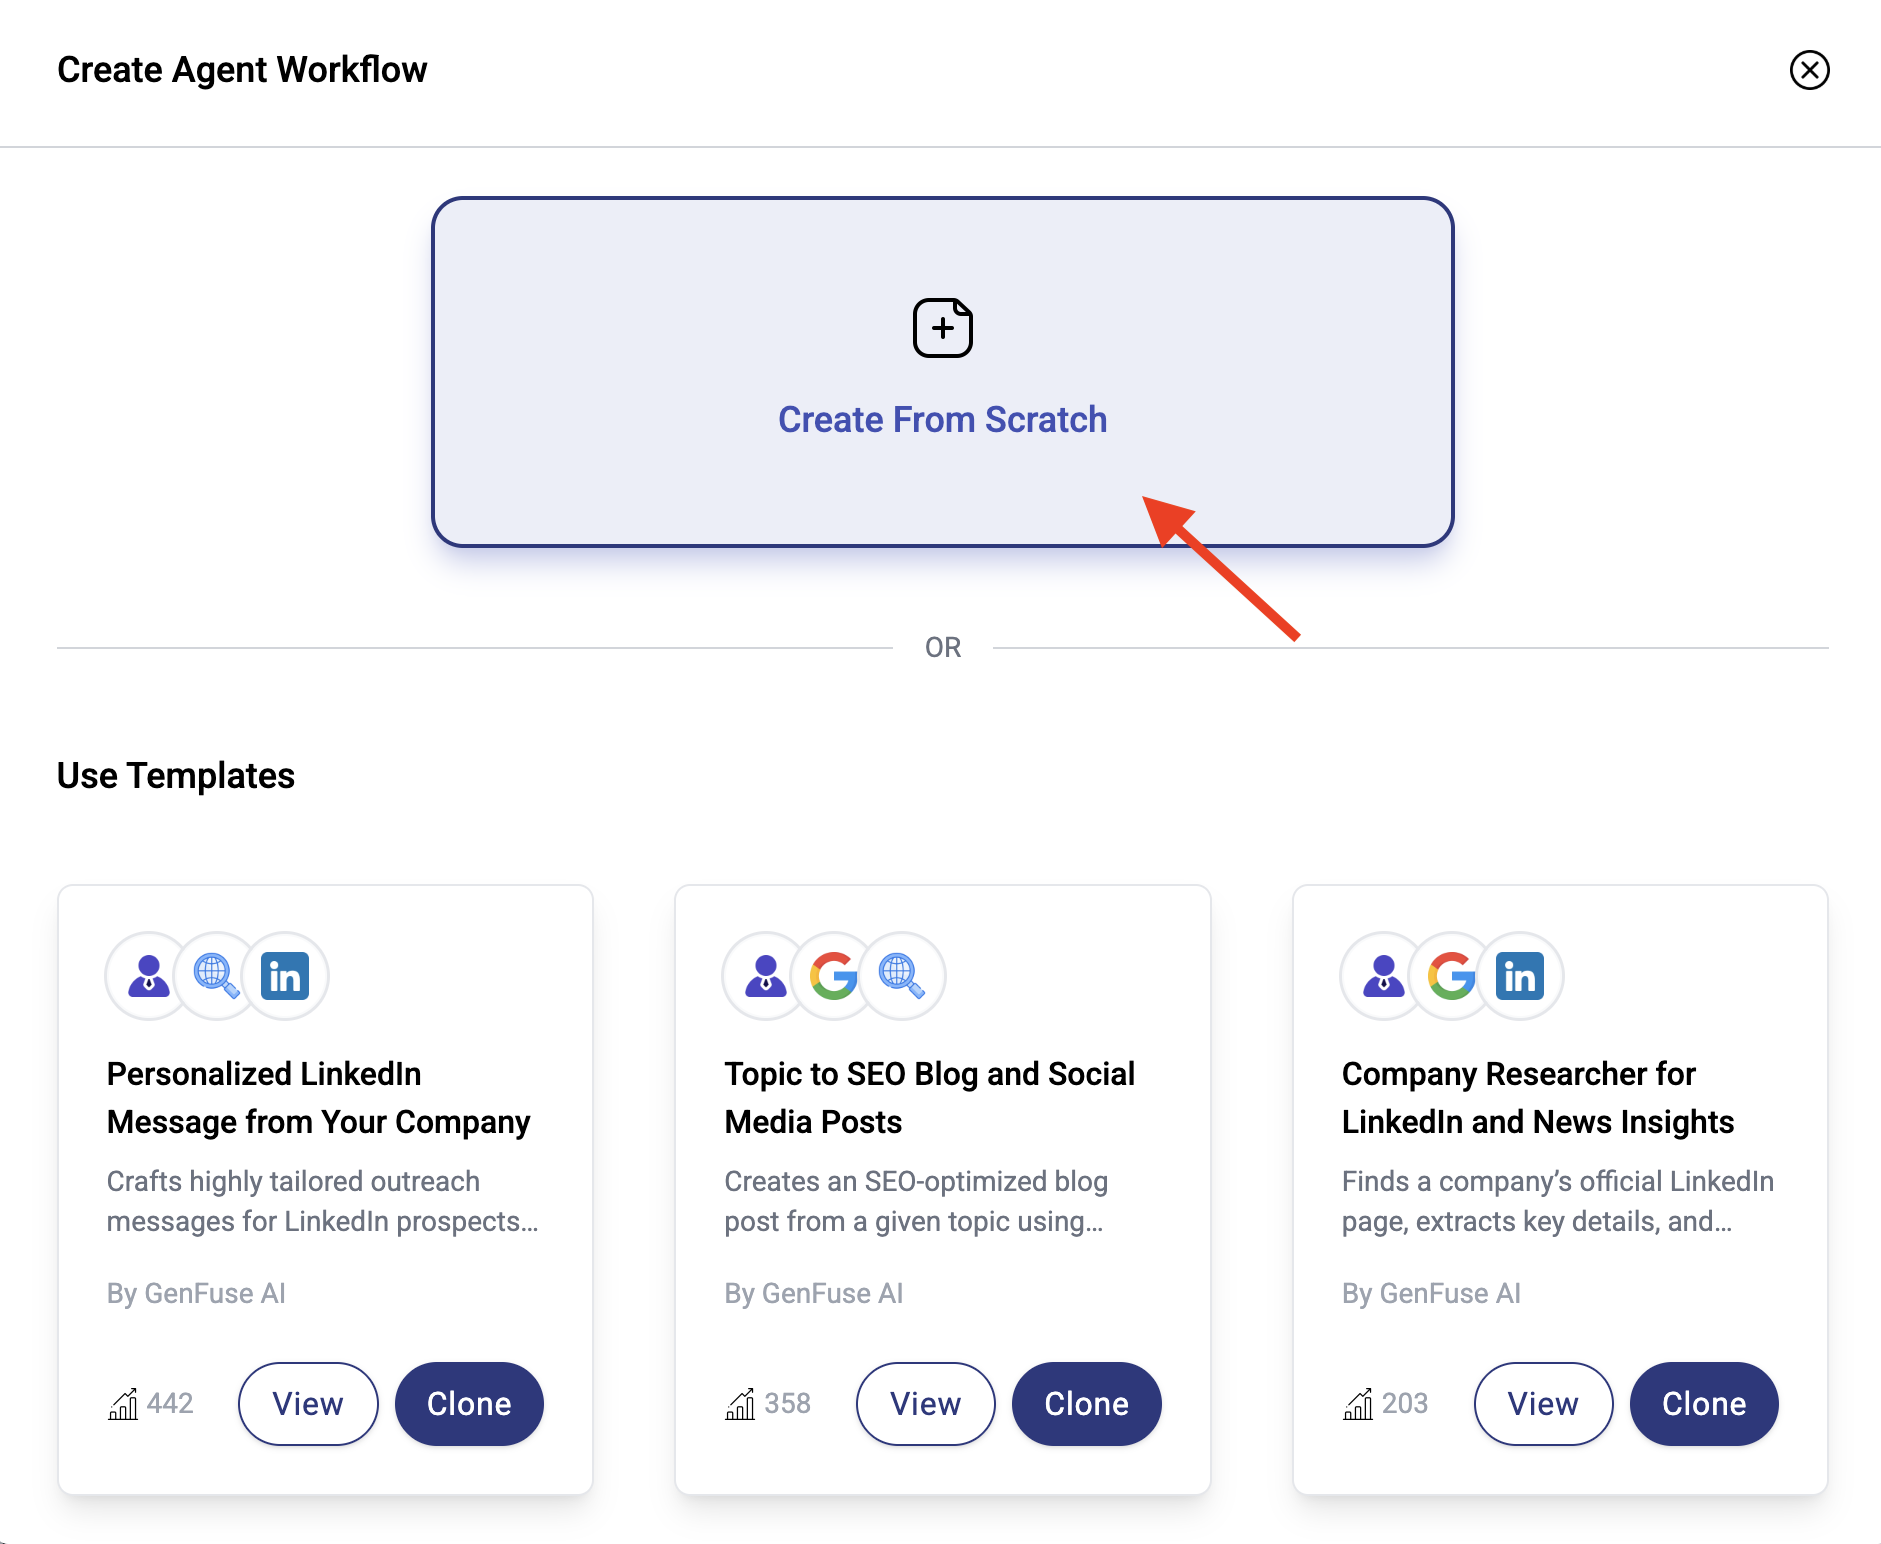
To create a new agent workflow:
1. [Sign Up](https://genfuseai.com/sign-up) in GenFuse AI
2. Once you've logged in, go to the [Agent Workflows](https://genfuseai.com/dashboard) page (in the sidebar)
3. Create a new workflow by clicking the button in the top right corner.
 ***
## Customizing the agent workflow
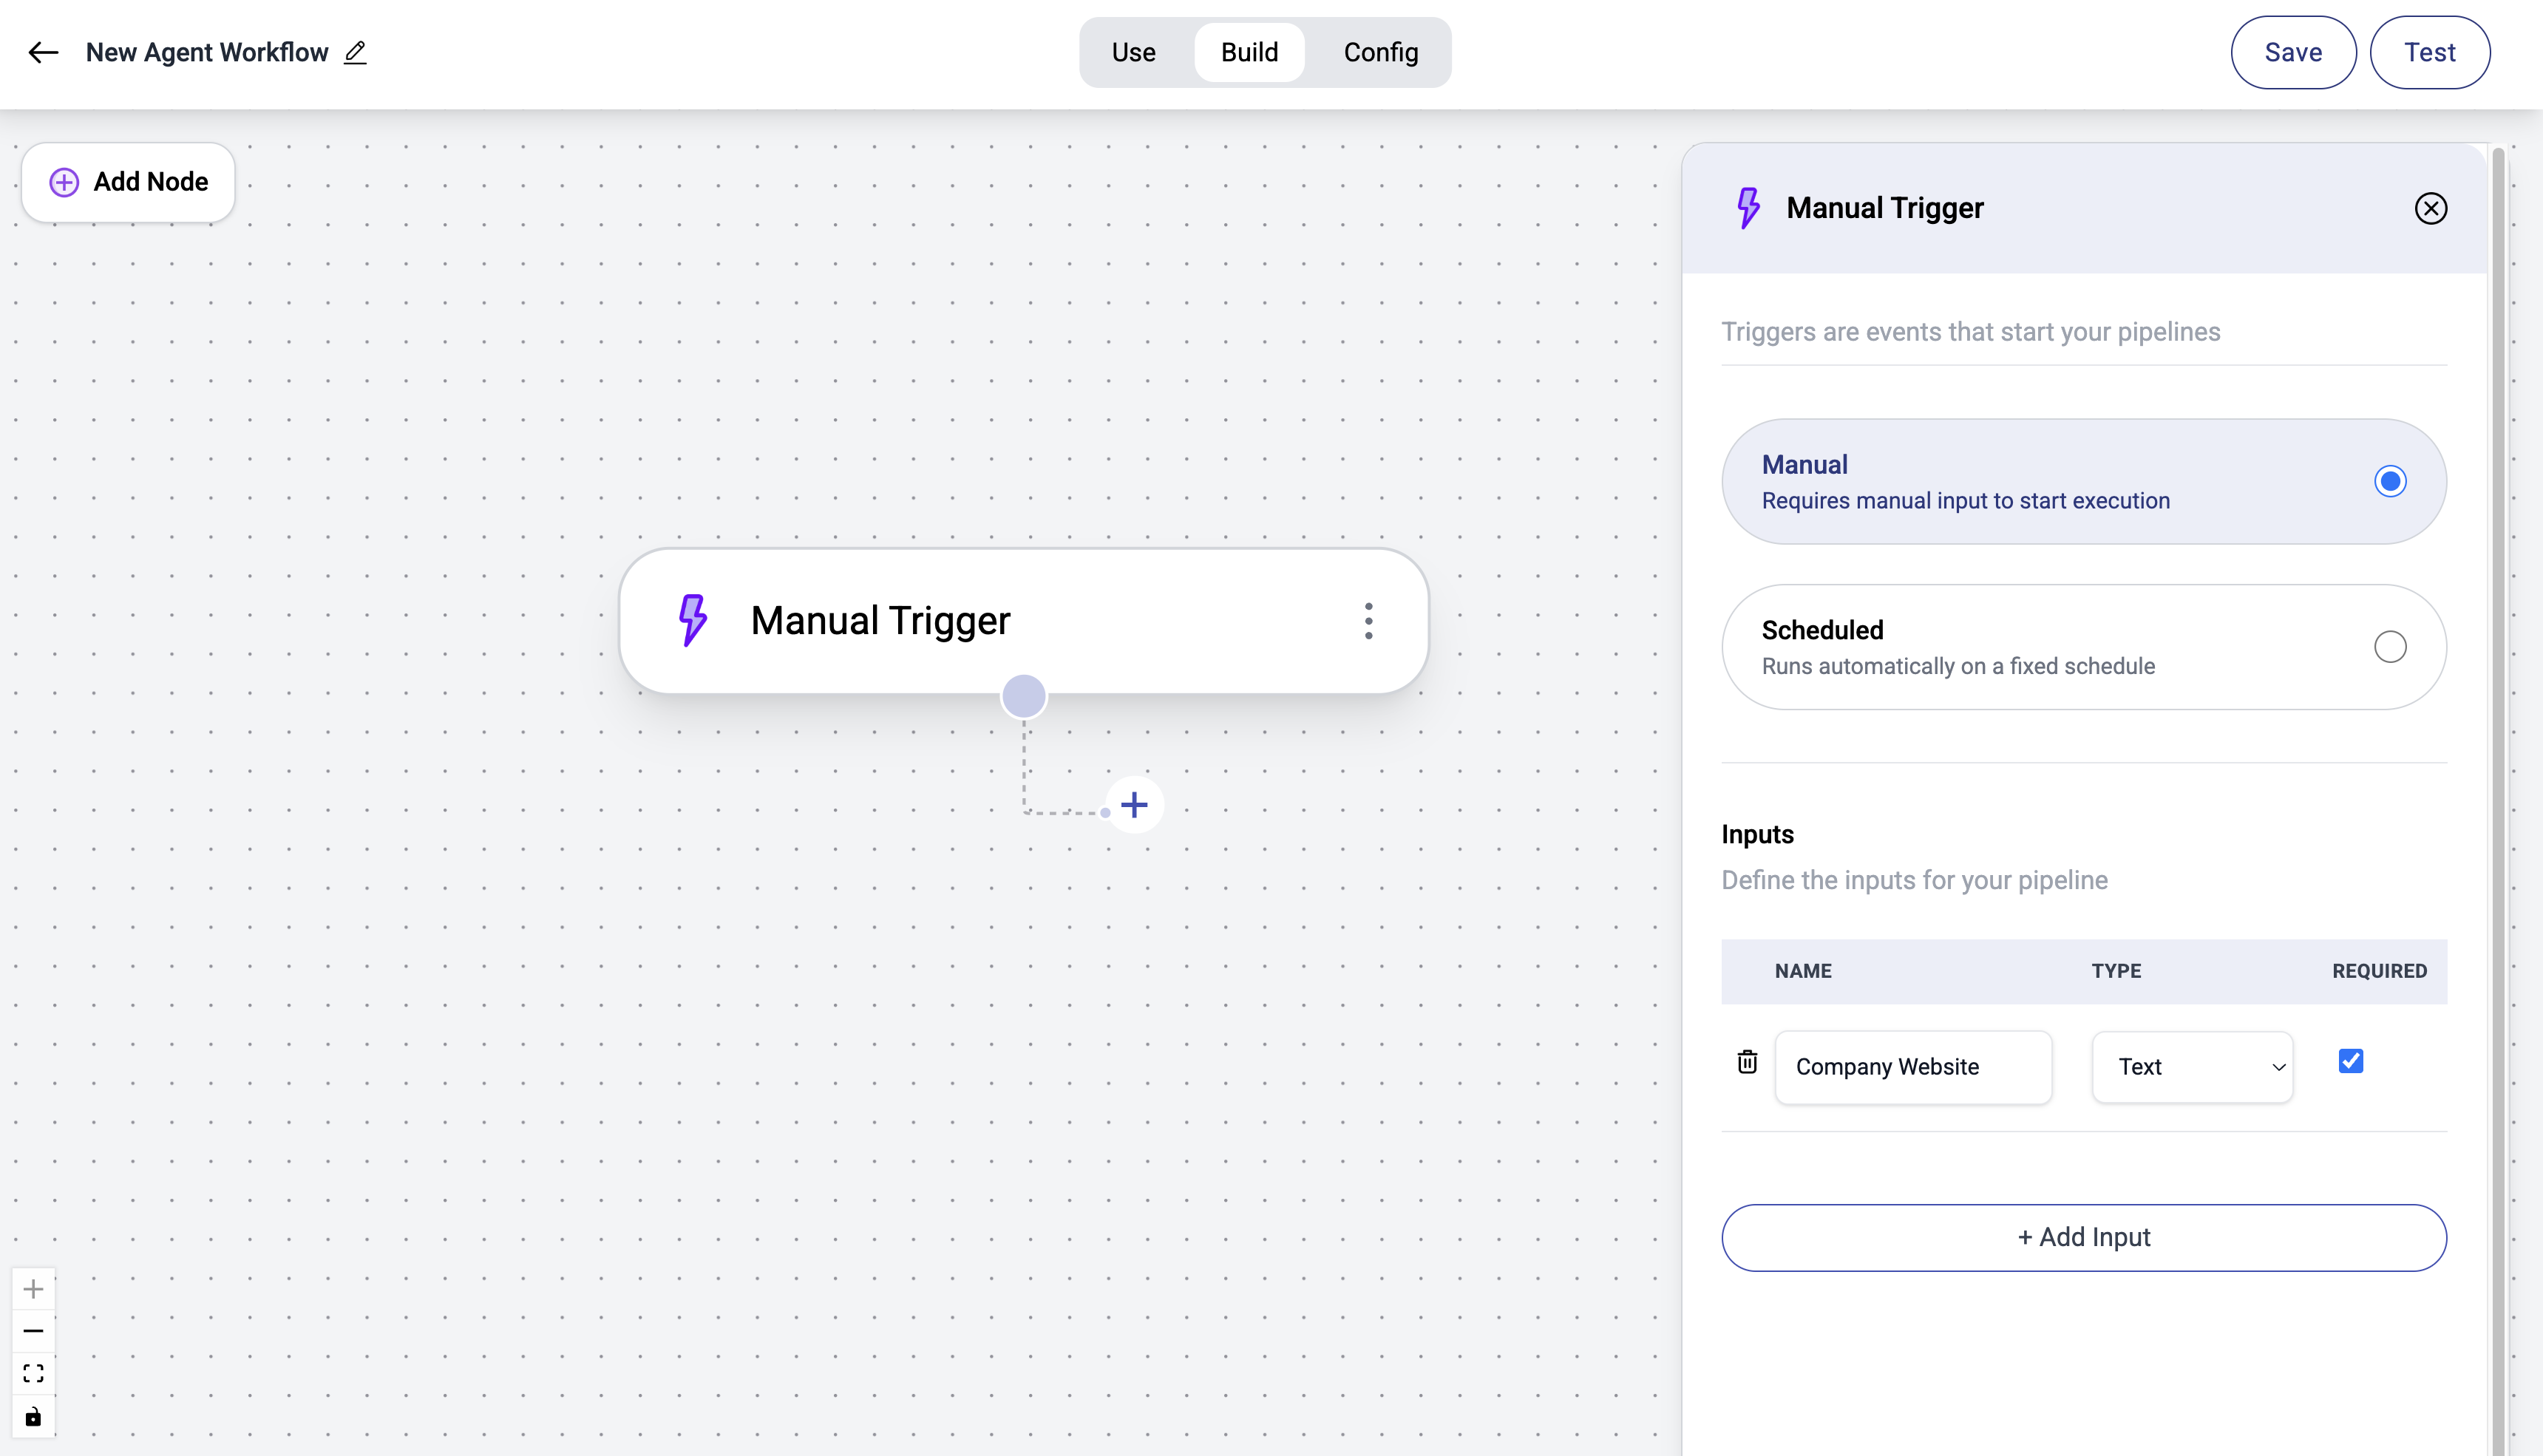
### Add a Trigger
Triggers are events that start your workflow.
Examples include manual triggers (run on demand), scheduled triggers (e.g. every weekday at 7 AM), or event-based triggers (e.g. when an email is received).
In this example, we'll set up a manual trigger that takes a company website as input.
* Click the `Trigger` node in your workflow
* Select `Manual` Trigger
* Click `Add Input` and add `Company Website` as an input — this lets you provide custom data each time the workflow runs.
***
## Customizing the agent workflow
### Add a Trigger
Triggers are events that start your workflow.
Examples include manual triggers (run on demand), scheduled triggers (e.g. every weekday at 7 AM), or event-based triggers (e.g. when an email is received).
In this example, we'll set up a manual trigger that takes a company website as input.
* Click the `Trigger` node in your workflow
* Select `Manual` Trigger
* Click `Add Input` and add `Company Website` as an input — this lets you provide custom data each time the workflow runs.
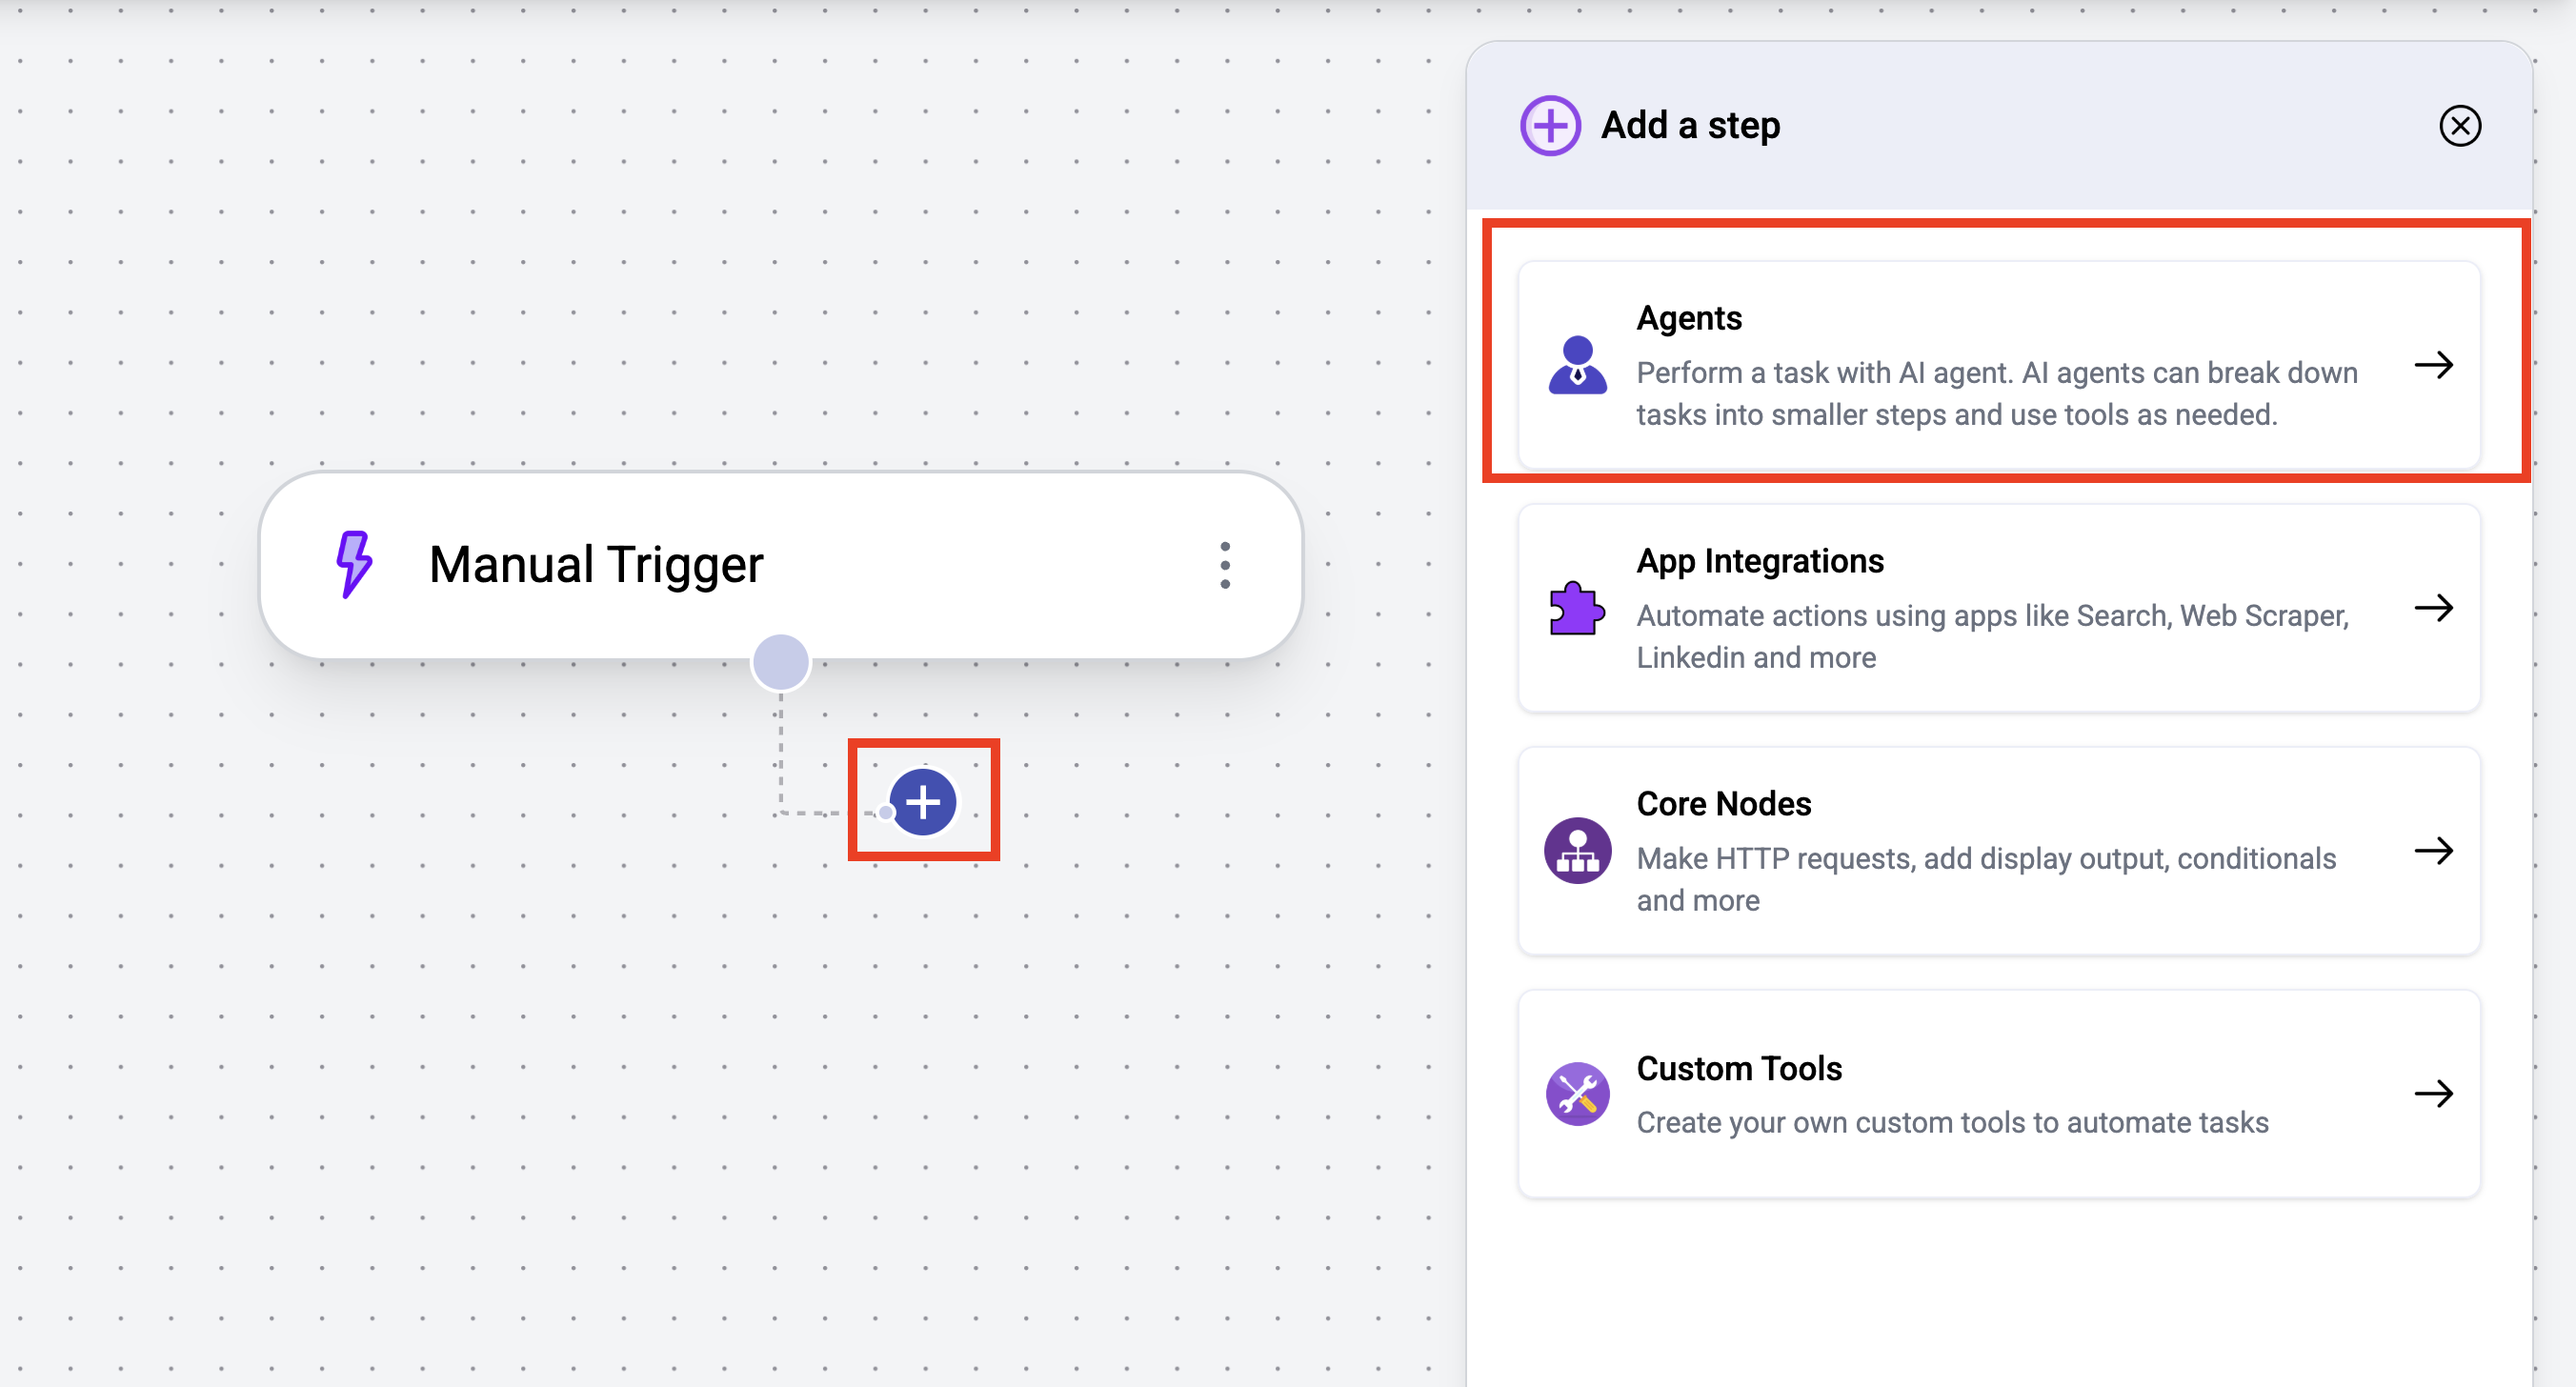
 ### Add an AI Agent
AI agents are intelligent systems powered by LLMs that can perform multi-step tasks without human intervention.
They can be equipped with tools and can autonomously decide how to use them to complete tasks.
* Click the `+` button to add a new step.
* Select `Agents`
* Click `New Agent` to create an agent.
### Add an AI Agent
AI agents are intelligent systems powered by LLMs that can perform multi-step tasks without human intervention.
They can be equipped with tools and can autonomously decide how to use them to complete tasks.
* Click the `+` button to add a new step.
* Select `Agents`
* Click `New Agent` to create an agent.
 #### Build the Agent with AI
Describe the task you want your agent to perform, and let AI build a powerful agent for you.
It will set up the agent’s instructions and add the necessary tools based on your task.
You can then customize the agent to fit your needs.
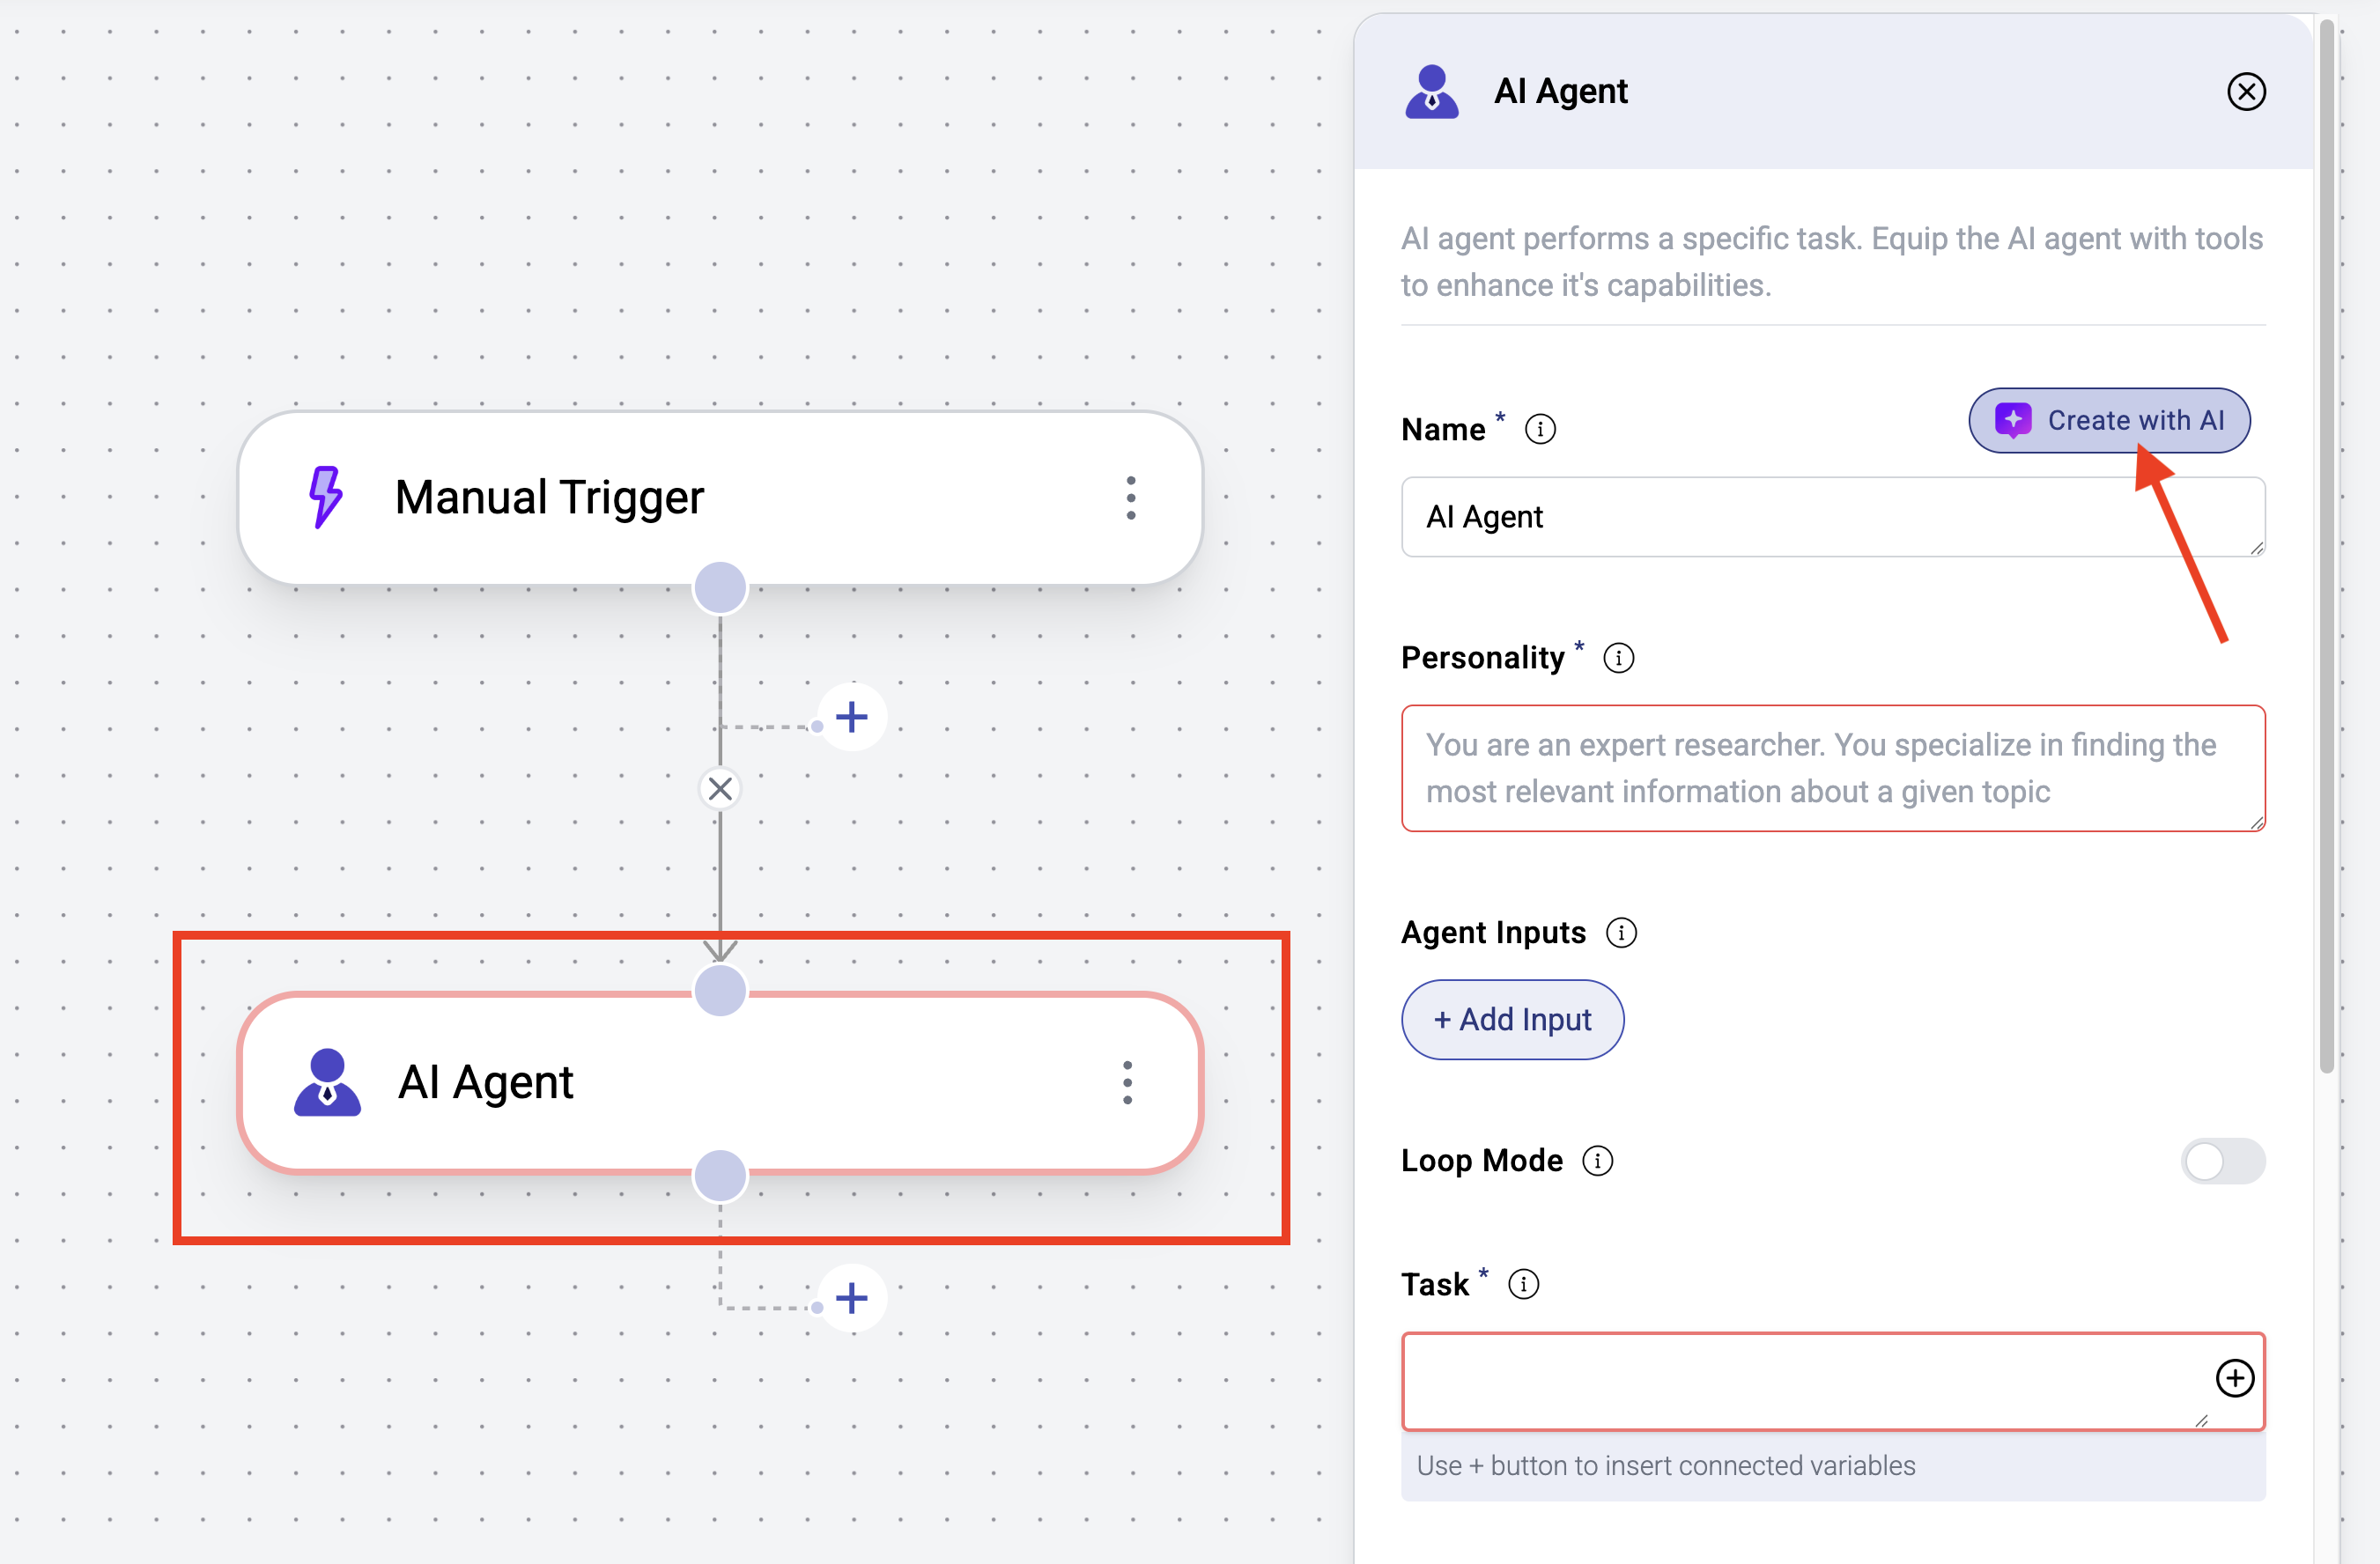
* Click on the added AI Agent node
* Click the `Create with AI` button
#### Build the Agent with AI
Describe the task you want your agent to perform, and let AI build a powerful agent for you.
It will set up the agent’s instructions and add the necessary tools based on your task.
You can then customize the agent to fit your needs.
* Click on the added AI Agent node
* Click the `Create with AI` button
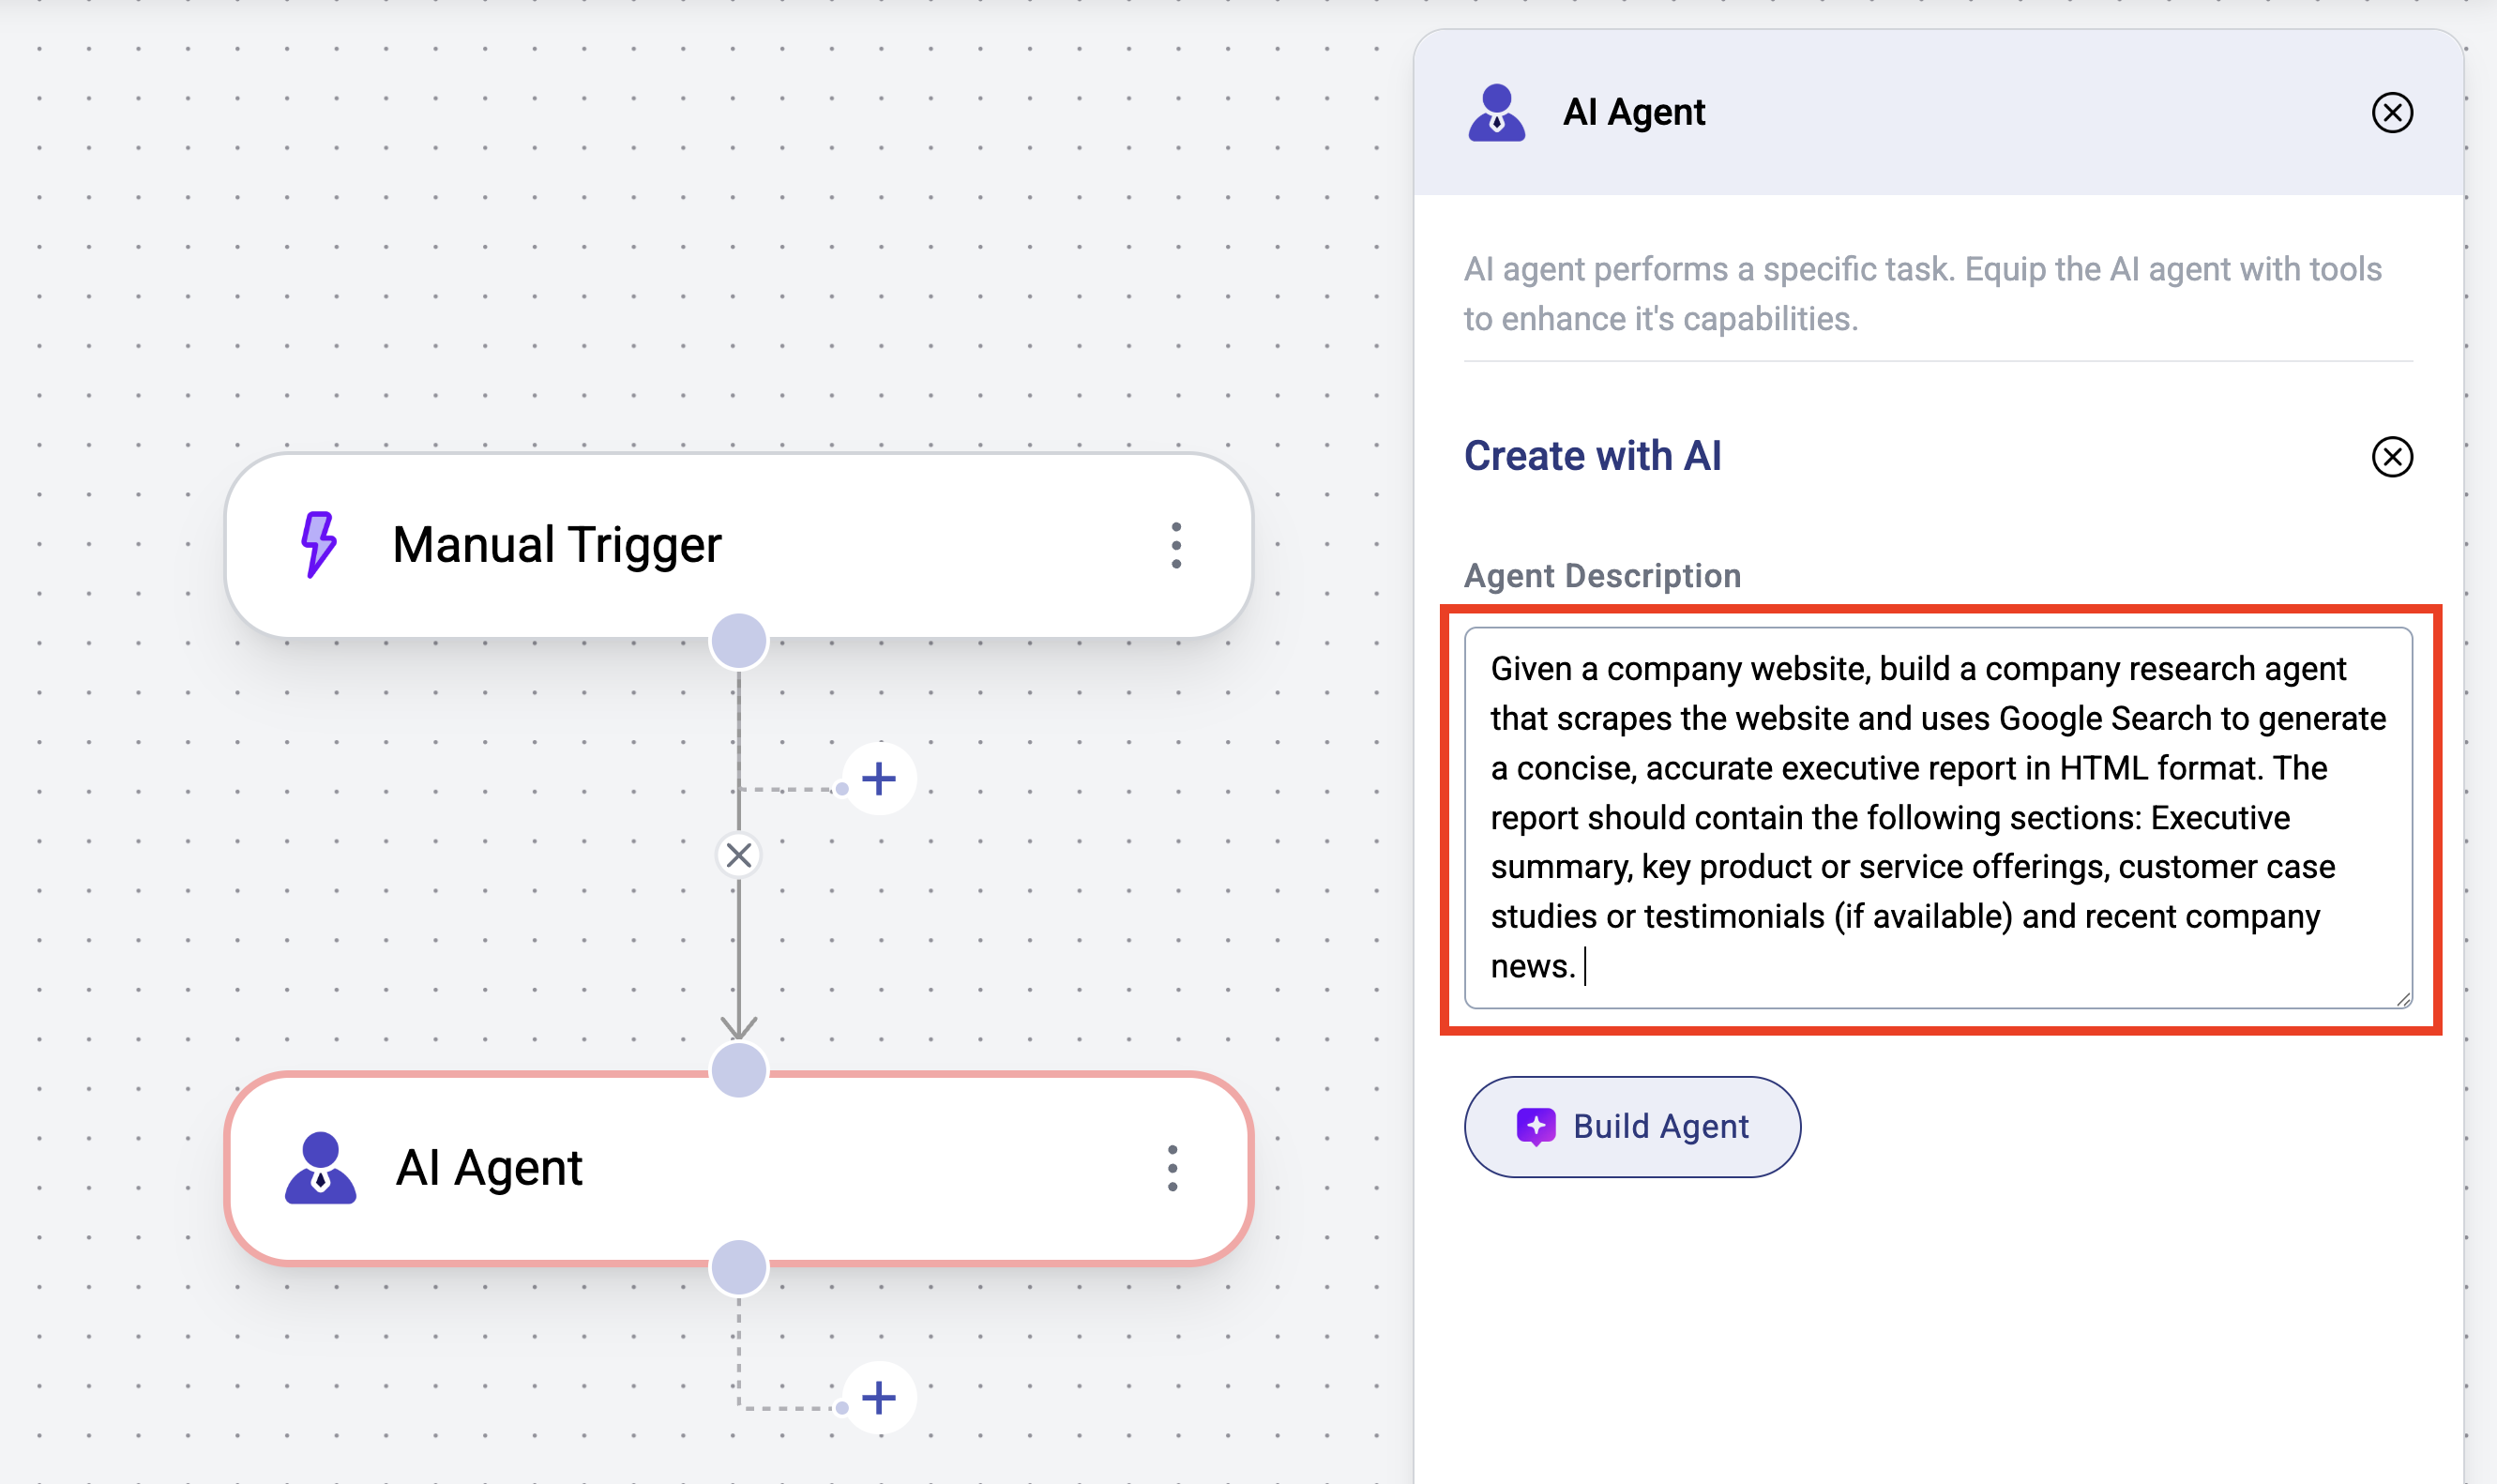
 * Set the agent description to:
```Plain text theme={null}
Given a company website, build a company research agent that scrapes the website and uses Google Search to generate a concise, accurate executive report in HTML format.
The report should contain the following sections: Executive summary, key product or service offerings, customer case studies or testimonials (if available).
```
* Click `Build Agent`
* Set the agent description to:
```Plain text theme={null}
Given a company website, build a company research agent that scrapes the website and uses Google Search to generate a concise, accurate executive report in HTML format.
The report should contain the following sections: Executive summary, key product or service offerings, customer case studies or testimonials (if available).
```
* Click `Build Agent`
 * Once your agent is built, accept it and make any necessary changes.
You can customize the agent instructions, add or remove tools or change the underlying LLM model (under Settings).
#### Add Agent Input
Each agent can accept one or more inputs. By configuring these inputs, you can pass data from earlier steps to the AI agent.
Use the `+` button in the text box to insert output from any previous step into the current step.
Optionally, you can reference any agent input within the agent task.
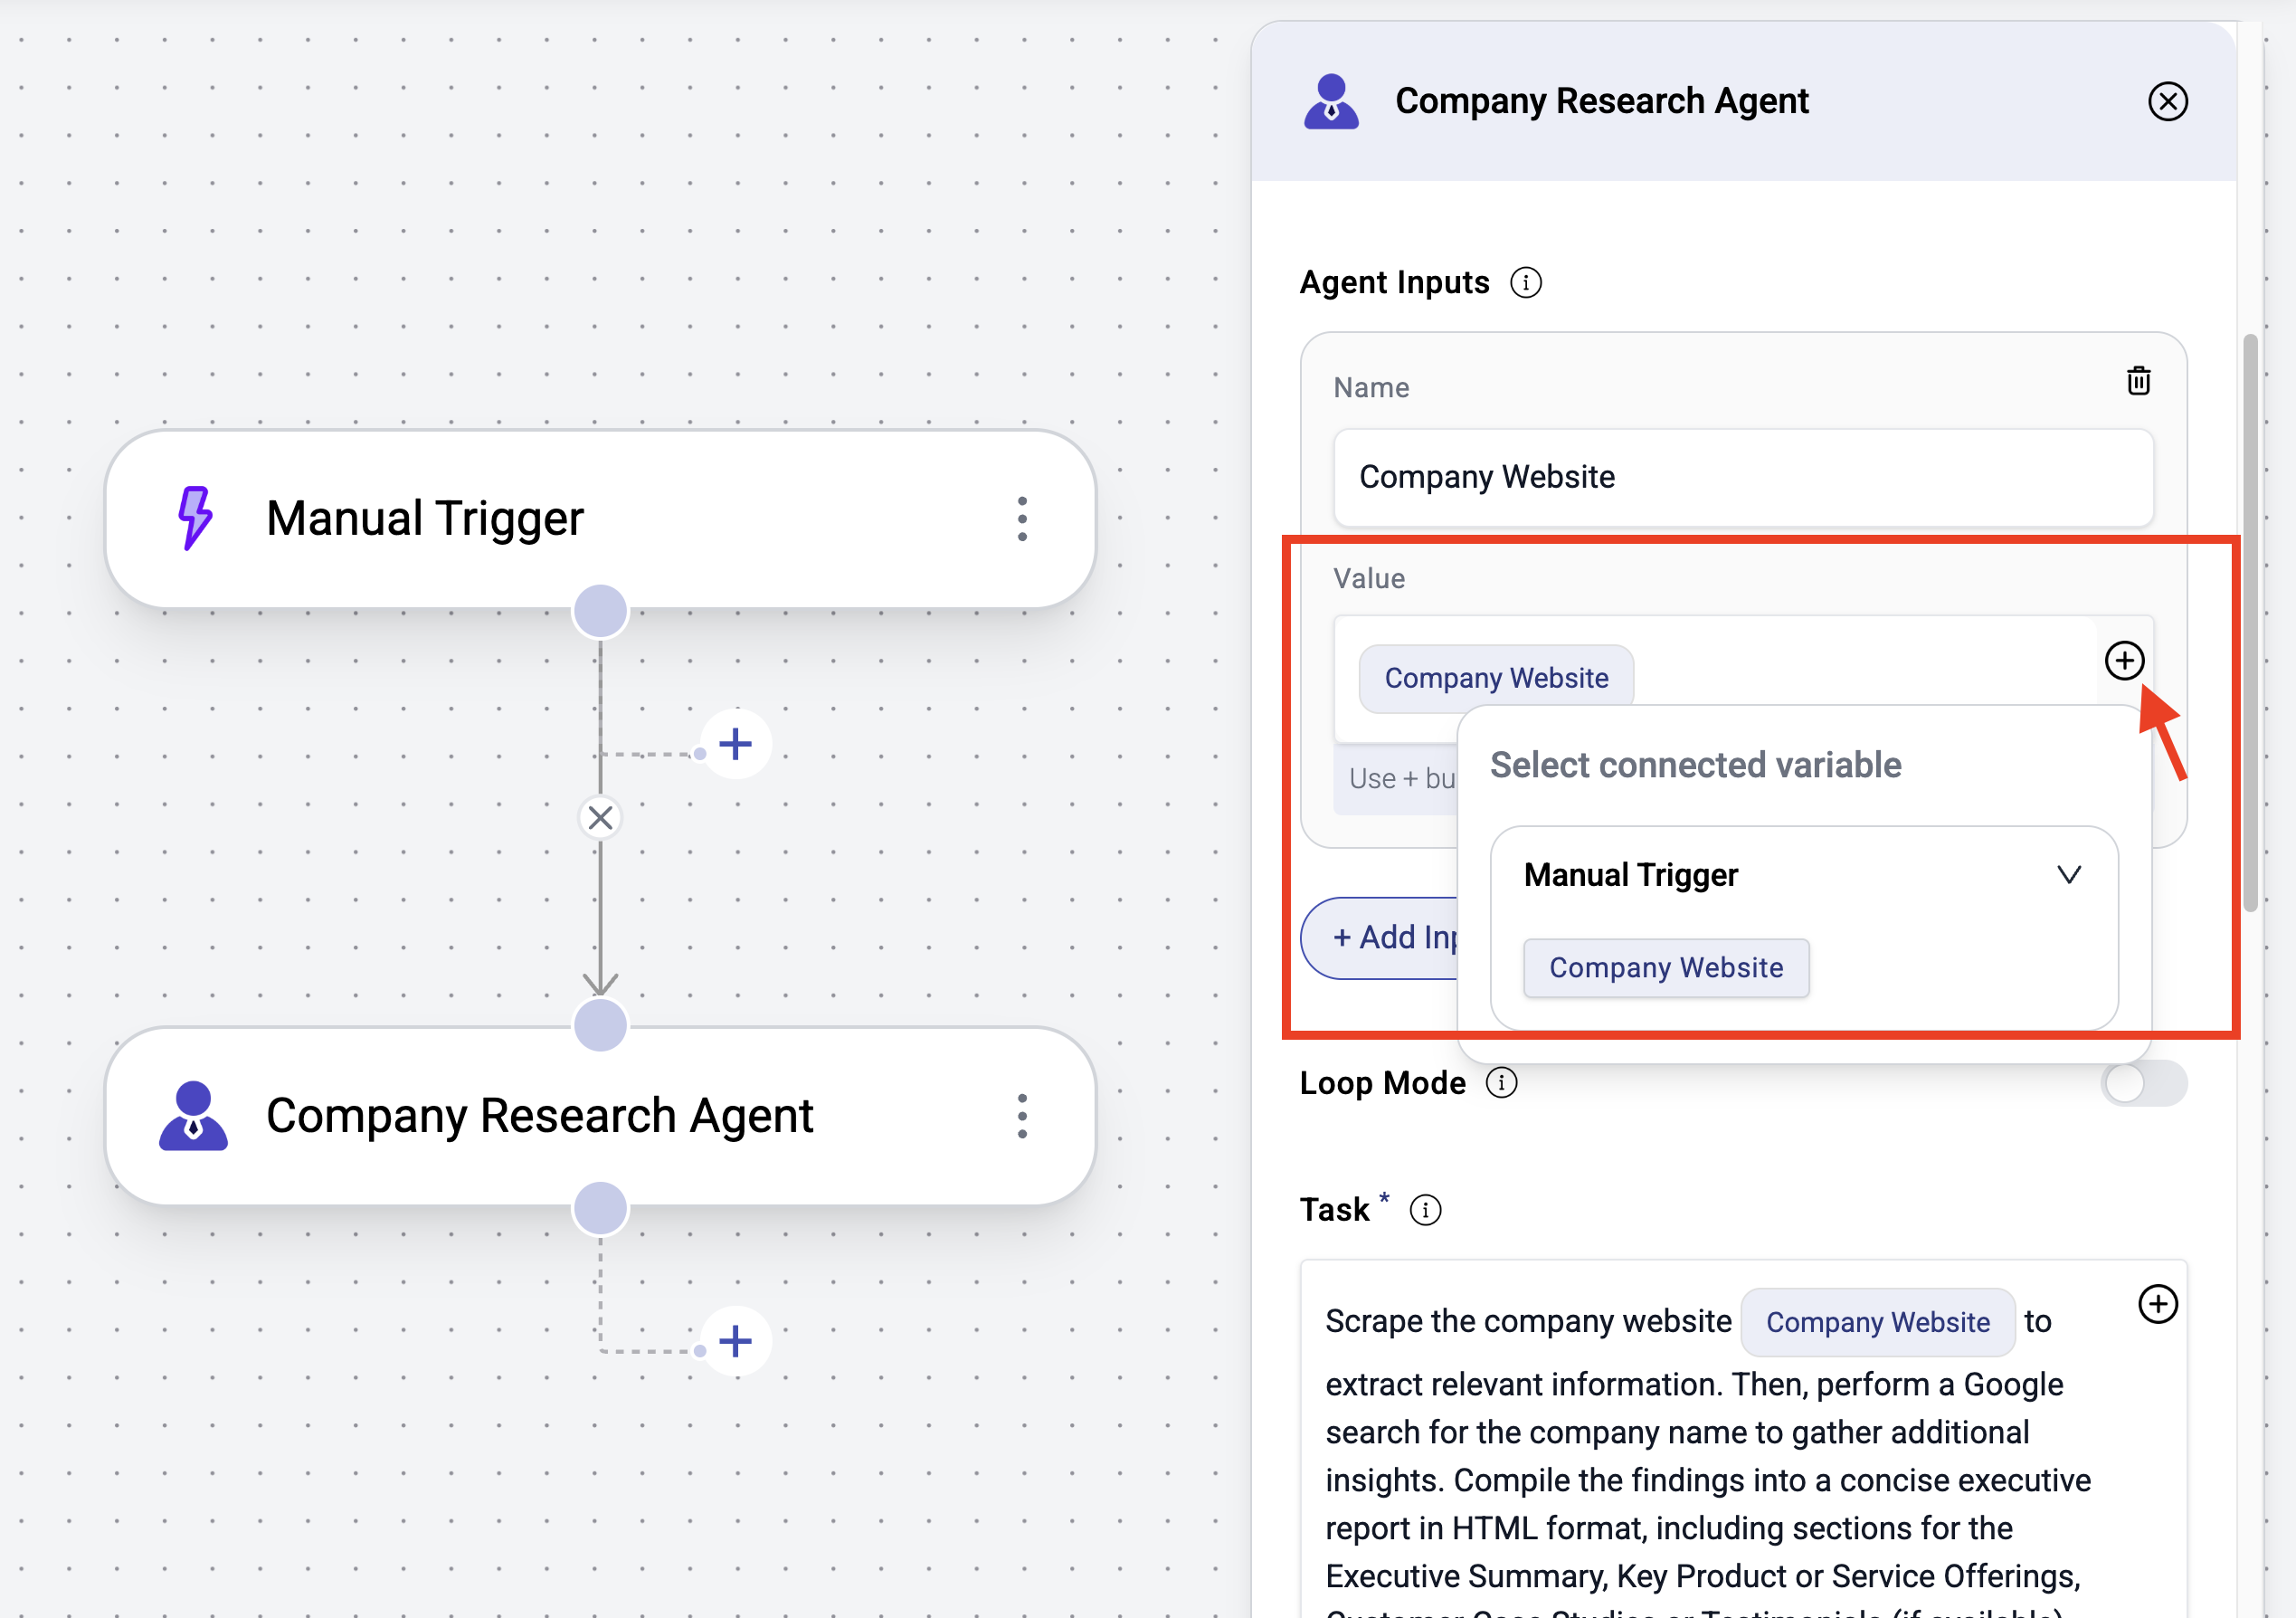
* If it's not already added, create an agent input named `Company Website`.
* Click the `+` button to map the company website from the `Manual Trigger` step to the value of this input.
* Once your agent is built, accept it and make any necessary changes.
You can customize the agent instructions, add or remove tools or change the underlying LLM model (under Settings).
#### Add Agent Input
Each agent can accept one or more inputs. By configuring these inputs, you can pass data from earlier steps to the AI agent.
Use the `+` button in the text box to insert output from any previous step into the current step.
Optionally, you can reference any agent input within the agent task.
* If it's not already added, create an agent input named `Company Website`.
* Click the `+` button to map the company website from the `Manual Trigger` step to the value of this input.
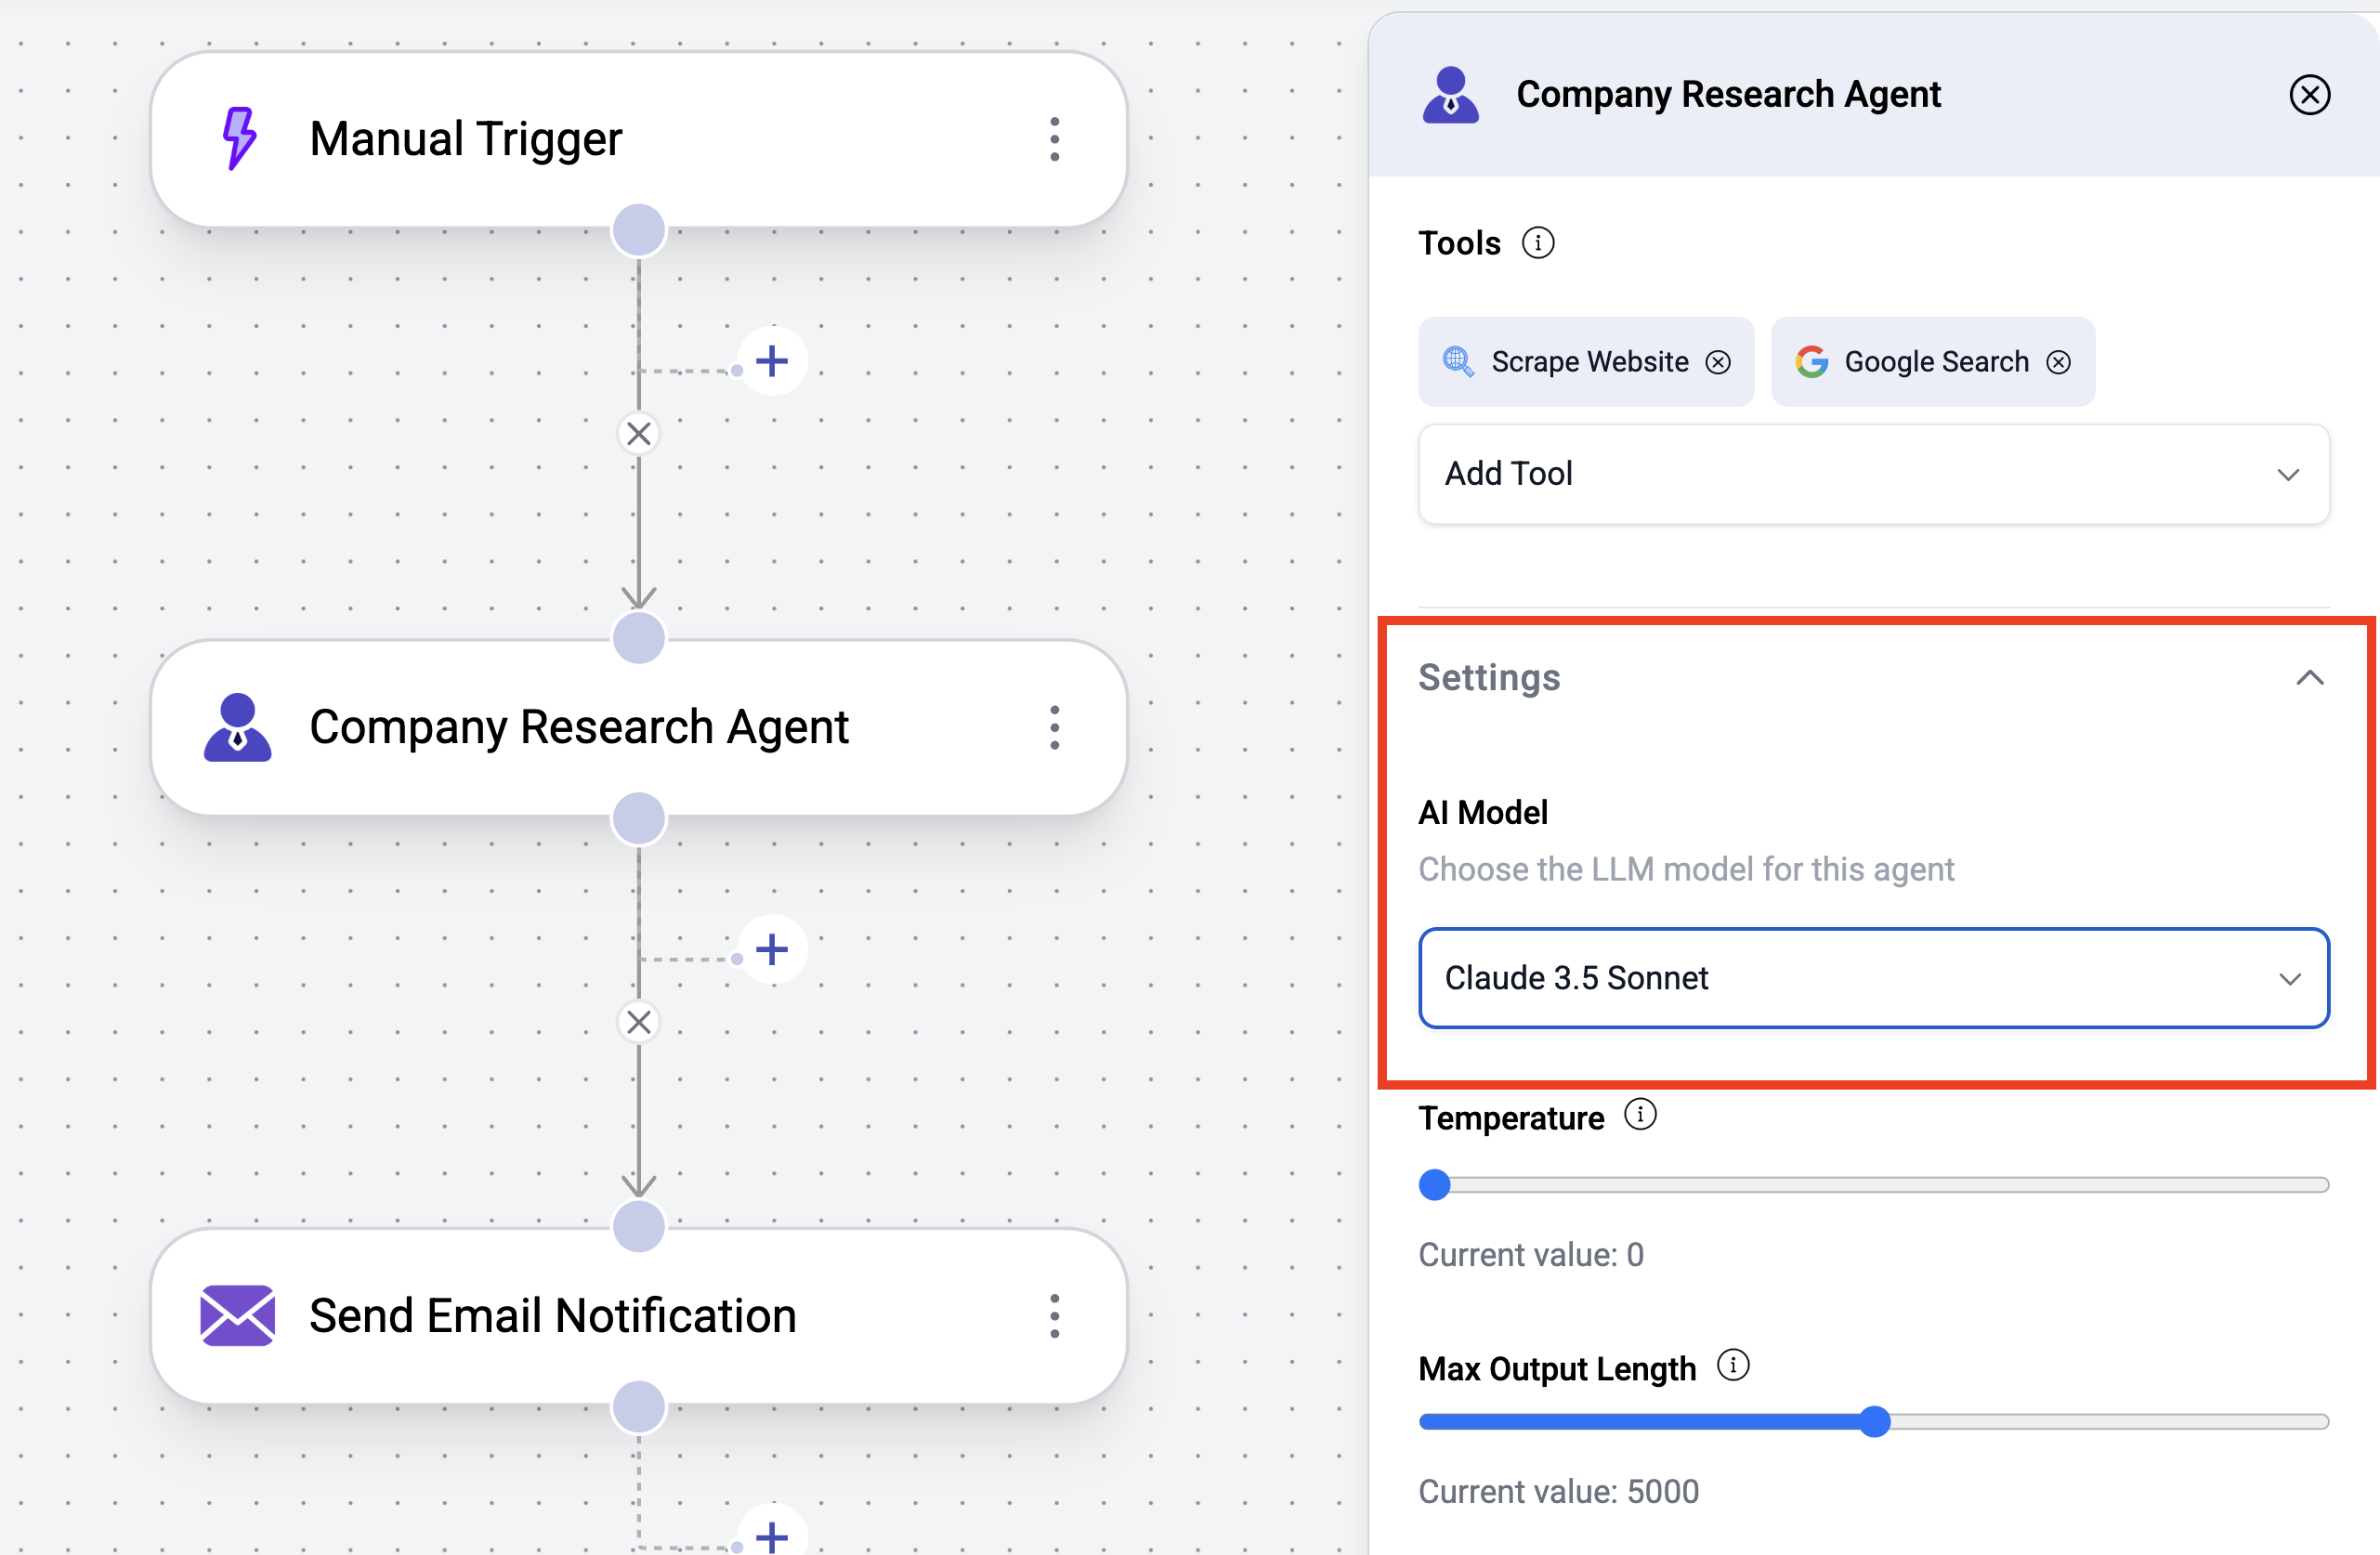
 #### Add Tools
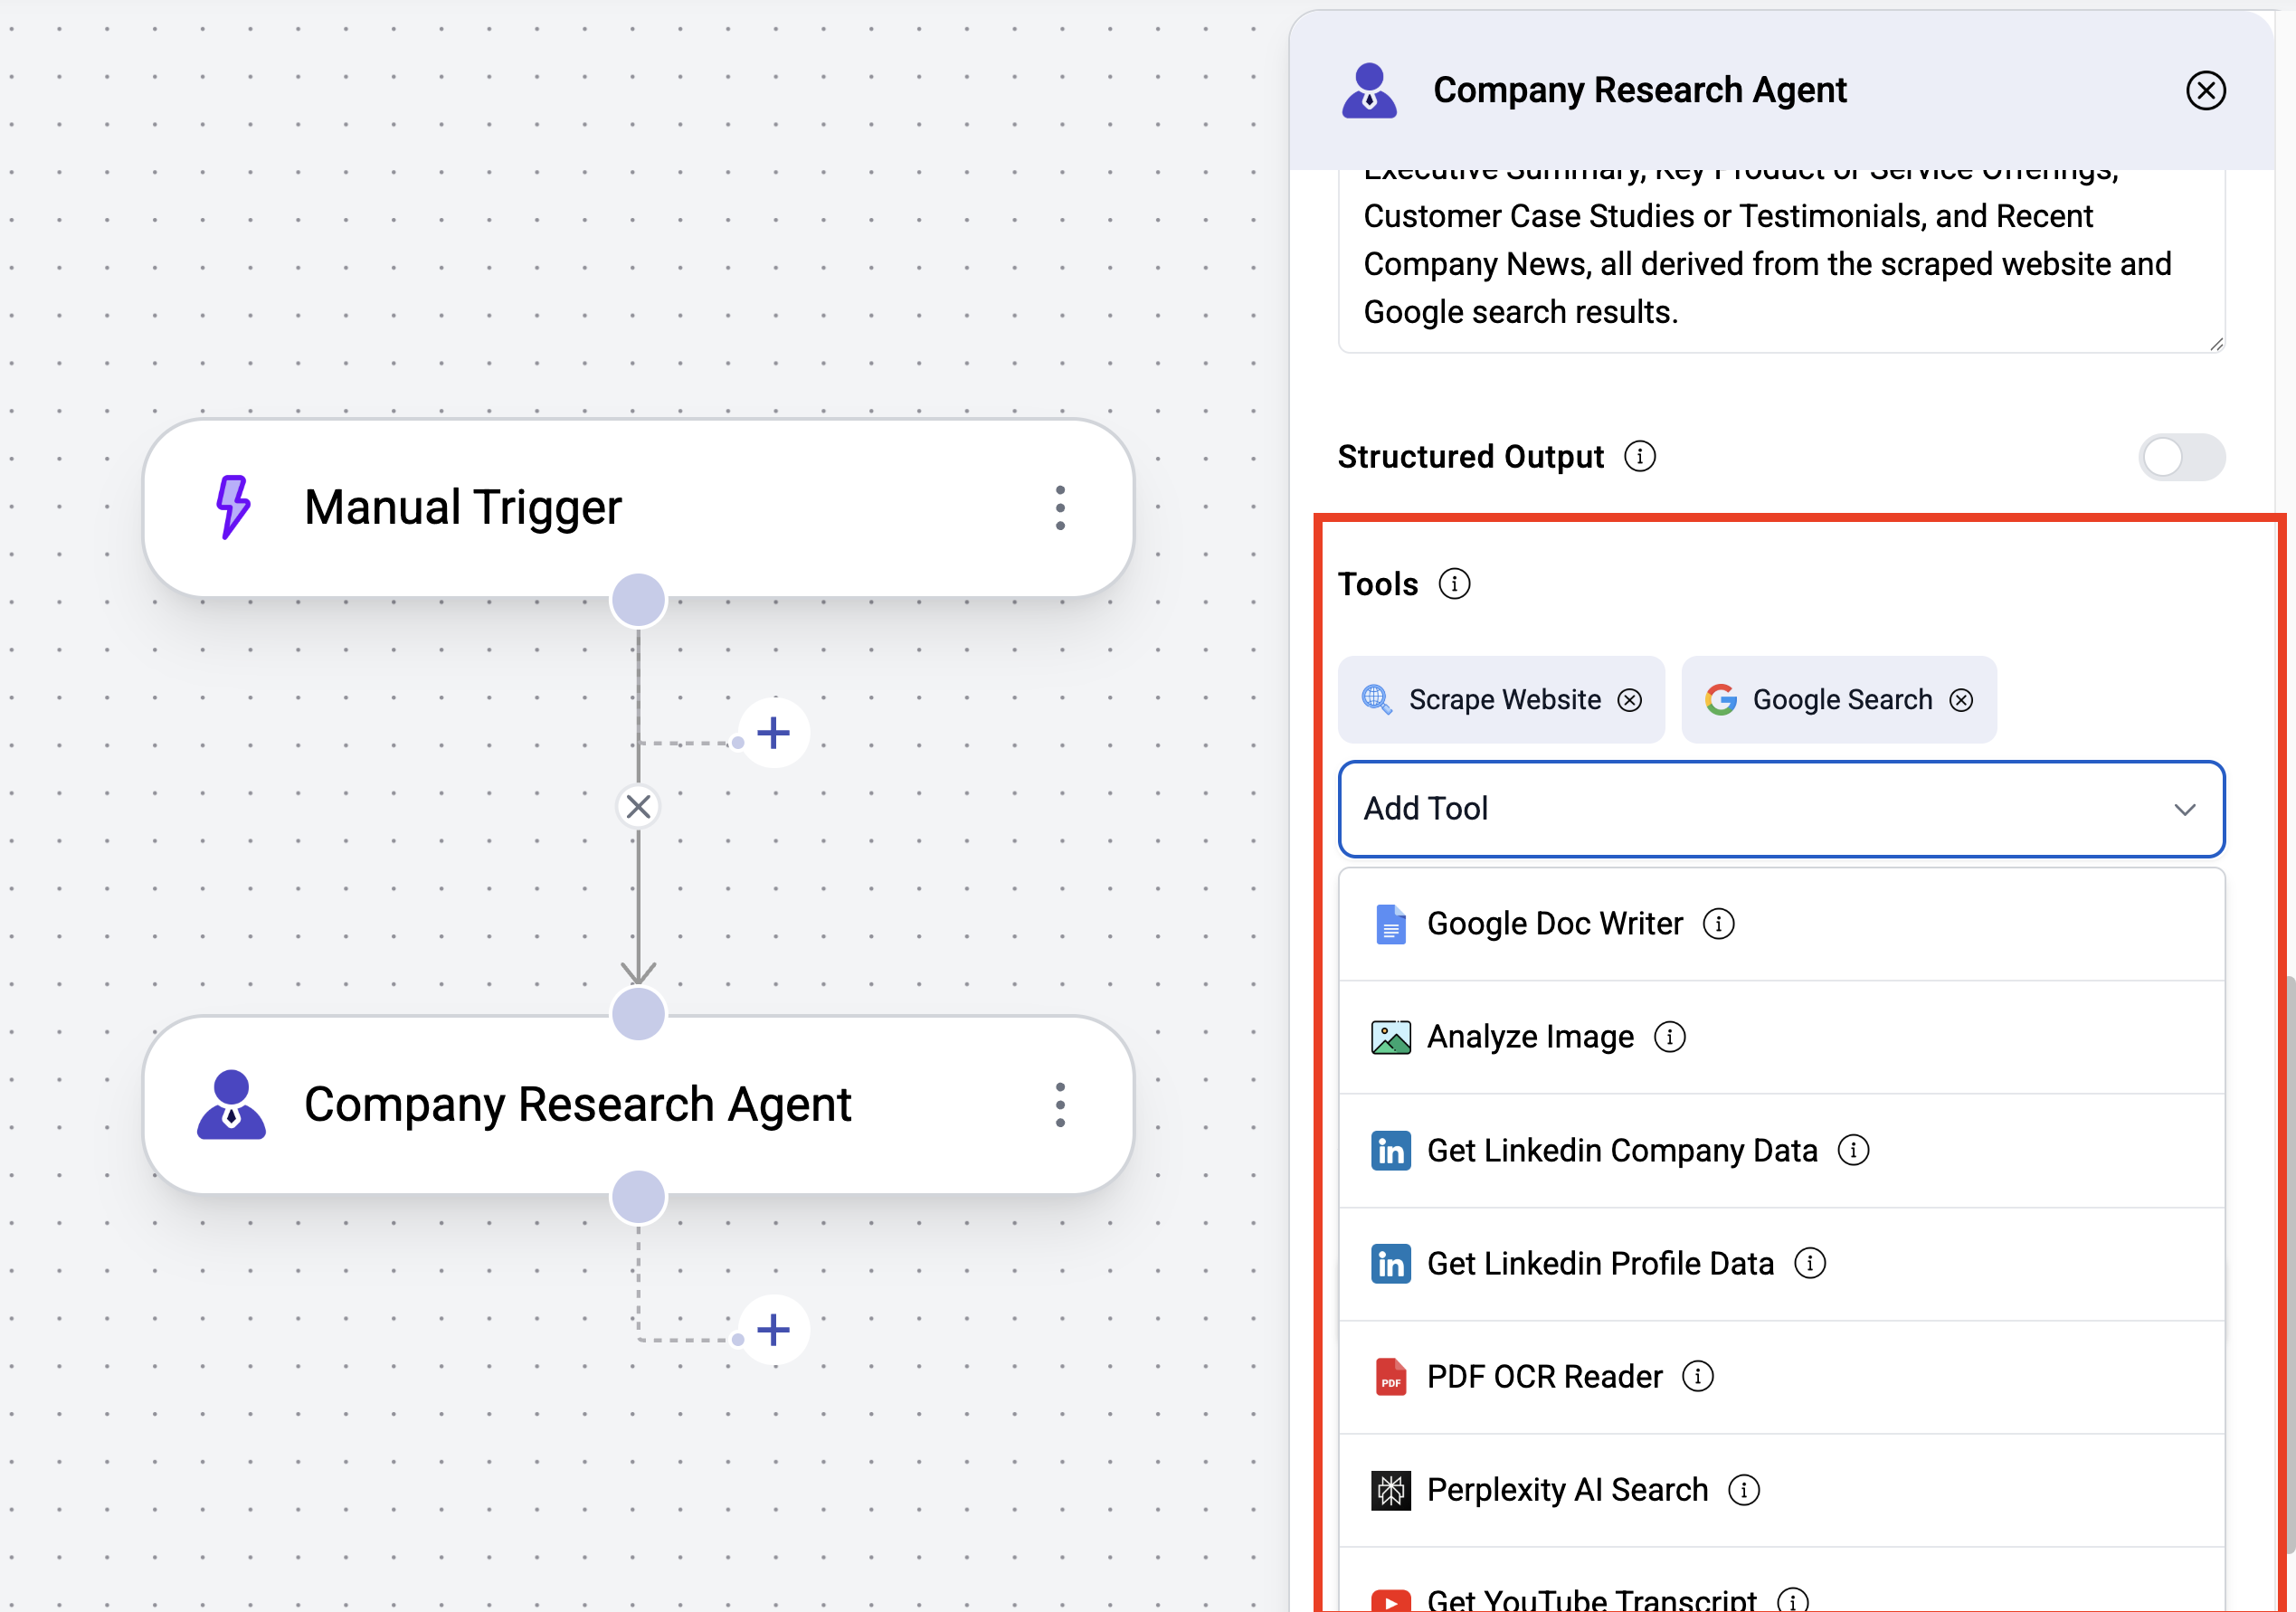
Each agent can be equipped with tools. Based on the task, the agent will use them as needed to complete the work.
* Add or remove tools as required. For this example, you can add the `Scrape Website` and `Google Search` tools.
#### Add Tools
Each agent can be equipped with tools. Based on the task, the agent will use them as needed to complete the work.
* Add or remove tools as required. For this example, you can add the `Scrape Website` and `Google Search` tools.
 #### Update LLM Model
Each agent is powered by an LLM model, which you can choose under Settings.
Different agents in a workflow can use different LLM models.
* You can change the LLM model under settings.
#### Update LLM Model
Each agent is powered by an LLM model, which you can choose under Settings.
Different agents in a workflow can use different LLM models.
* You can change the LLM model under settings.
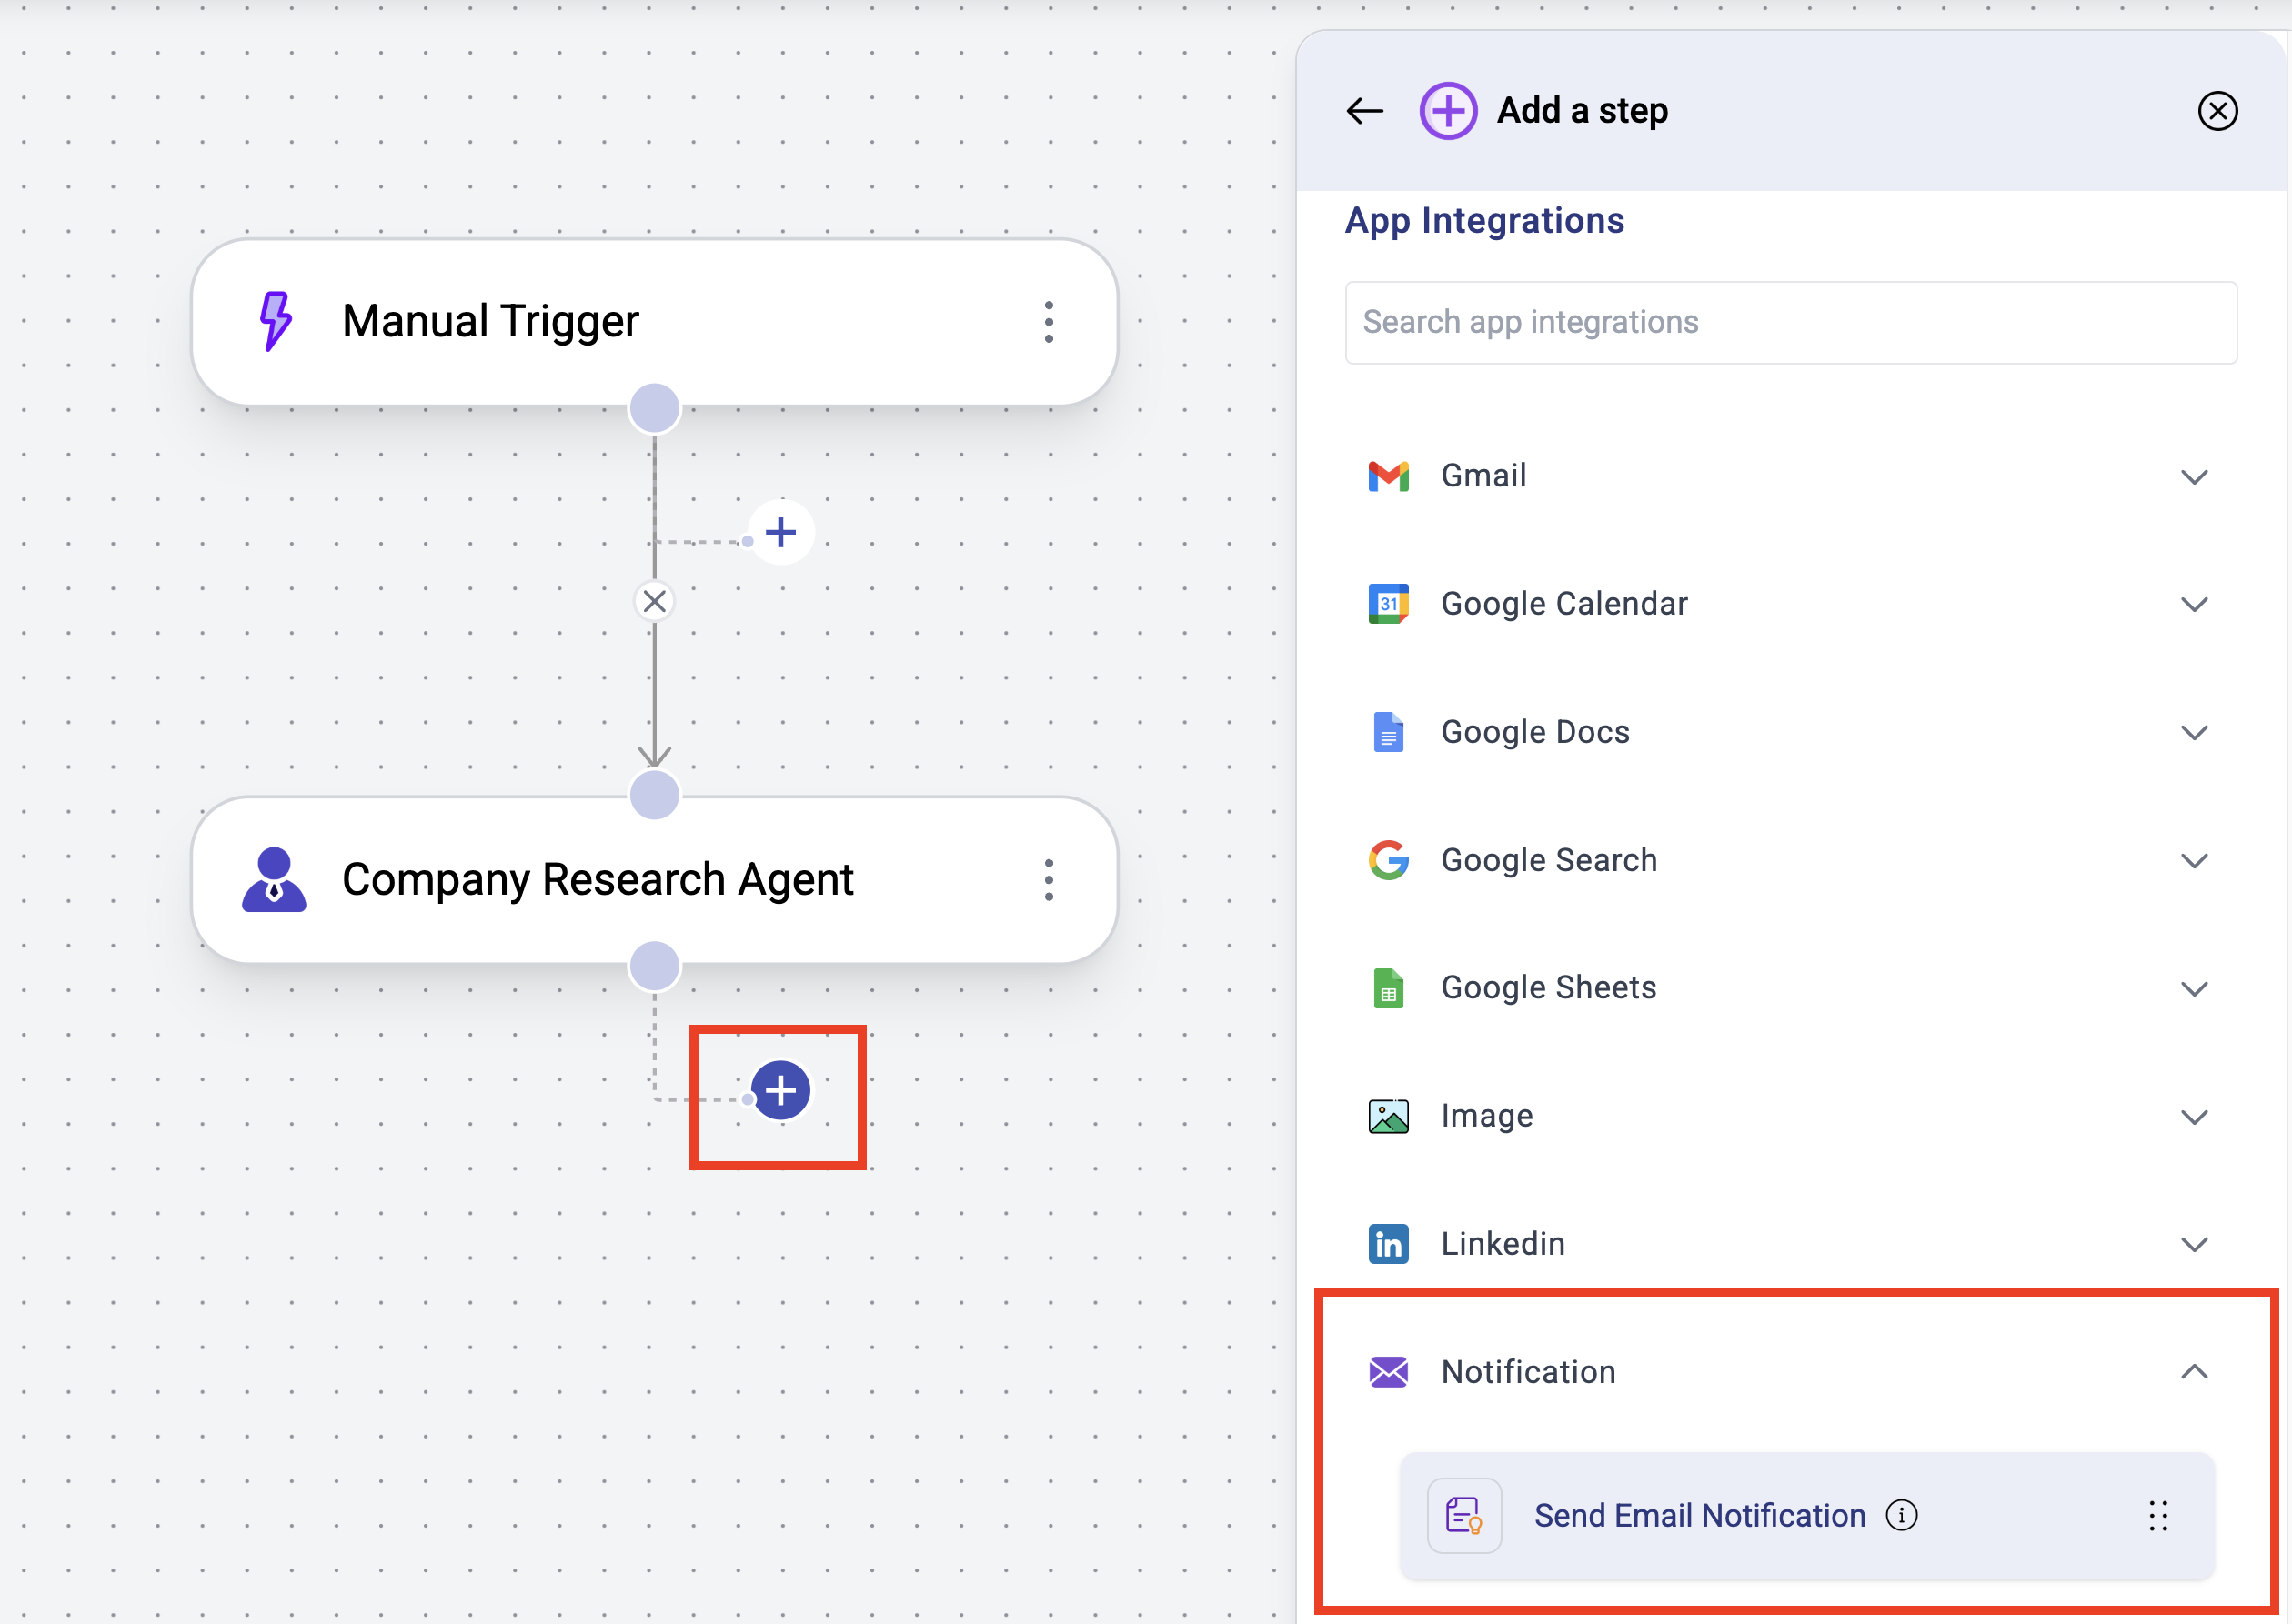
 ### Add Email Integration
App integrations enable you to connect to third-party services like Google Search, Sheets, Email, Linkedin, Web Scrapers and more.
* Click the `+` button to add a new step.
* Select `App Integrations`
* Click `Notification` and select the `Send Email Notification` action.
### Add Email Integration
App integrations enable you to connect to third-party services like Google Search, Sheets, Email, Linkedin, Web Scrapers and more.
* Click the `+` button to add a new step.
* Select `App Integrations`
* Click `Notification` and select the `Send Email Notification` action.
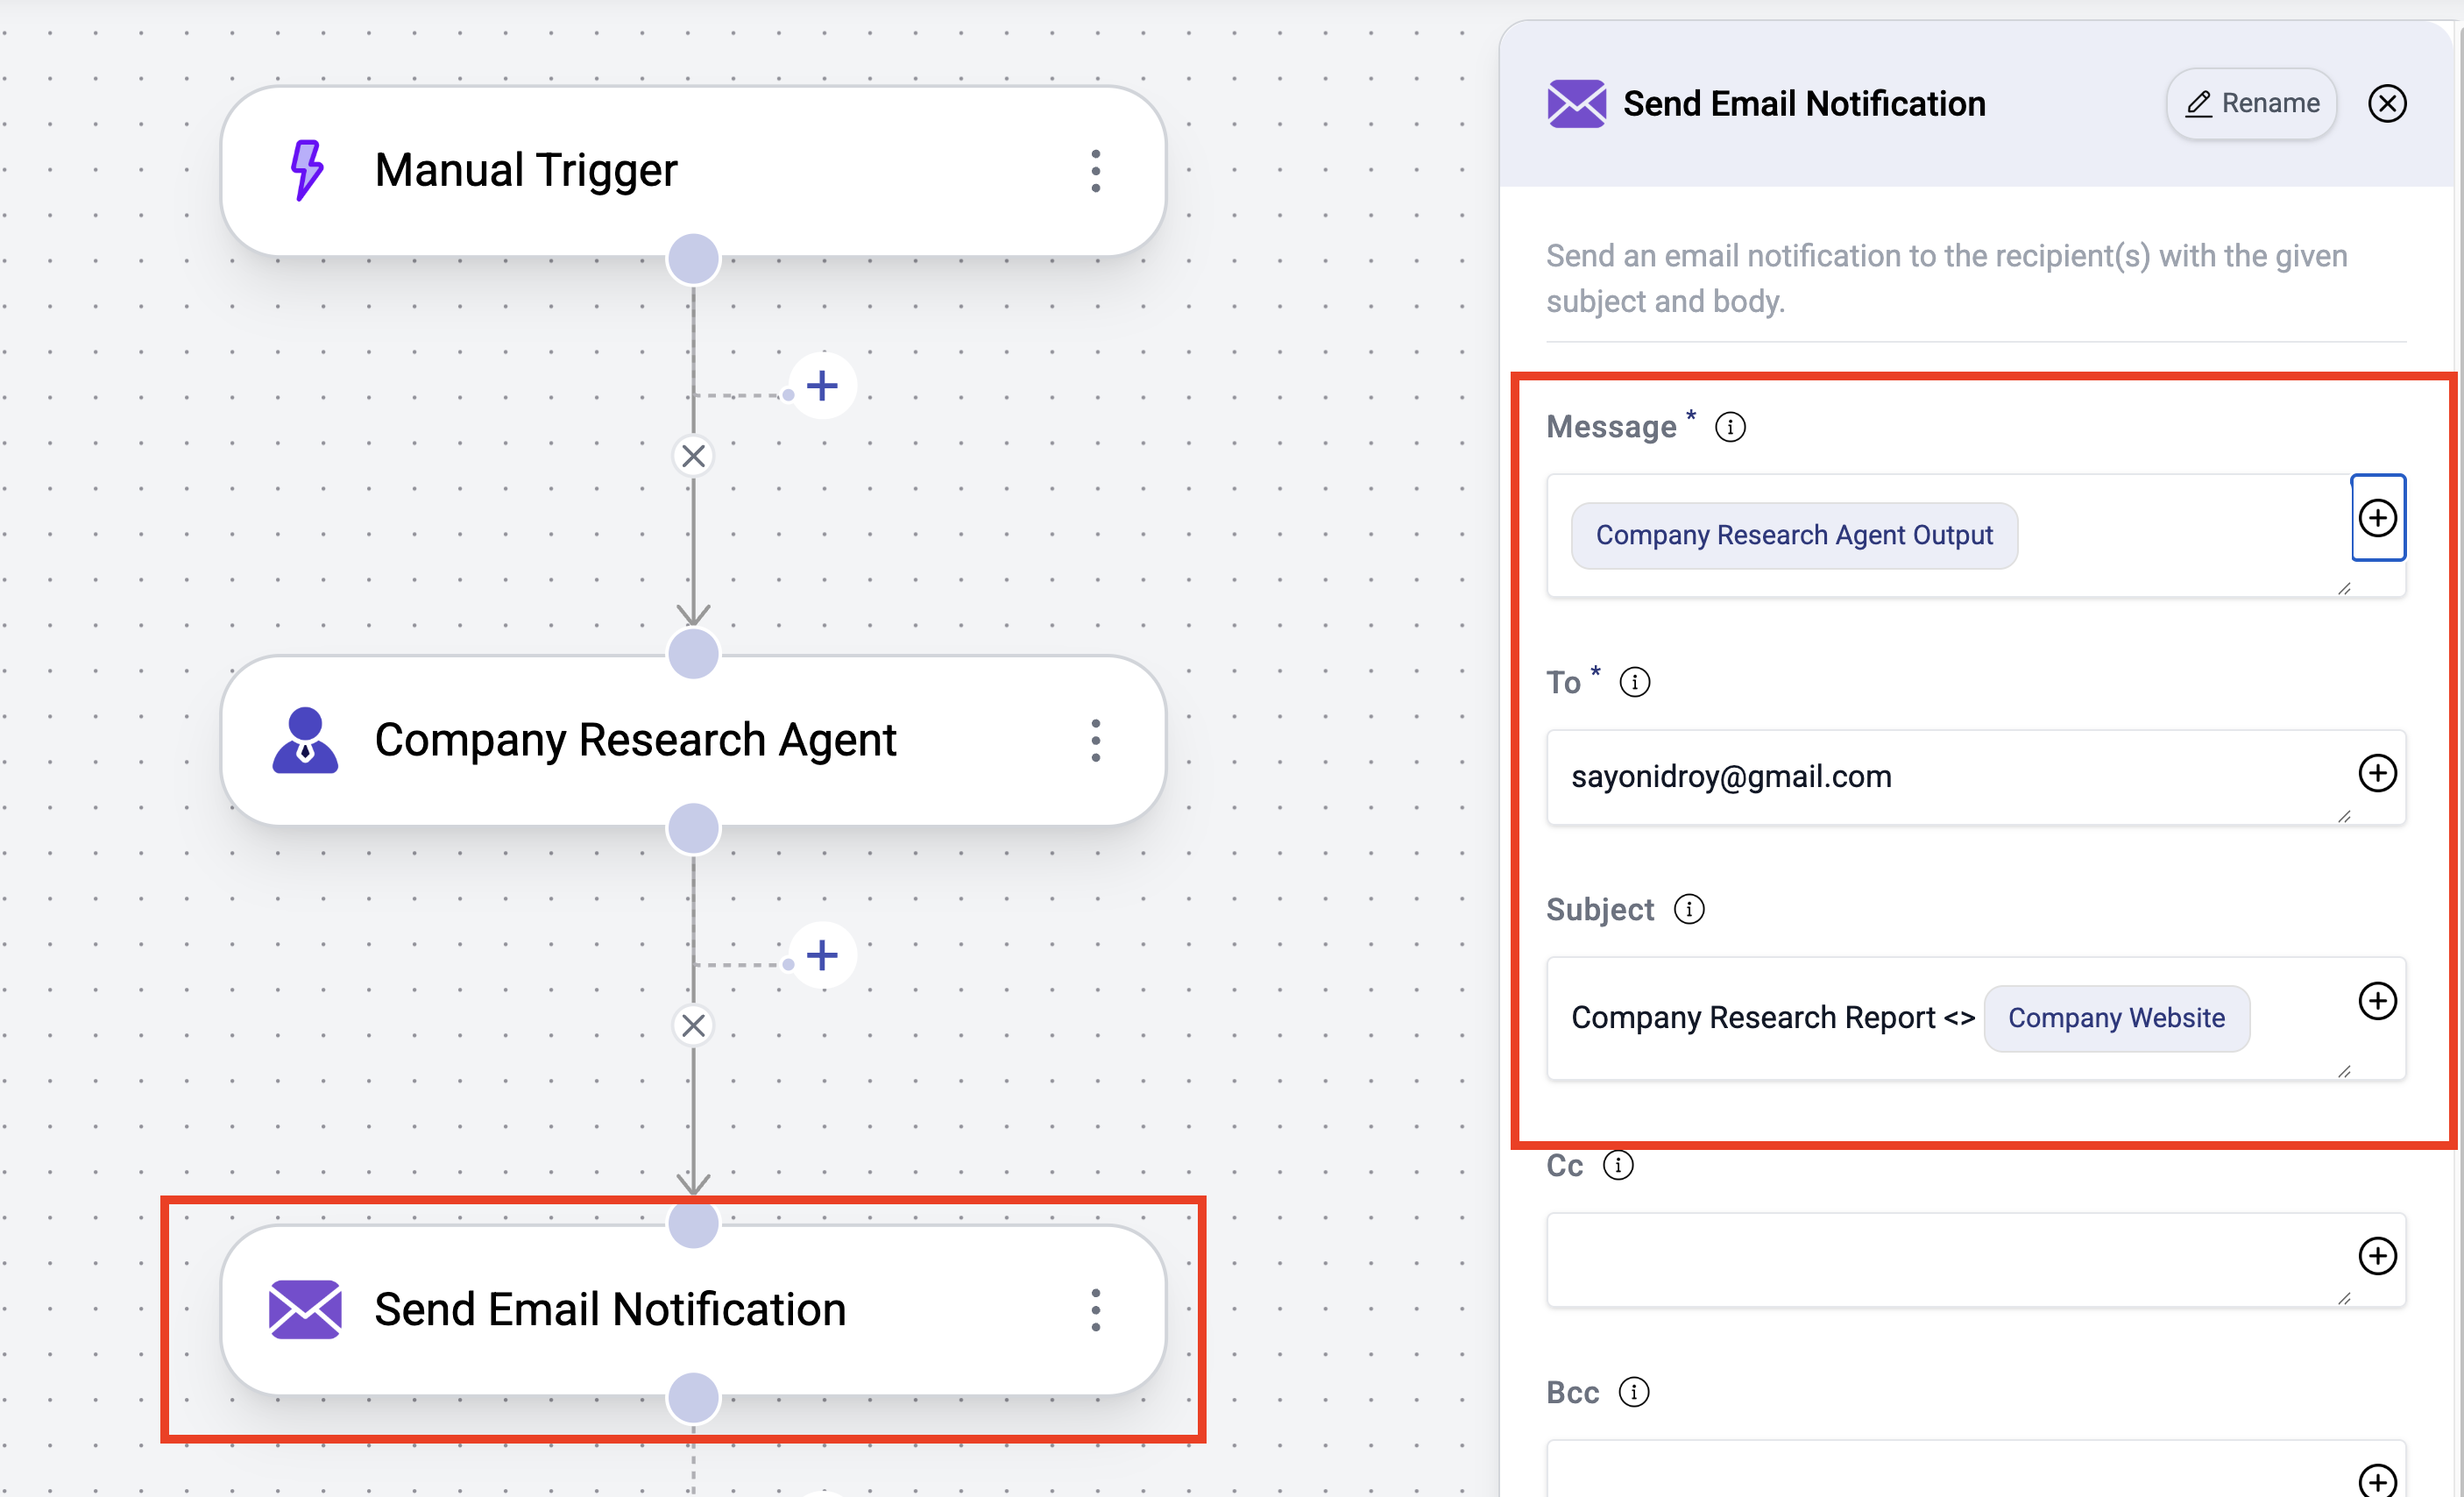
 * Configure the `Send Email Notification` node by clicking on it
* Set the email `Message` to the report generated by the `Company Research Agent` by clicking the `+` button
* Add your email id in the `To` field and add an optional Subject
* Configure the `Send Email Notification` node by clicking on it
* Set the email `Message` to the report generated by the `Company Research Agent` by clicking the `+` button
* Add your email id in the `To` field and add an optional Subject
 ***
## Run the agent workflow
* `Save` the workflow
* `Test` the workflow by providing the company website you want to research
***
## Run the agent workflow
* `Save` the workflow
* `Test` the workflow by providing the company website you want to research
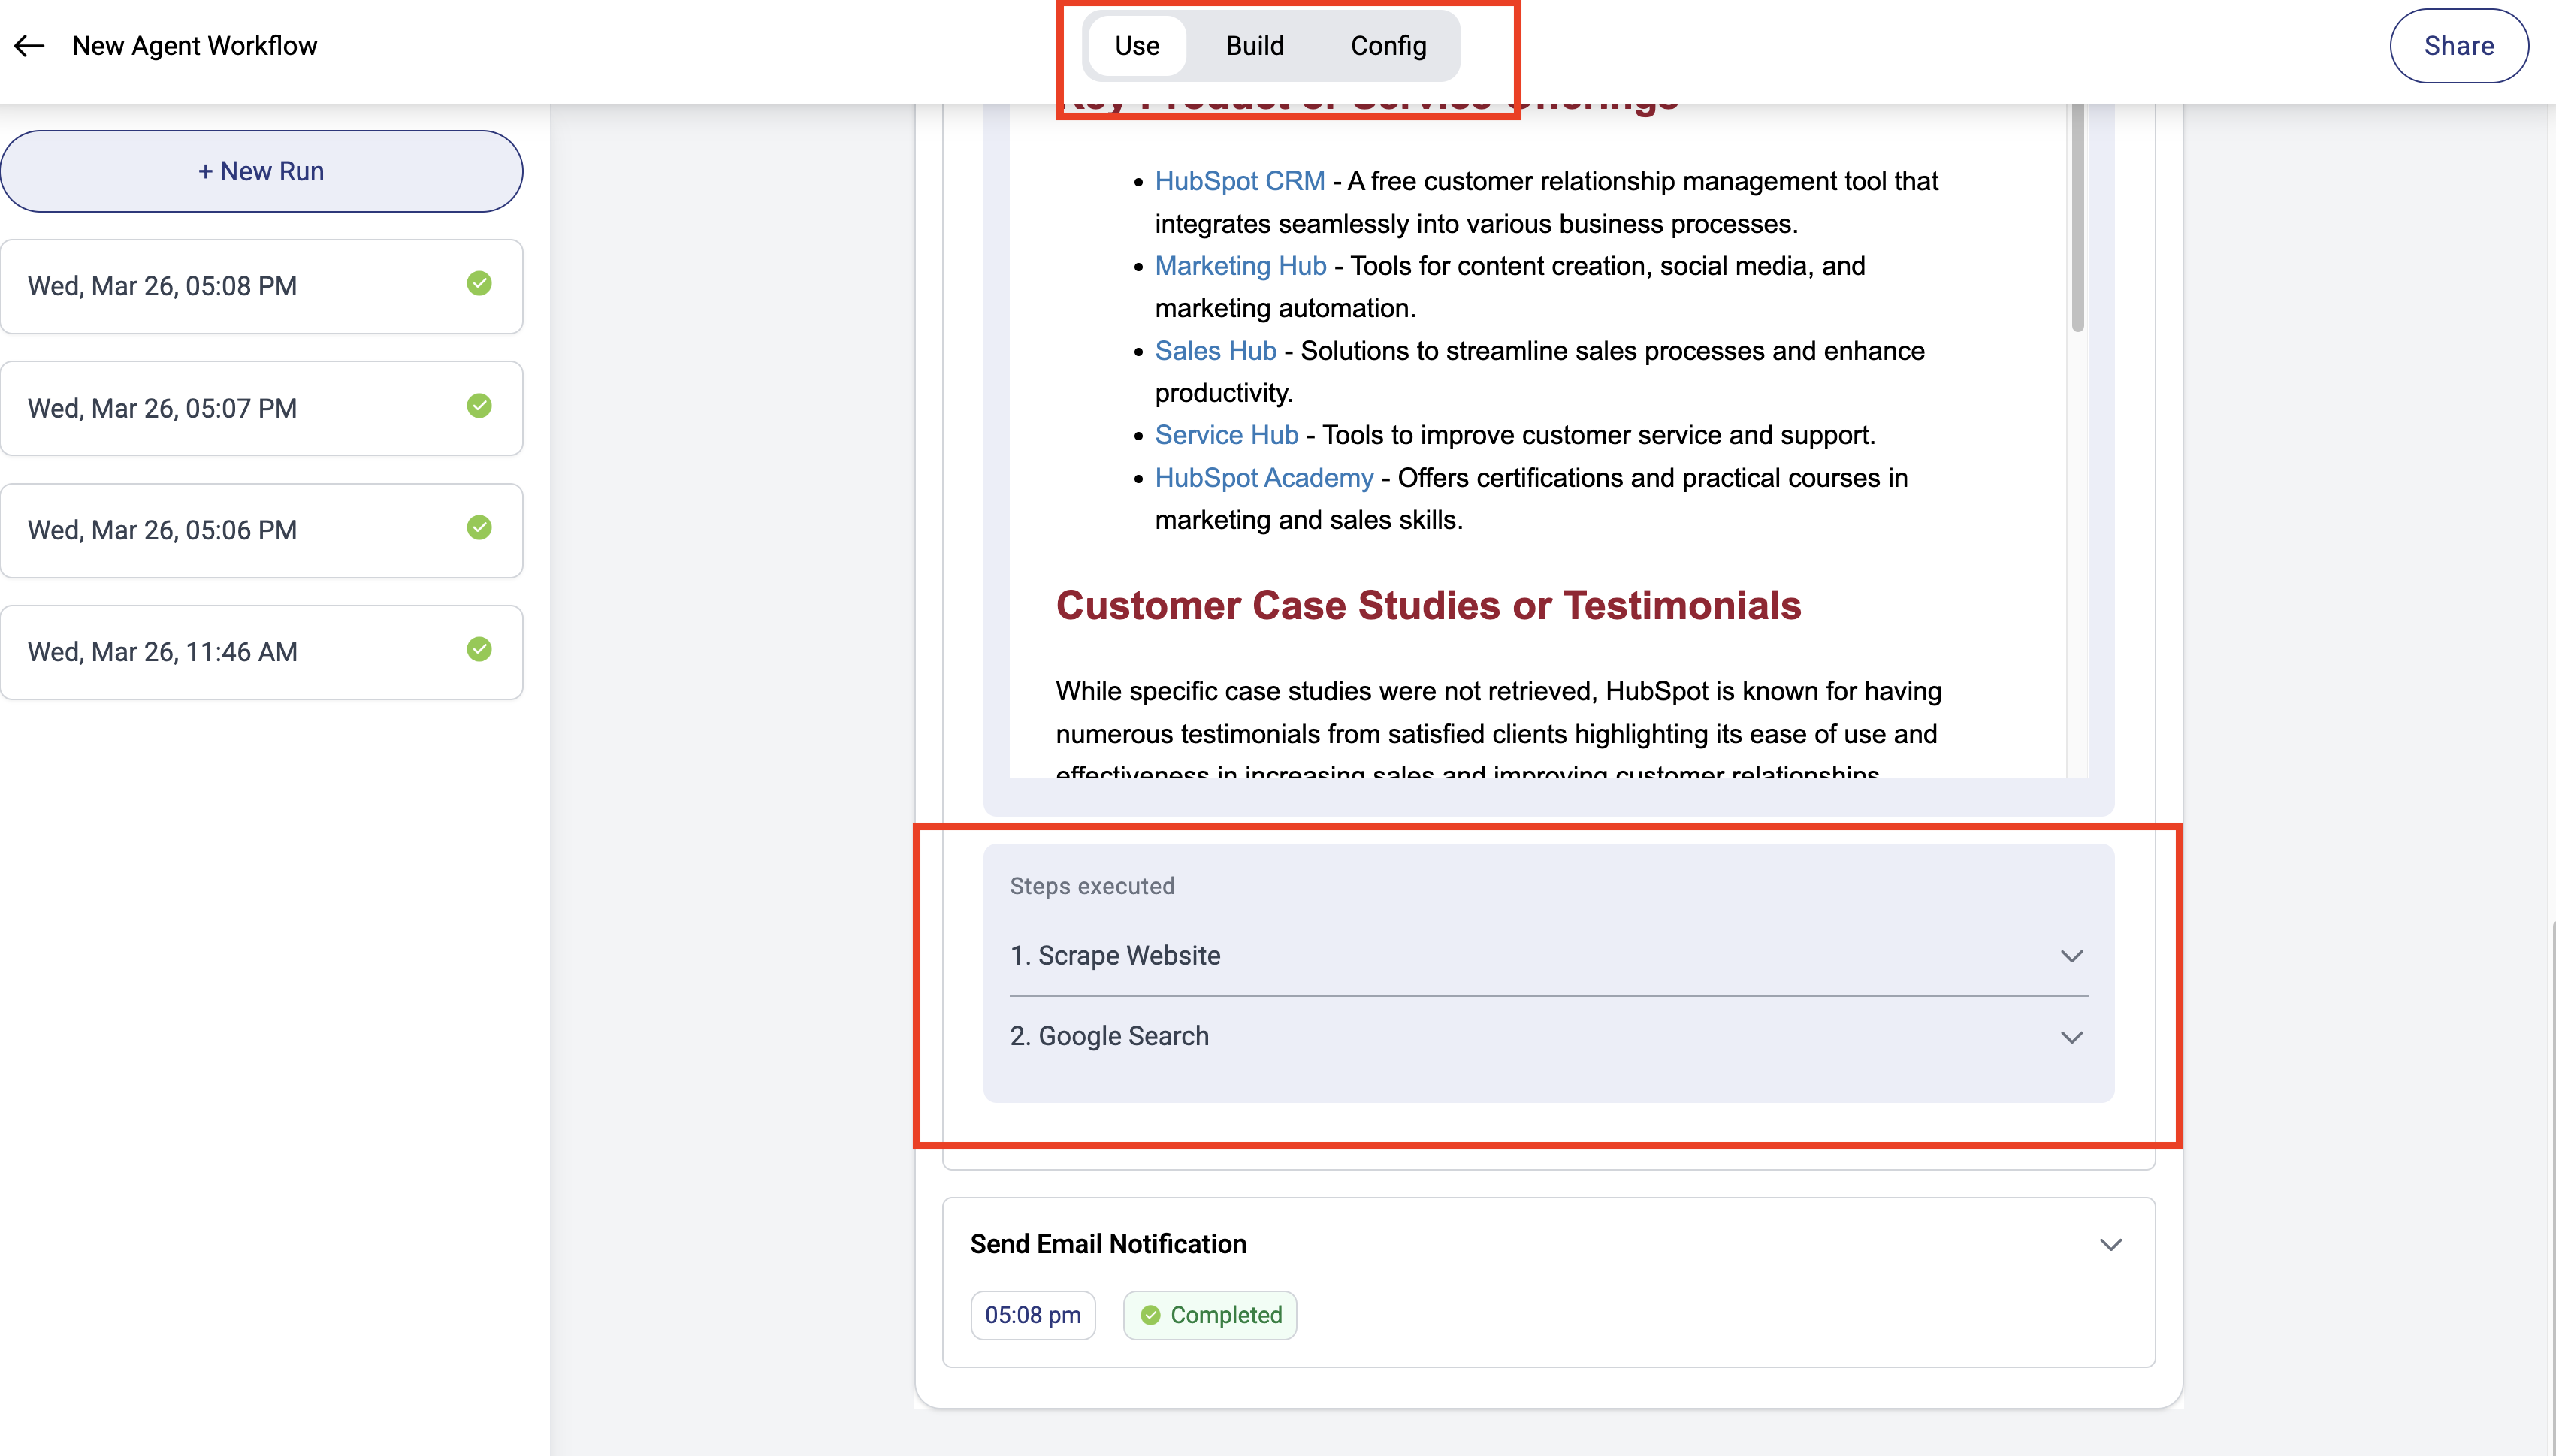
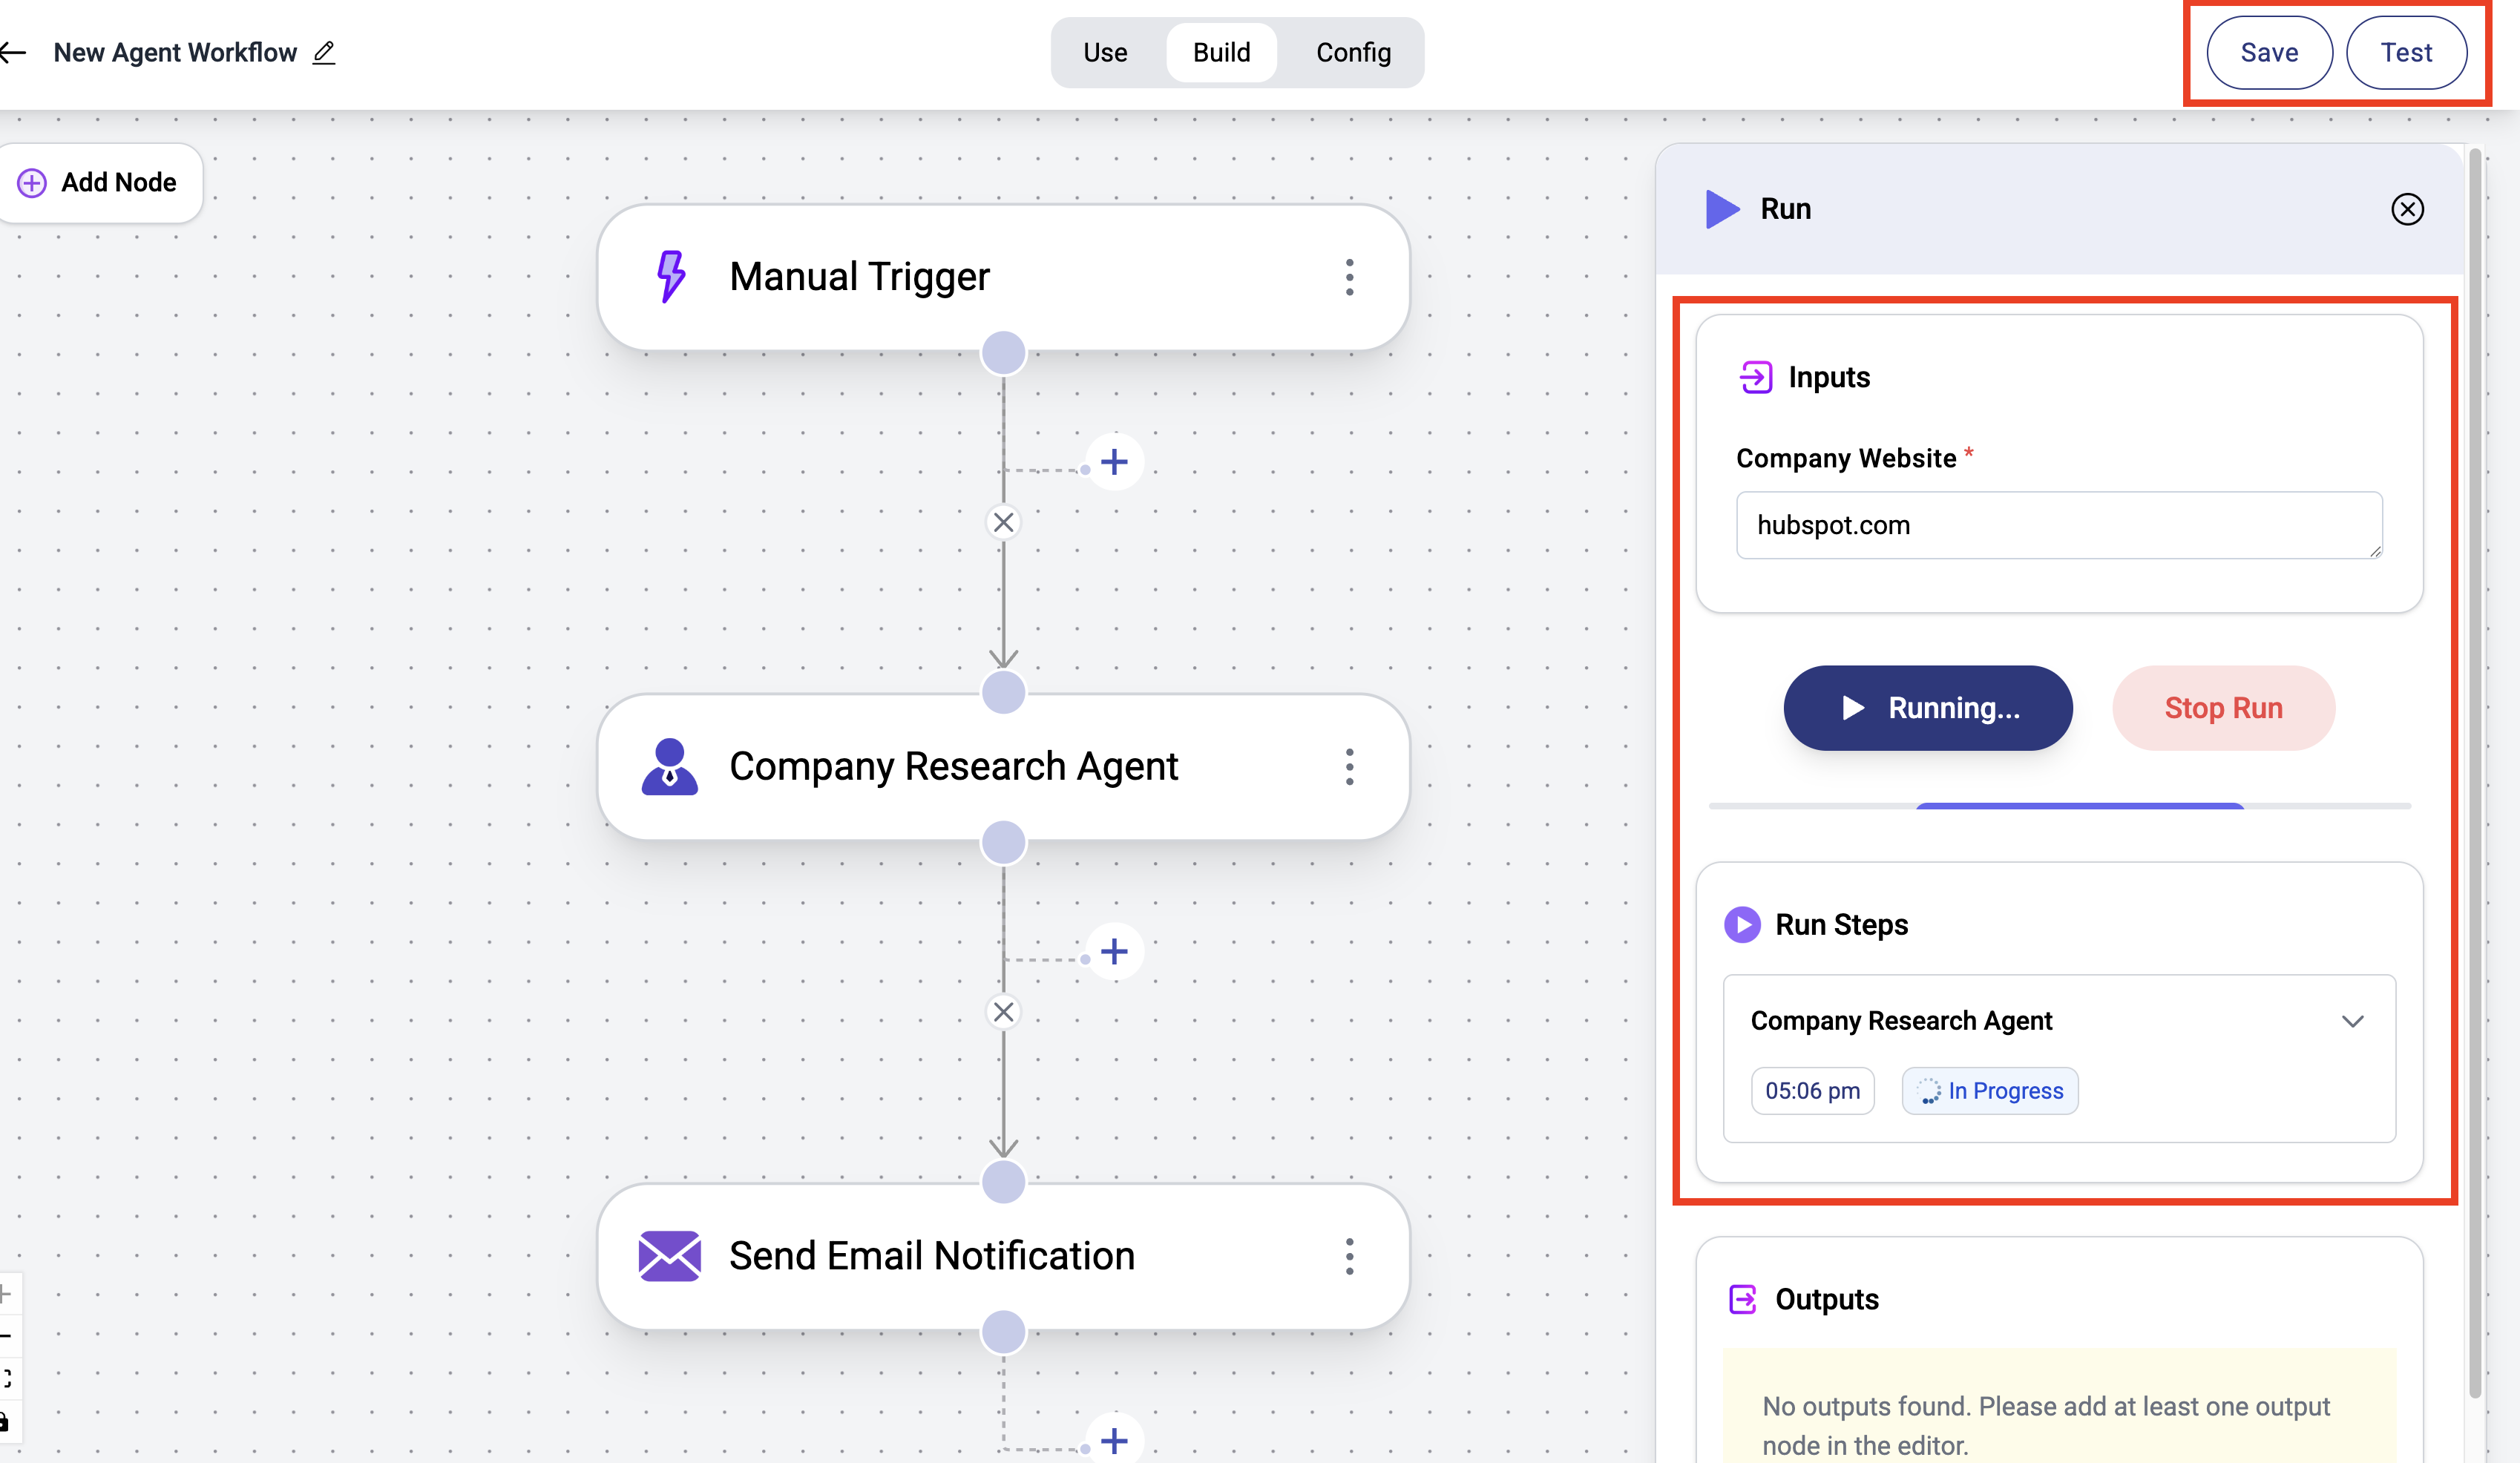 * Once the run completes, you'll be able to see the exact steps that were taken to complete the task.
And you should've received your first email from the AI agent!
* Customize the workflow as needed
* Run your workflow easily and see all past runs in the `Use` tab
* Once the run completes, you'll be able to see the exact steps that were taken to complete the task.
And you should've received your first email from the AI agent!
* Customize the workflow as needed
* Run your workflow easily and see all past runs in the `Use` tab
 ***
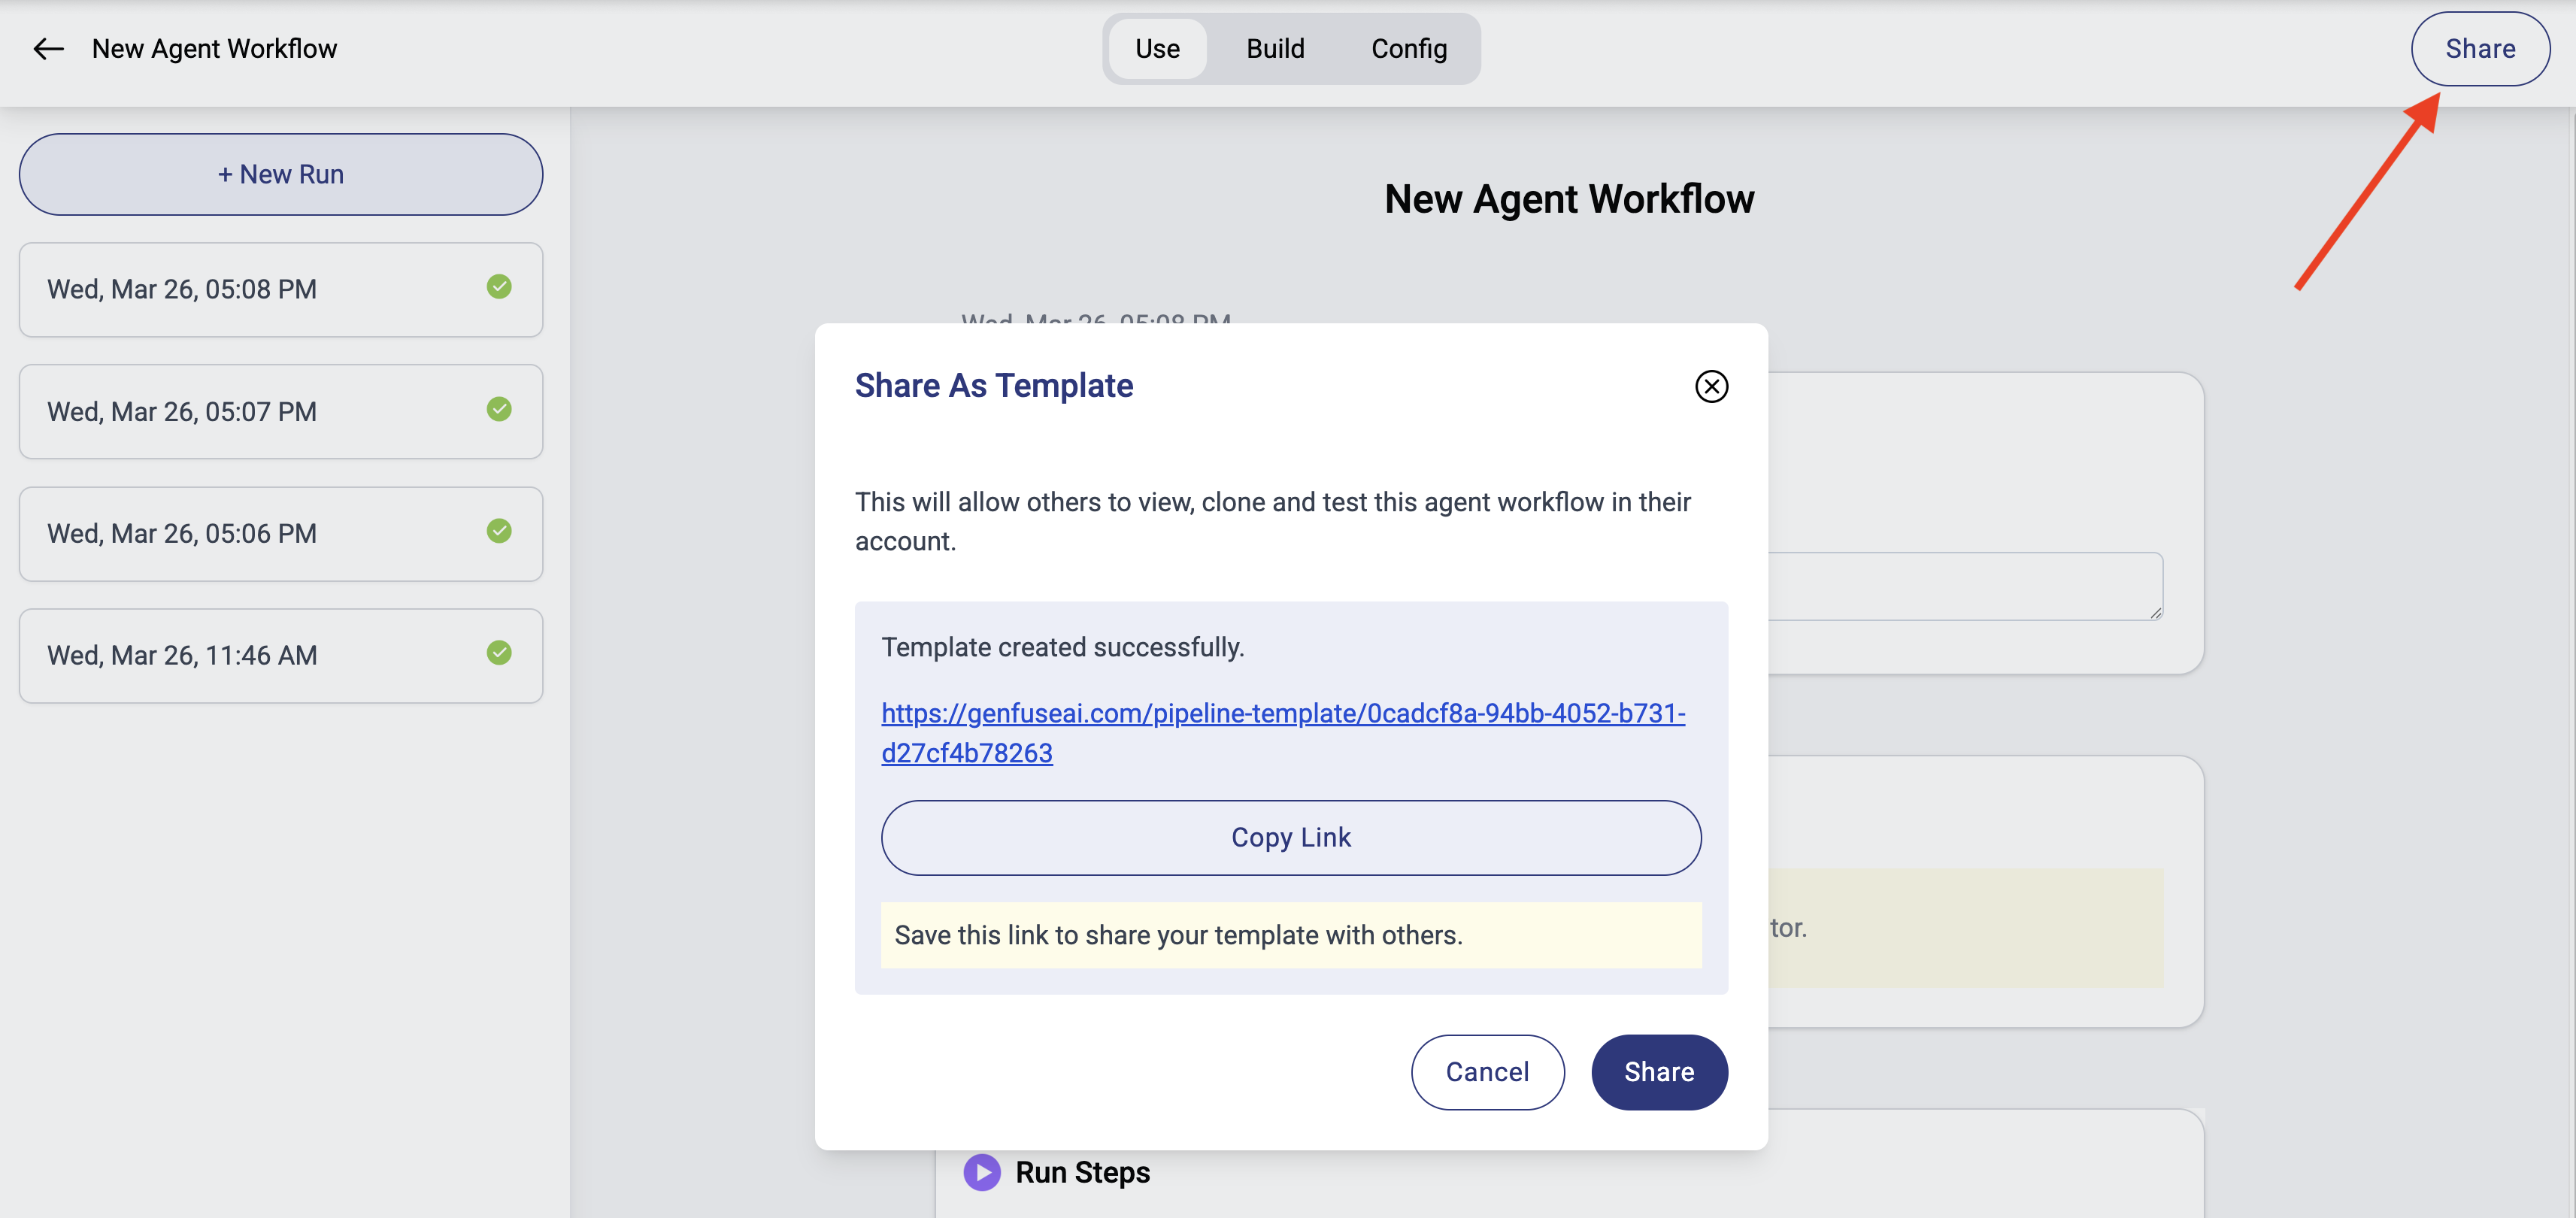
## Share your workflow
Congratulations! You've successfully built your first agent workflow.
Share it with your team by clicking the `Share` button. Your teammates can now clone and use this workflow.
***
## Share your workflow
Congratulations! You've successfully built your first agent workflow.
Share it with your team by clicking the `Share` button. Your teammates can now clone and use this workflow.