Creating an agent workflow
To create a new agent workflow:- Sign Up in GenFuse AI
- Once you’ve logged in, go to the Agent Workflows page (in the sidebar)
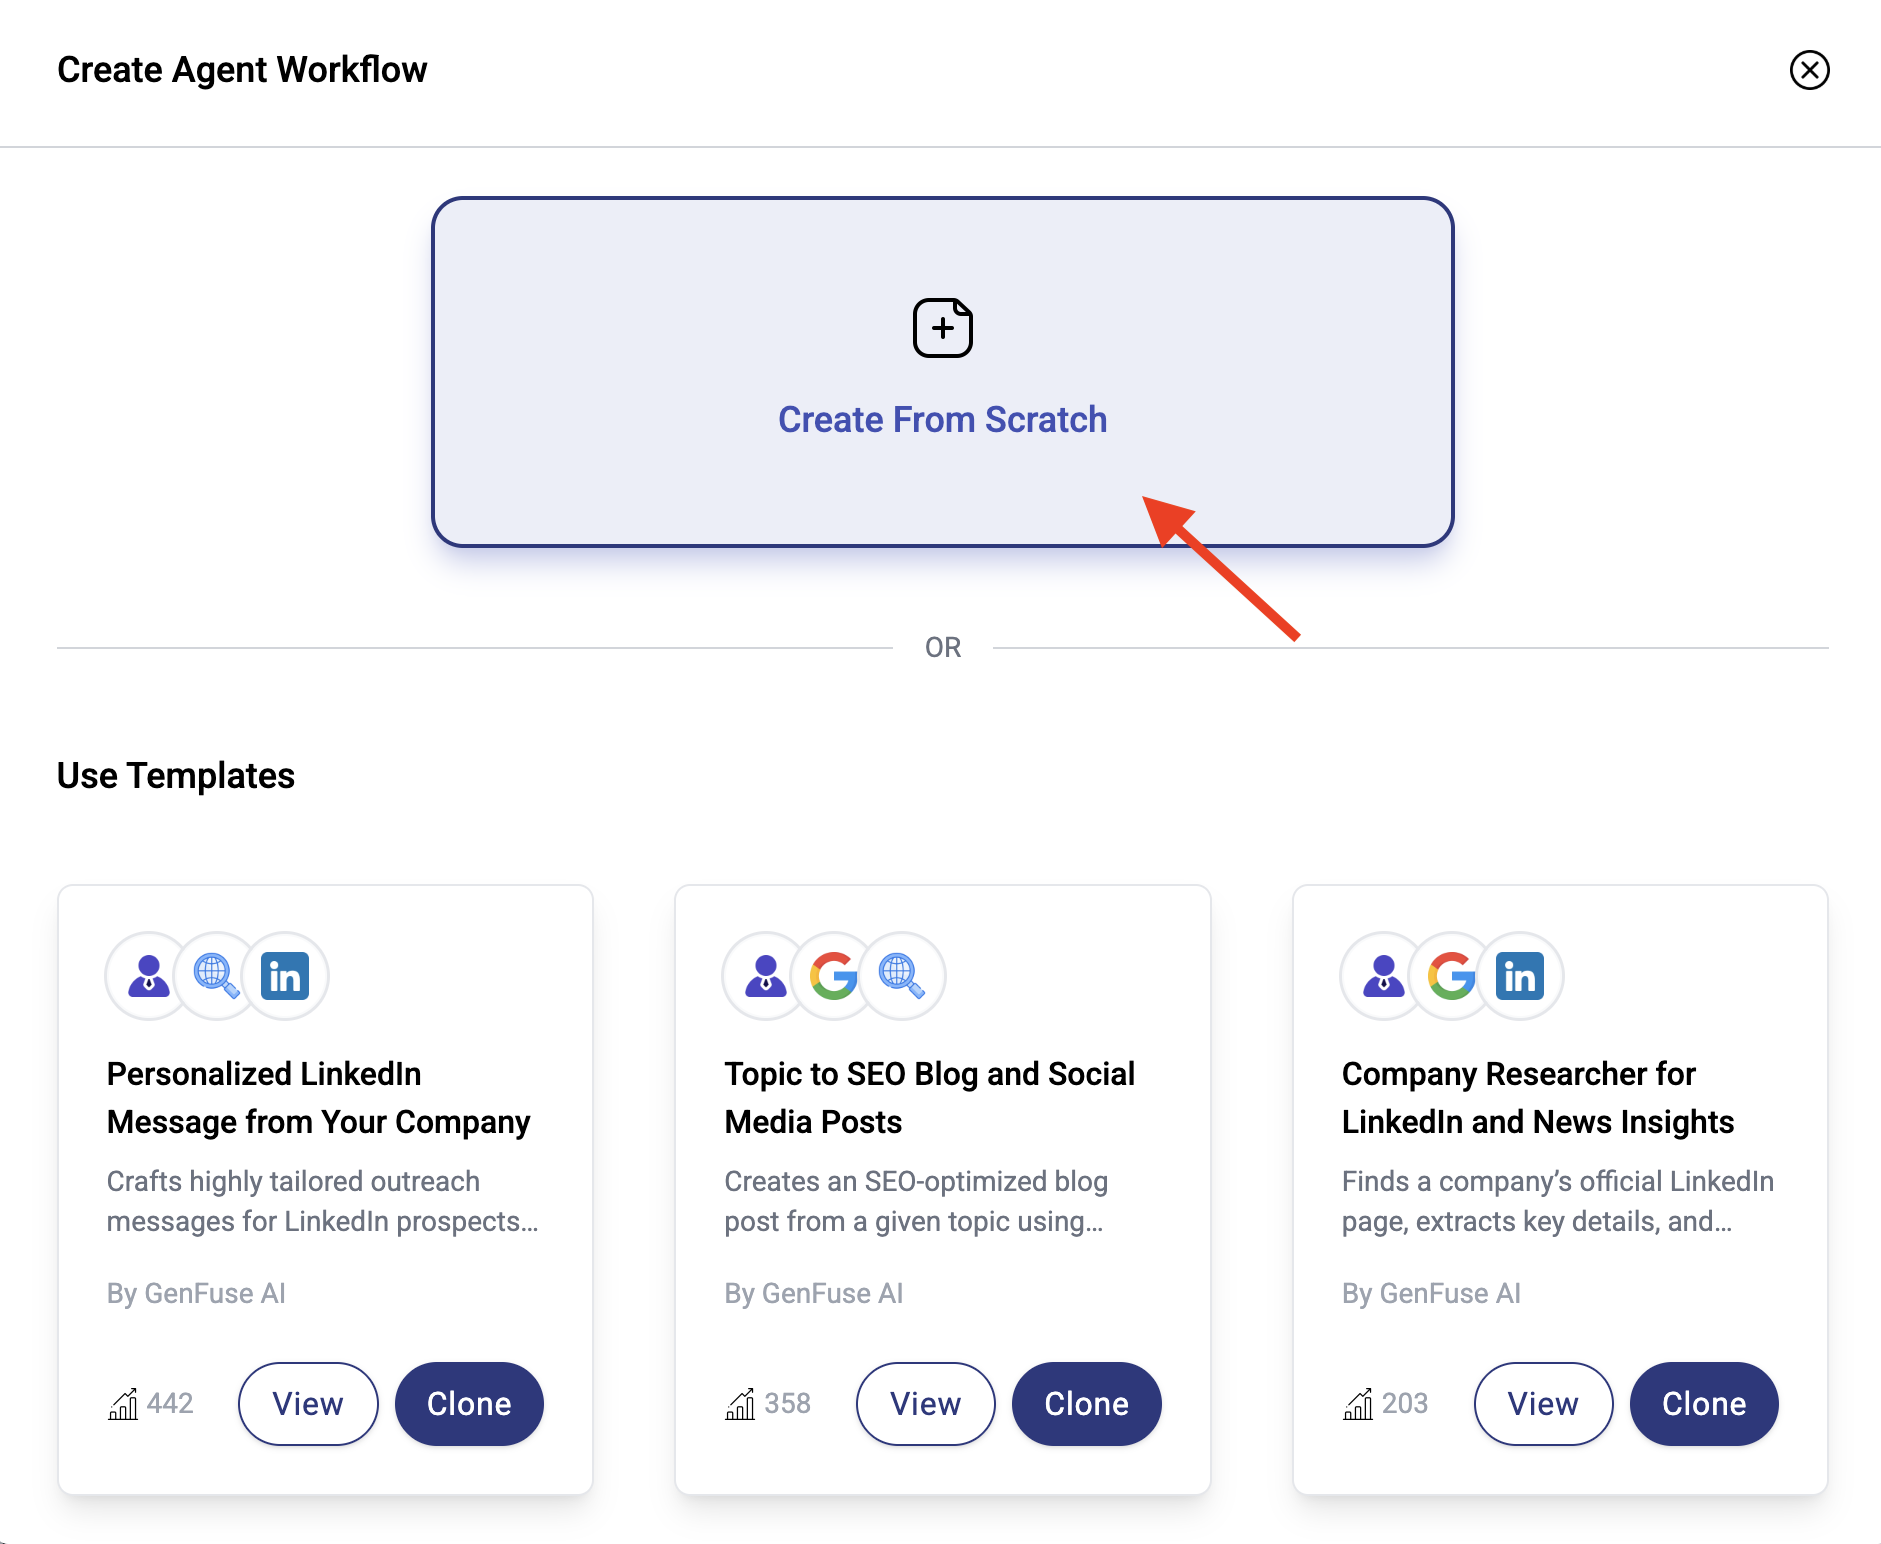
- Create a new workflow by clicking the button in the top right corner.
Customizing the agent workflow
Add a Trigger
In this example, we’ll set up a manual trigger that takes a company website as input.- Click the
Triggernode in your workflow - Select
ManualTrigger - Click
Add Inputand addCompany Websiteas an input — this lets you provide custom data each time the workflow runs.

Add an AI Agent
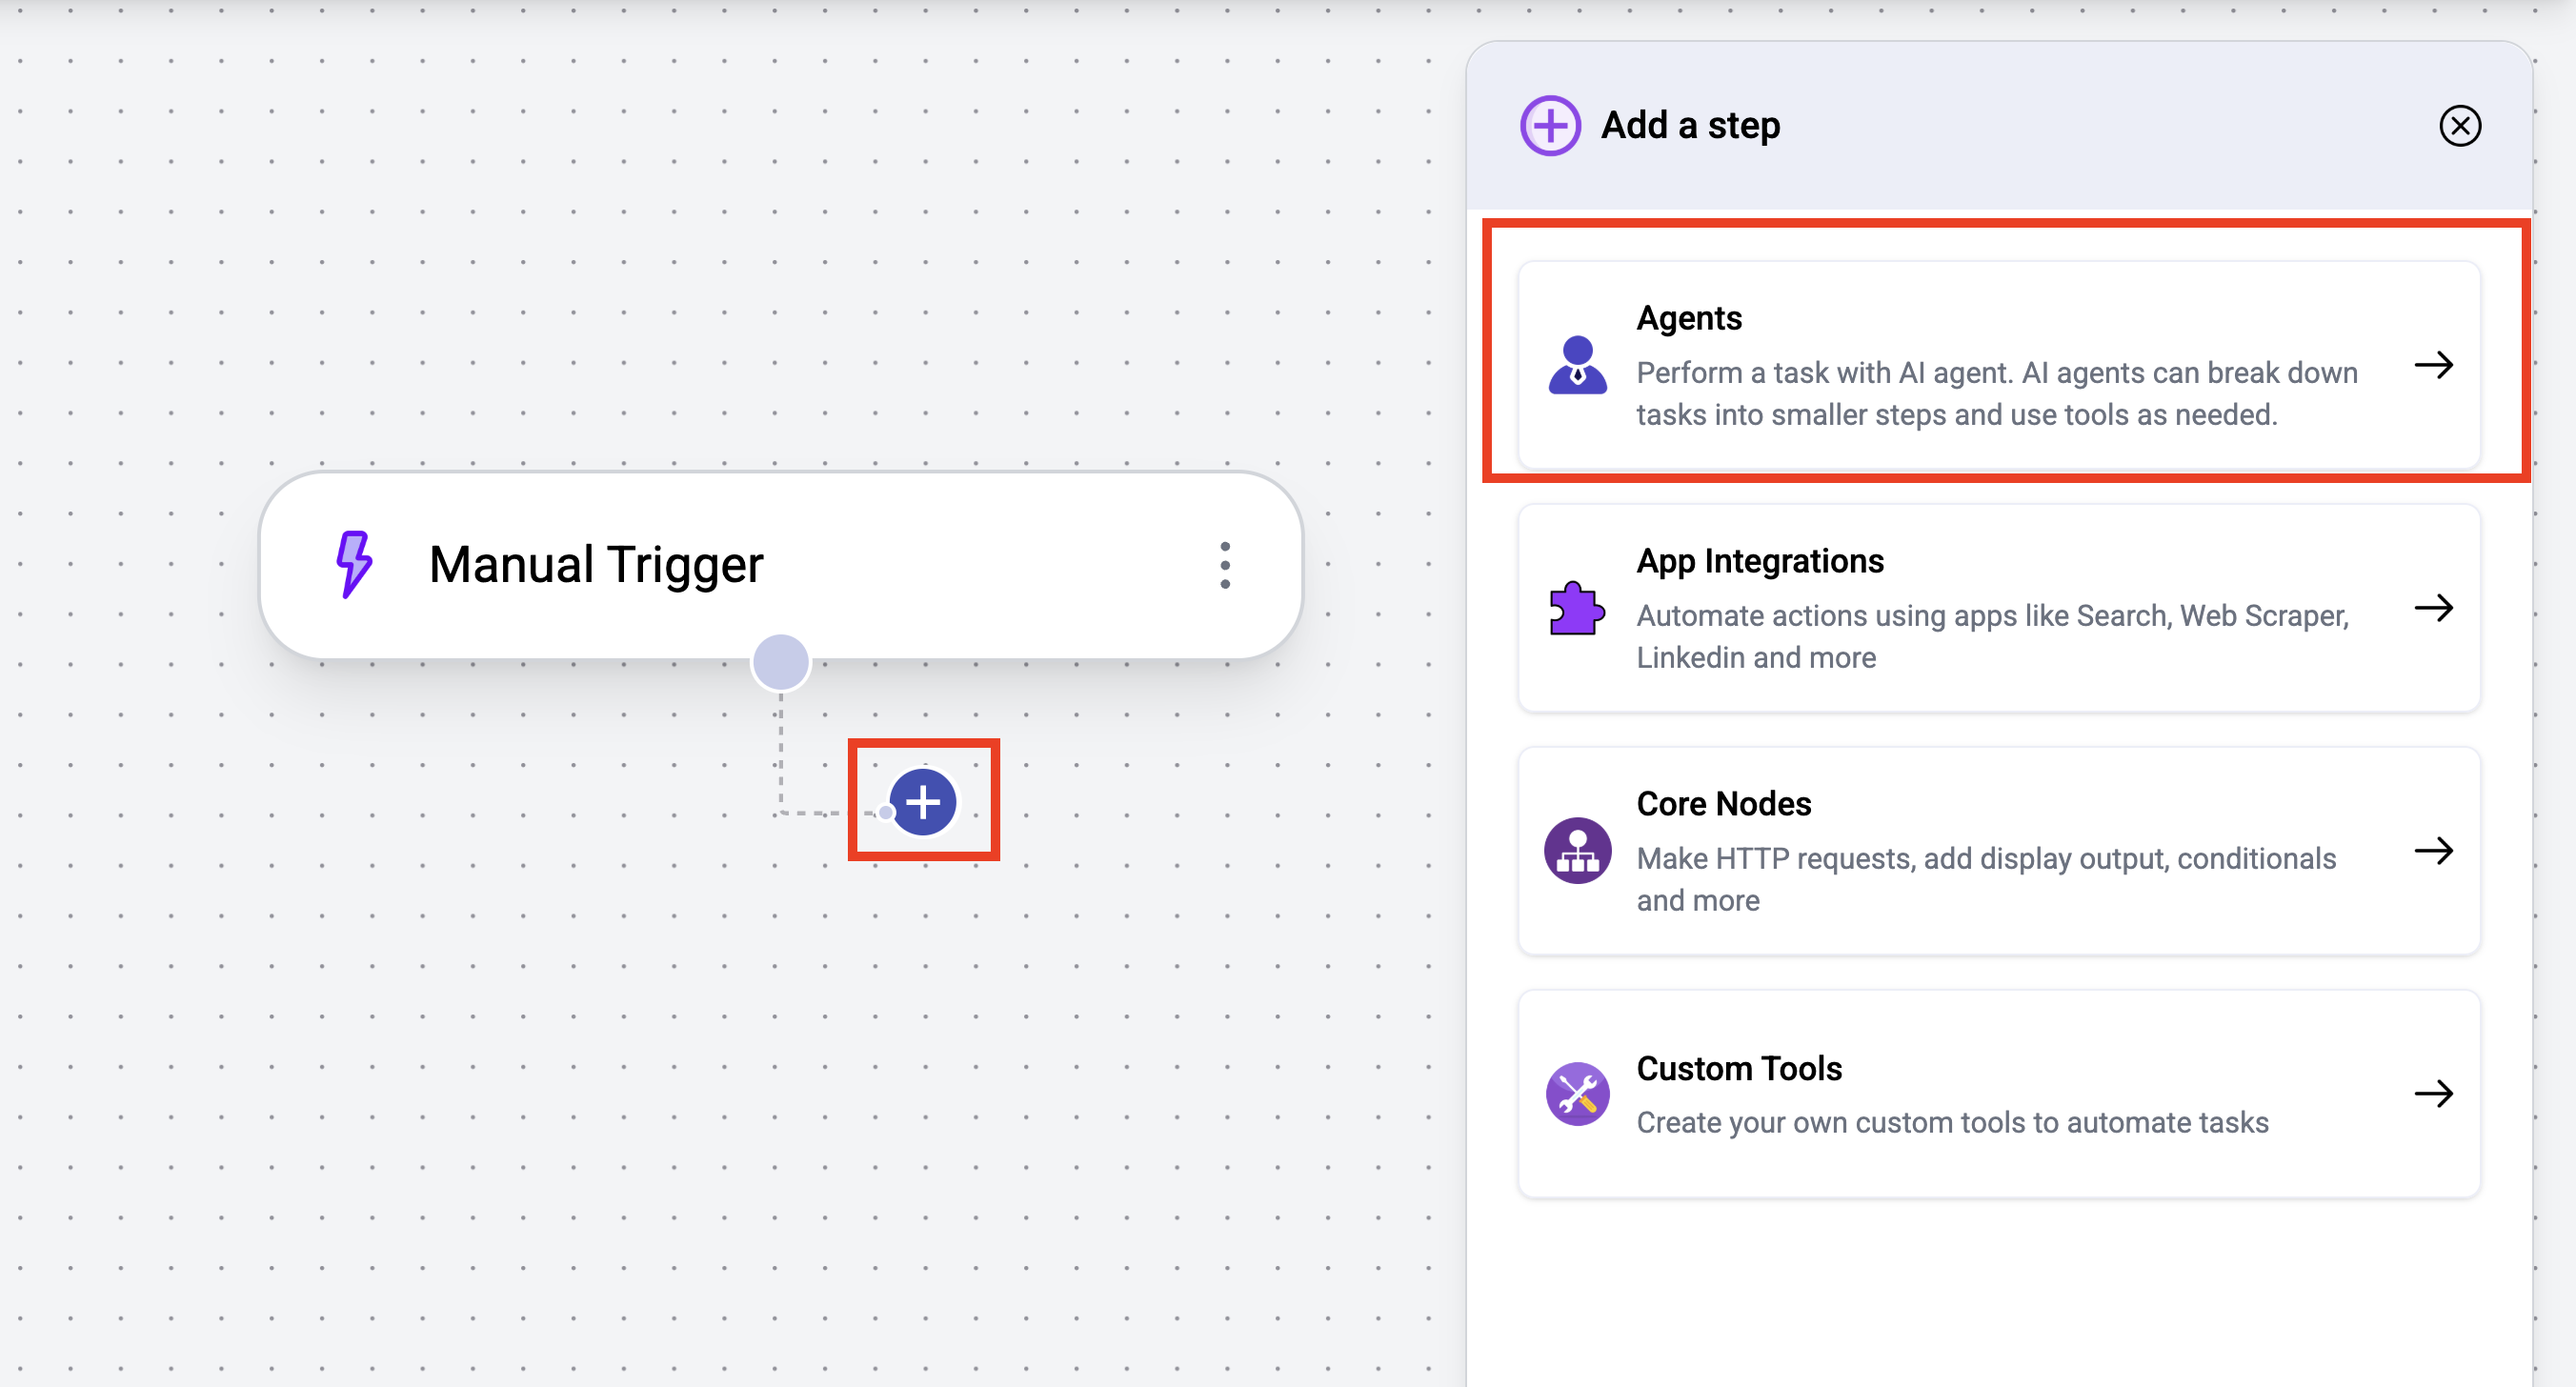
- Click the
+button to add a new step. - Select
Agents - Click
New Agentto create an agent.
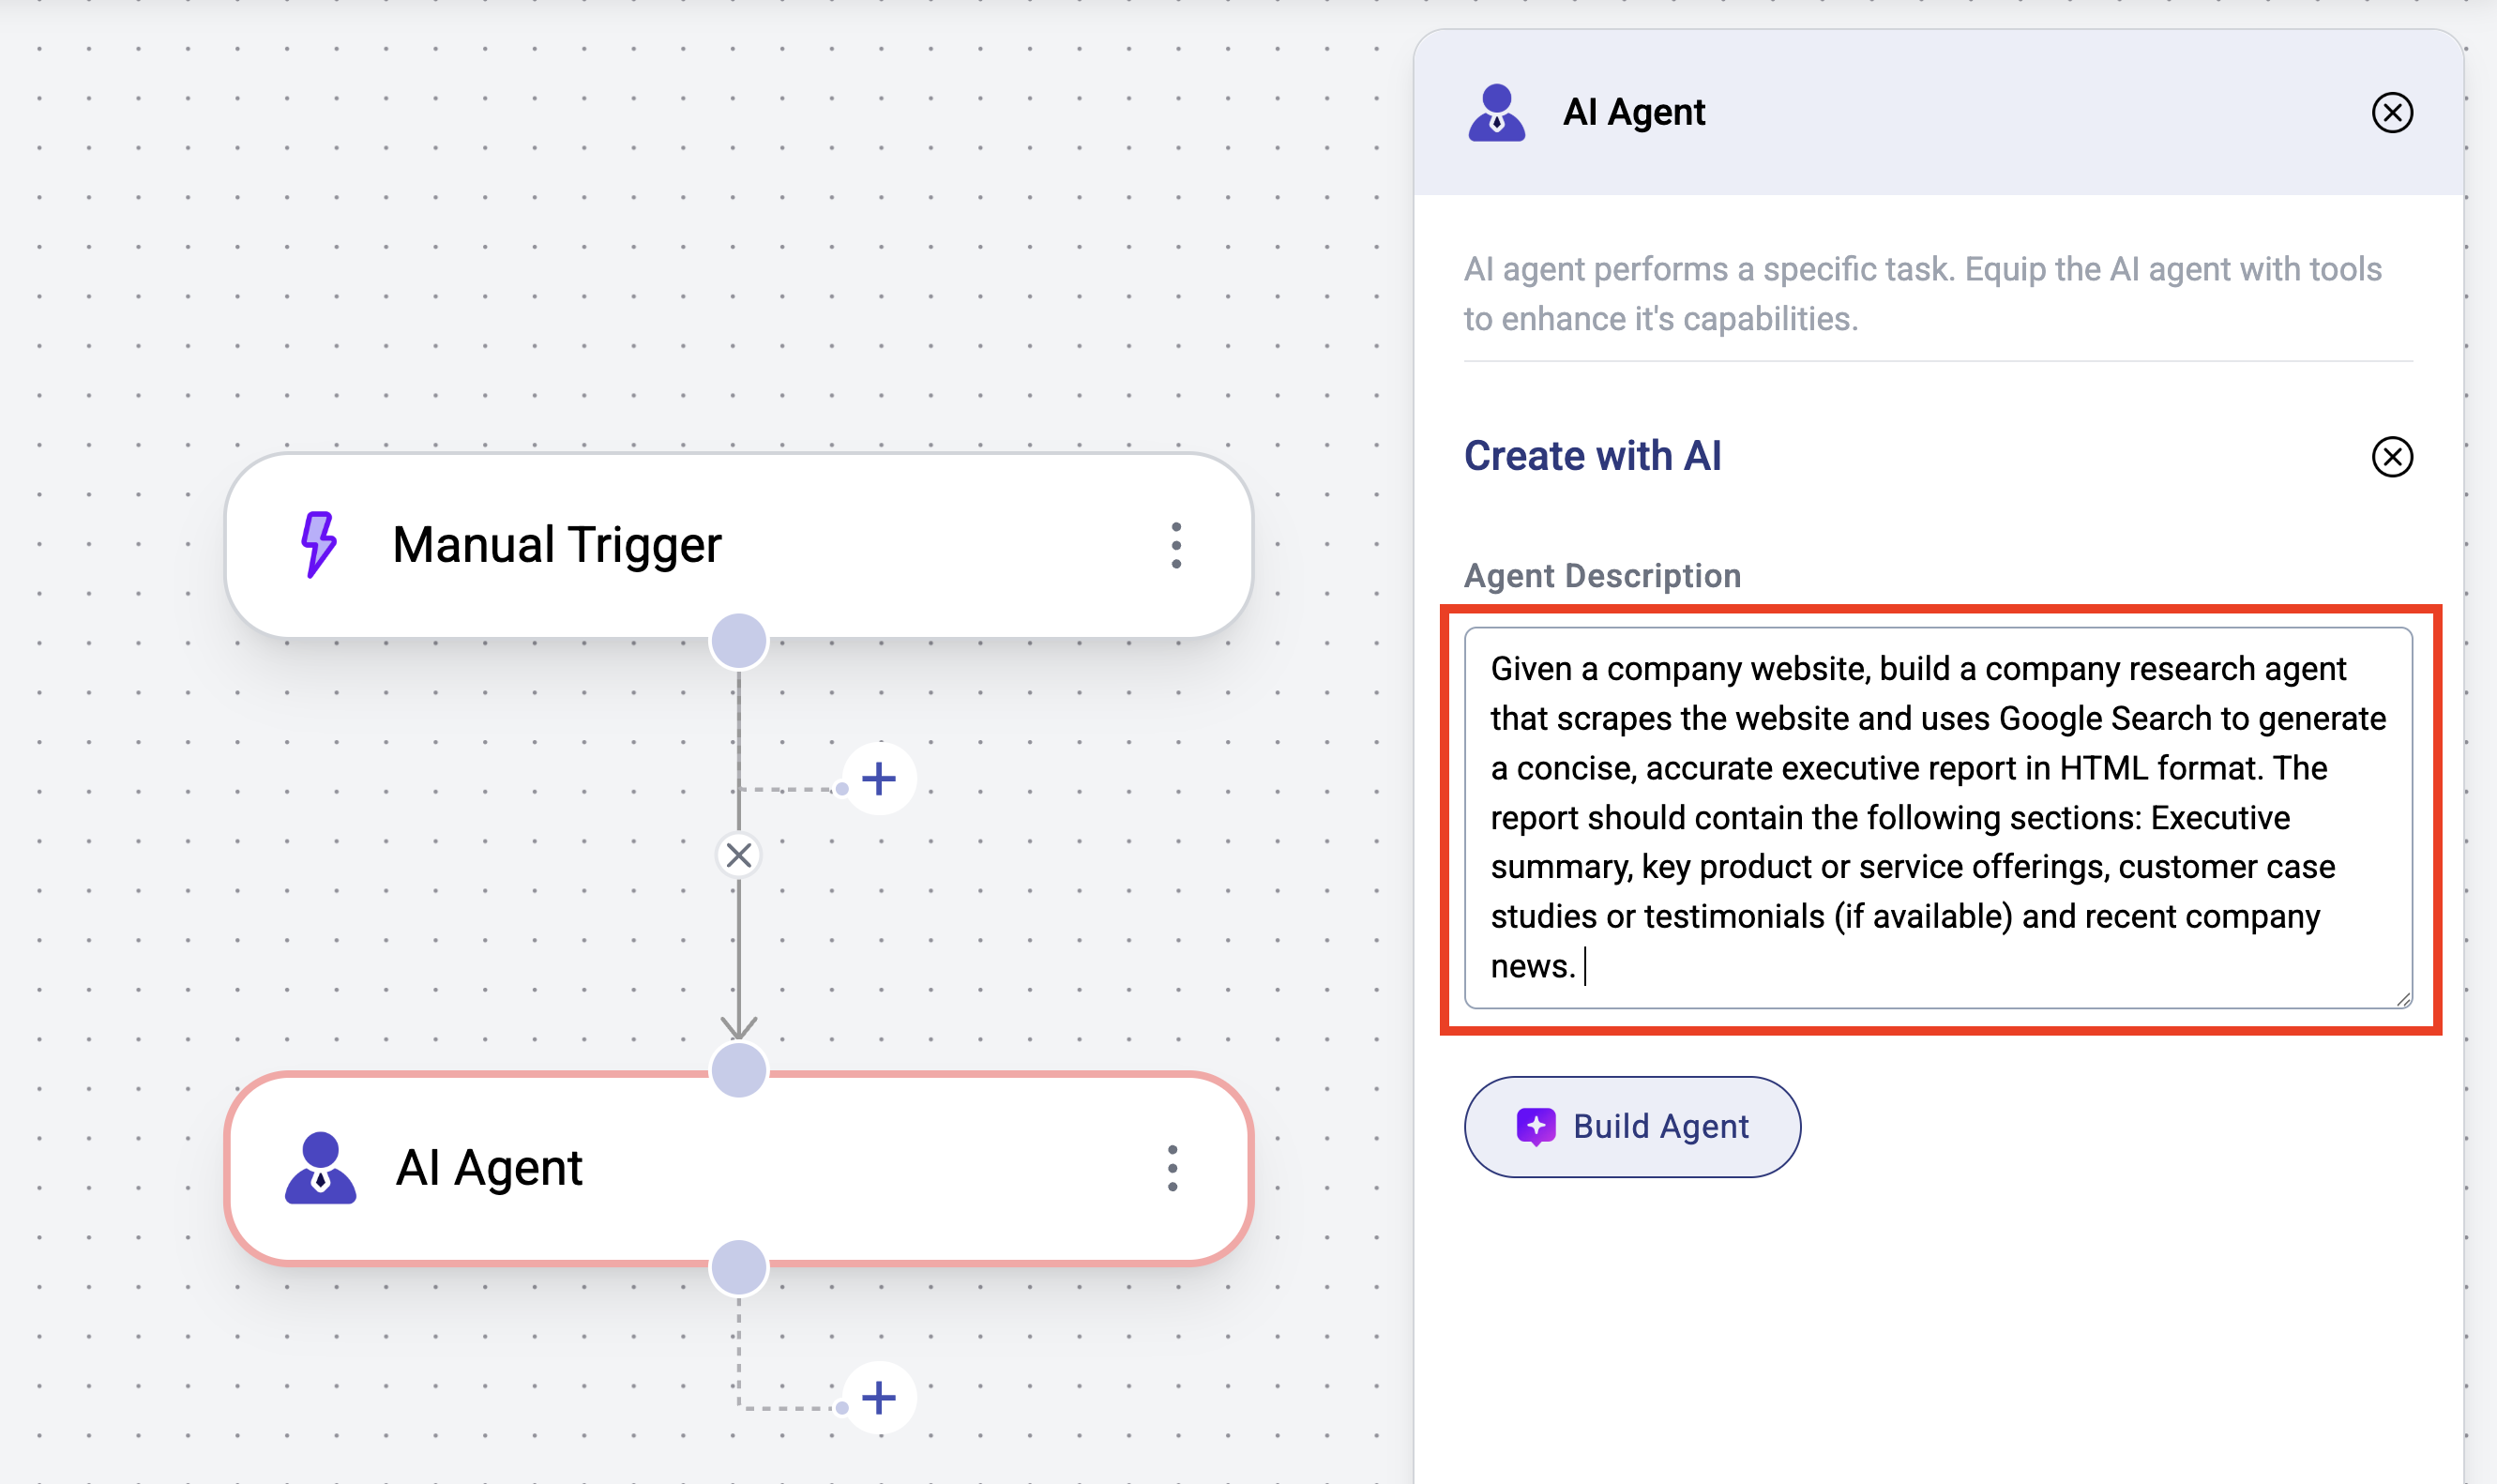
Build the Agent with AI
- Click on the added AI Agent node
- Click the
Create with AIbutton
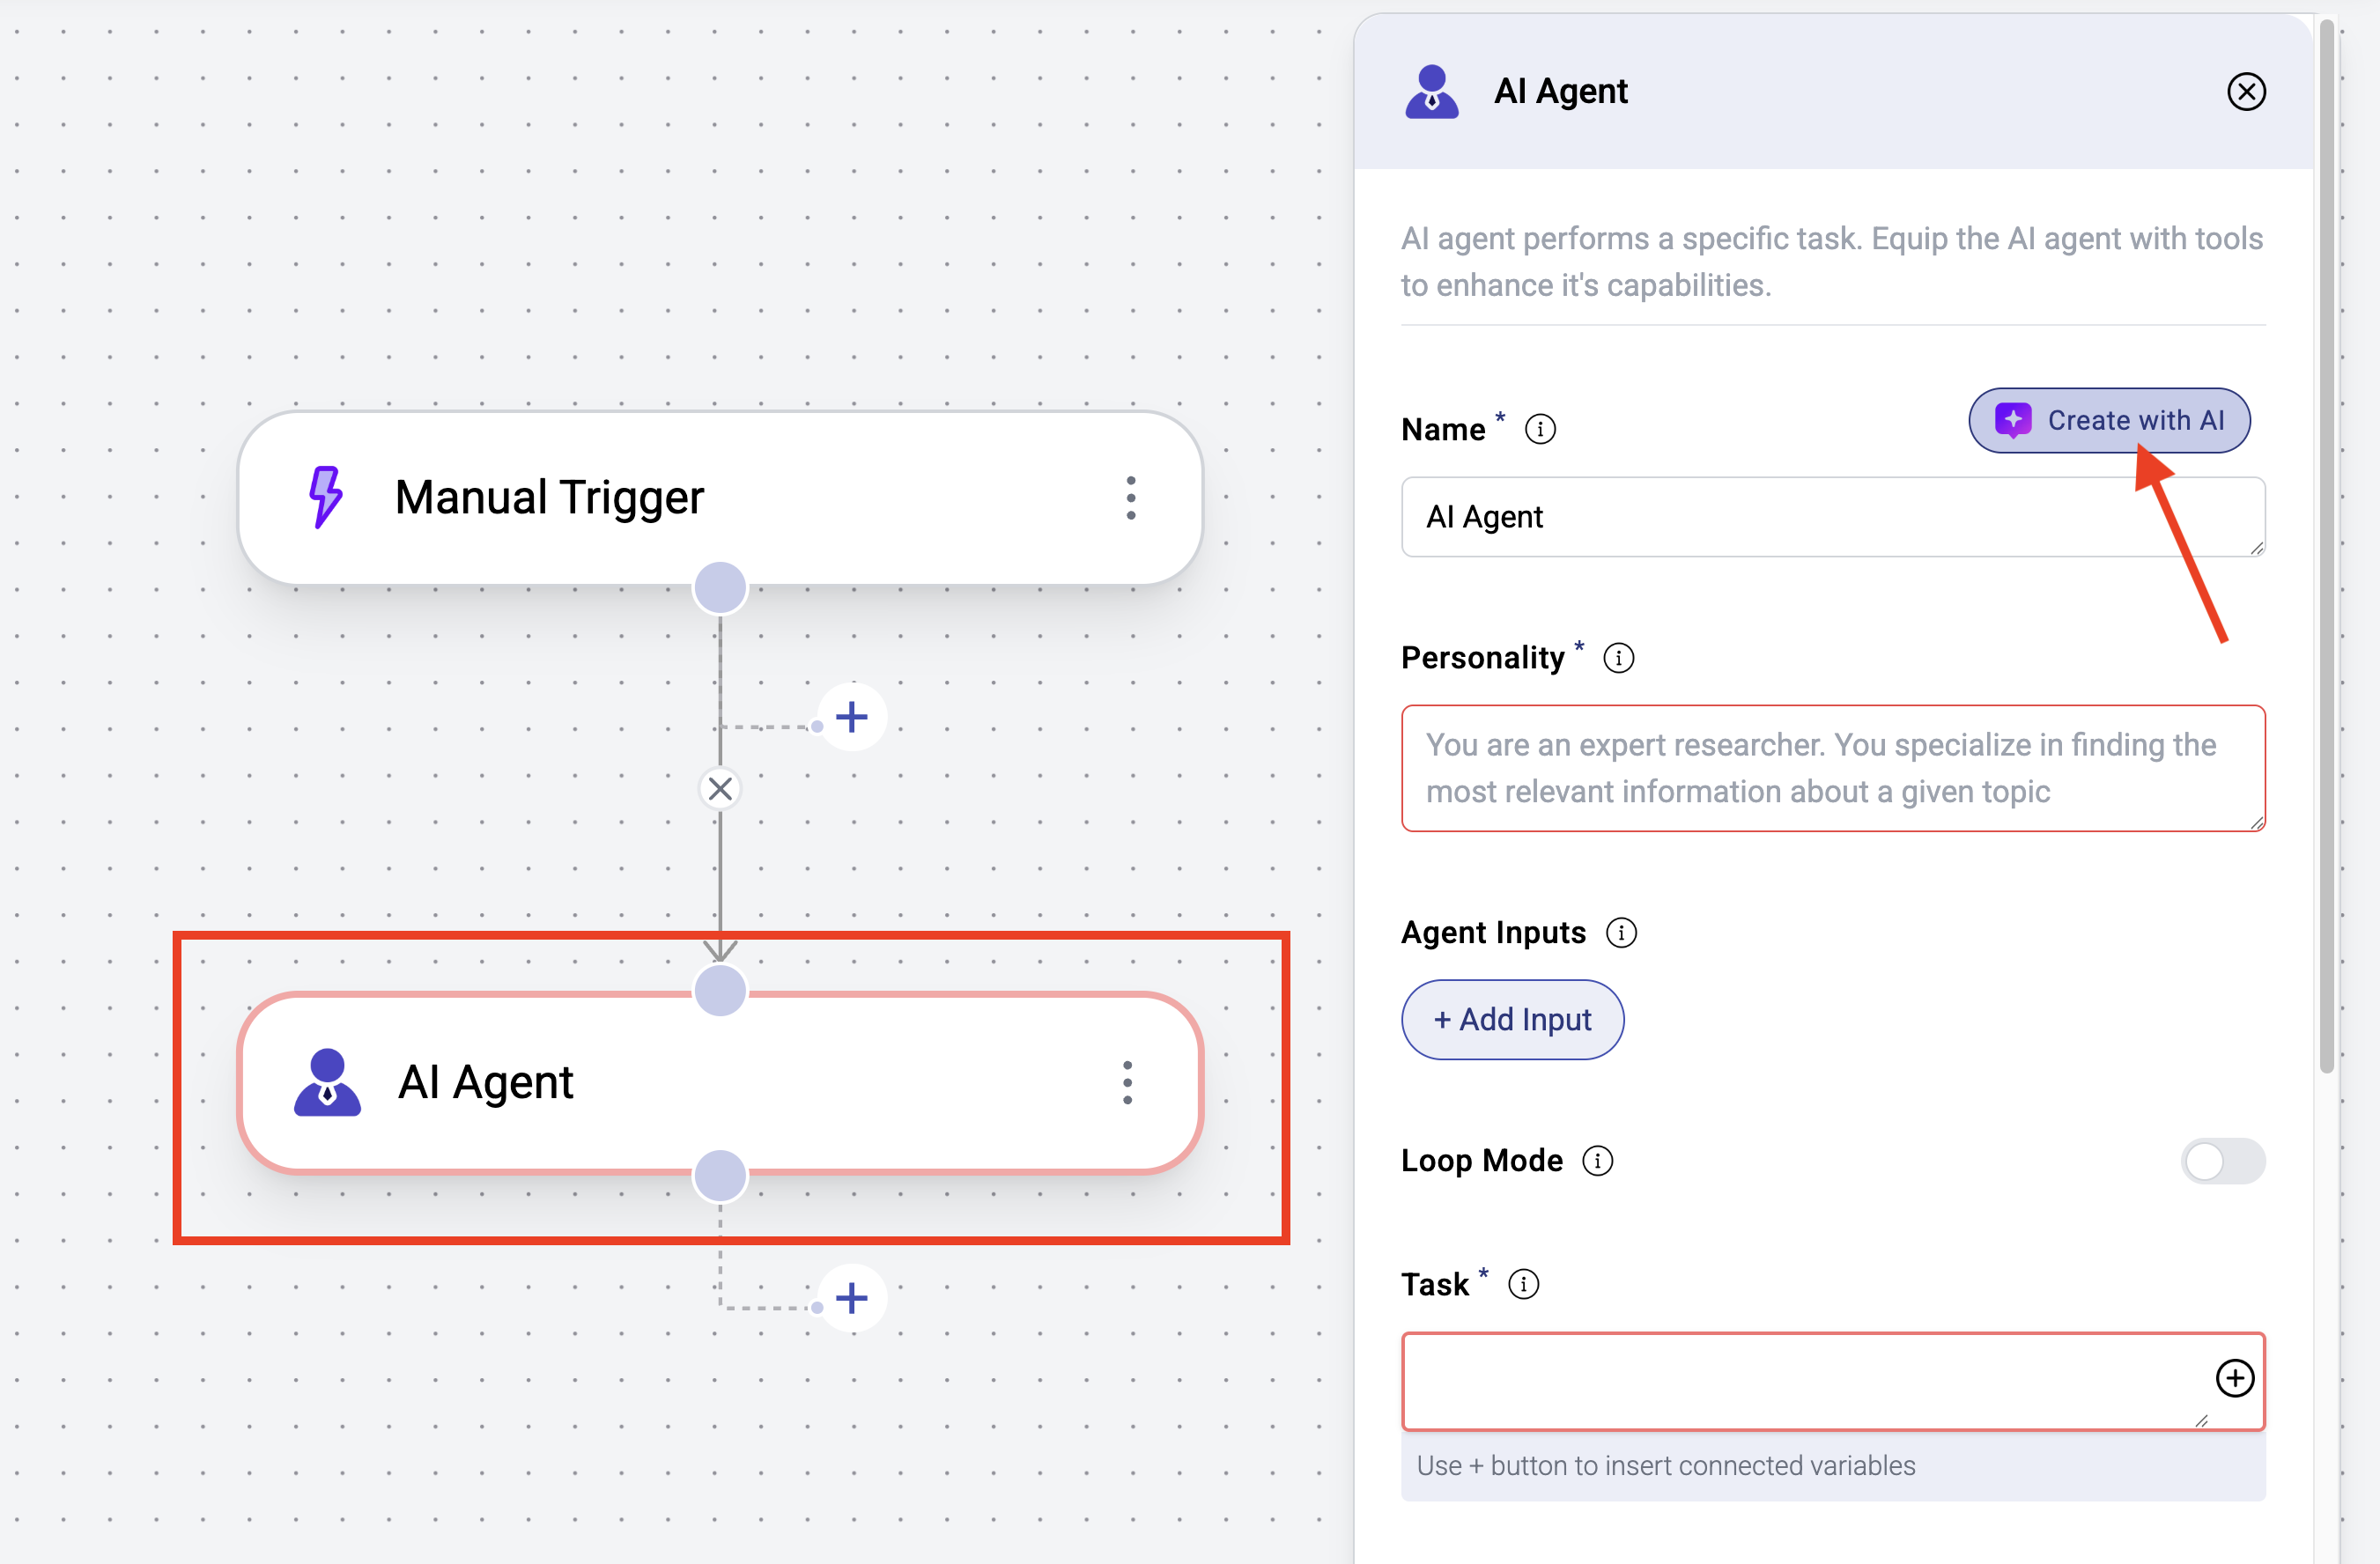
- Set the agent description to:
text
- Click
Build Agent
- Once your agent is built, accept it and make any necessary changes. You can customize the agent instructions, add or remove tools or change the underlying LLM model (under Settings).
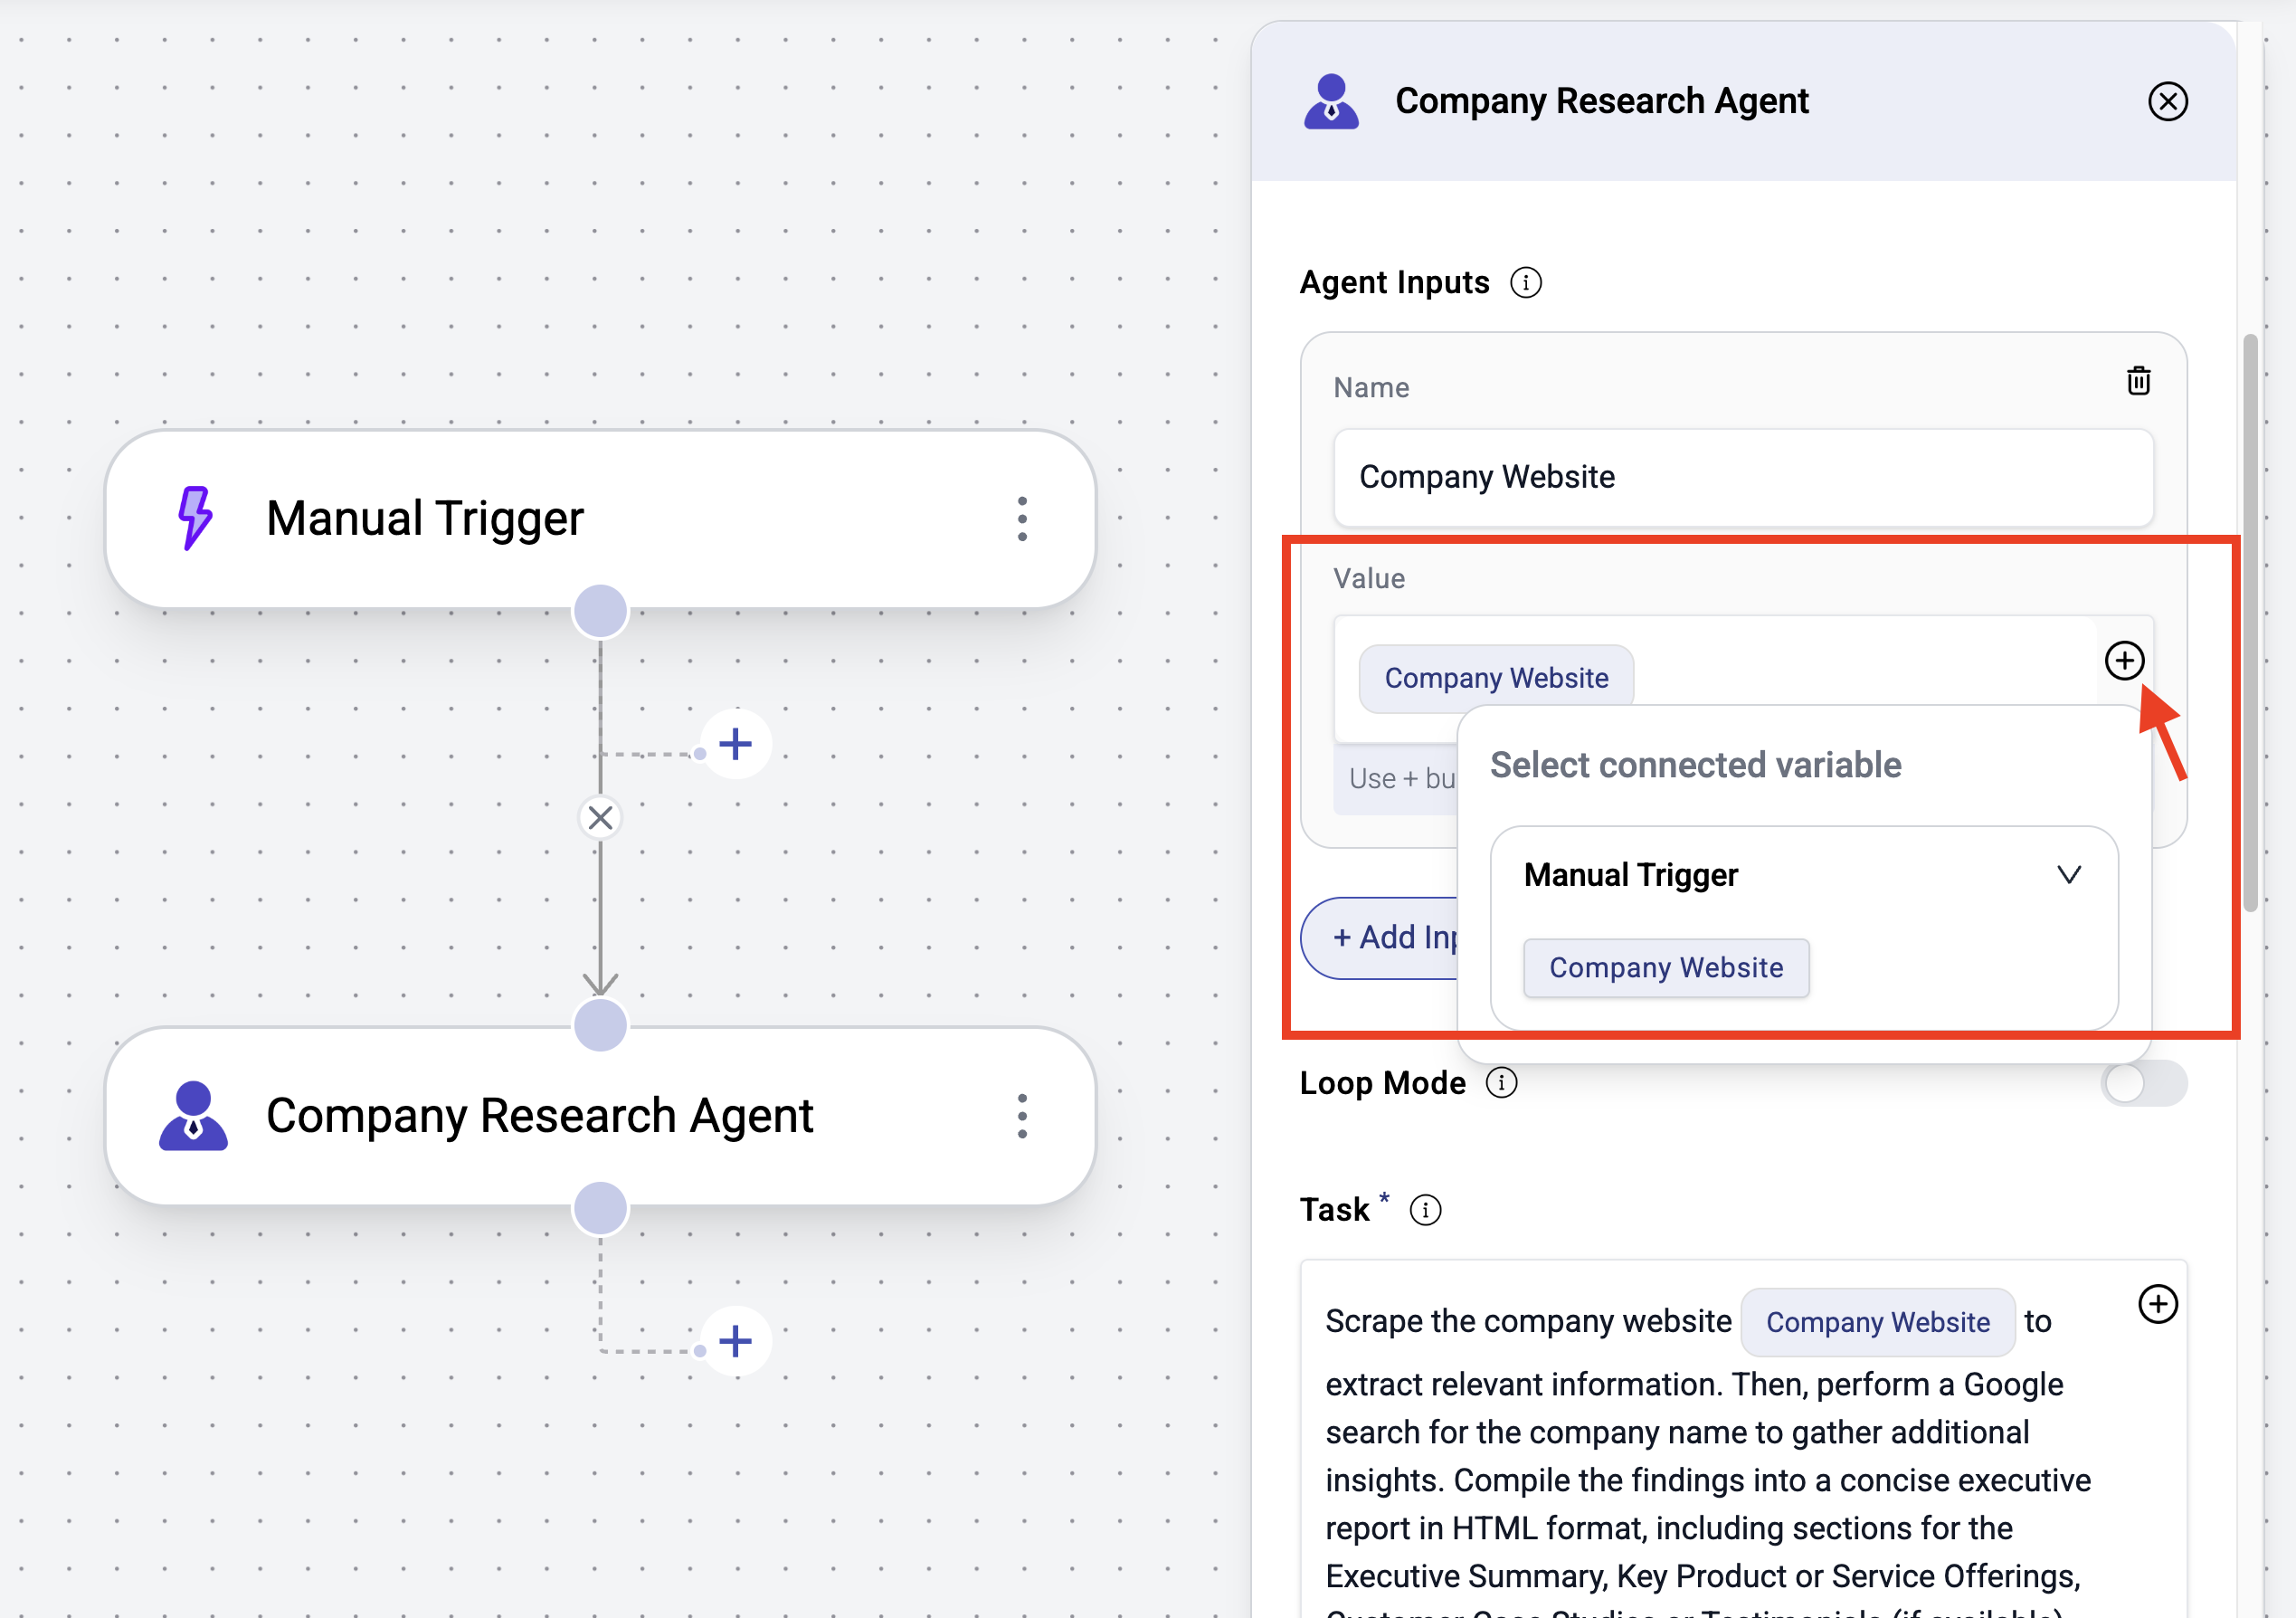
Add Agent Input
- If it’s not already added, create an agent input named
Company Website. - Click the
+button to map the company website from theManual Triggerstep to the value of this input.
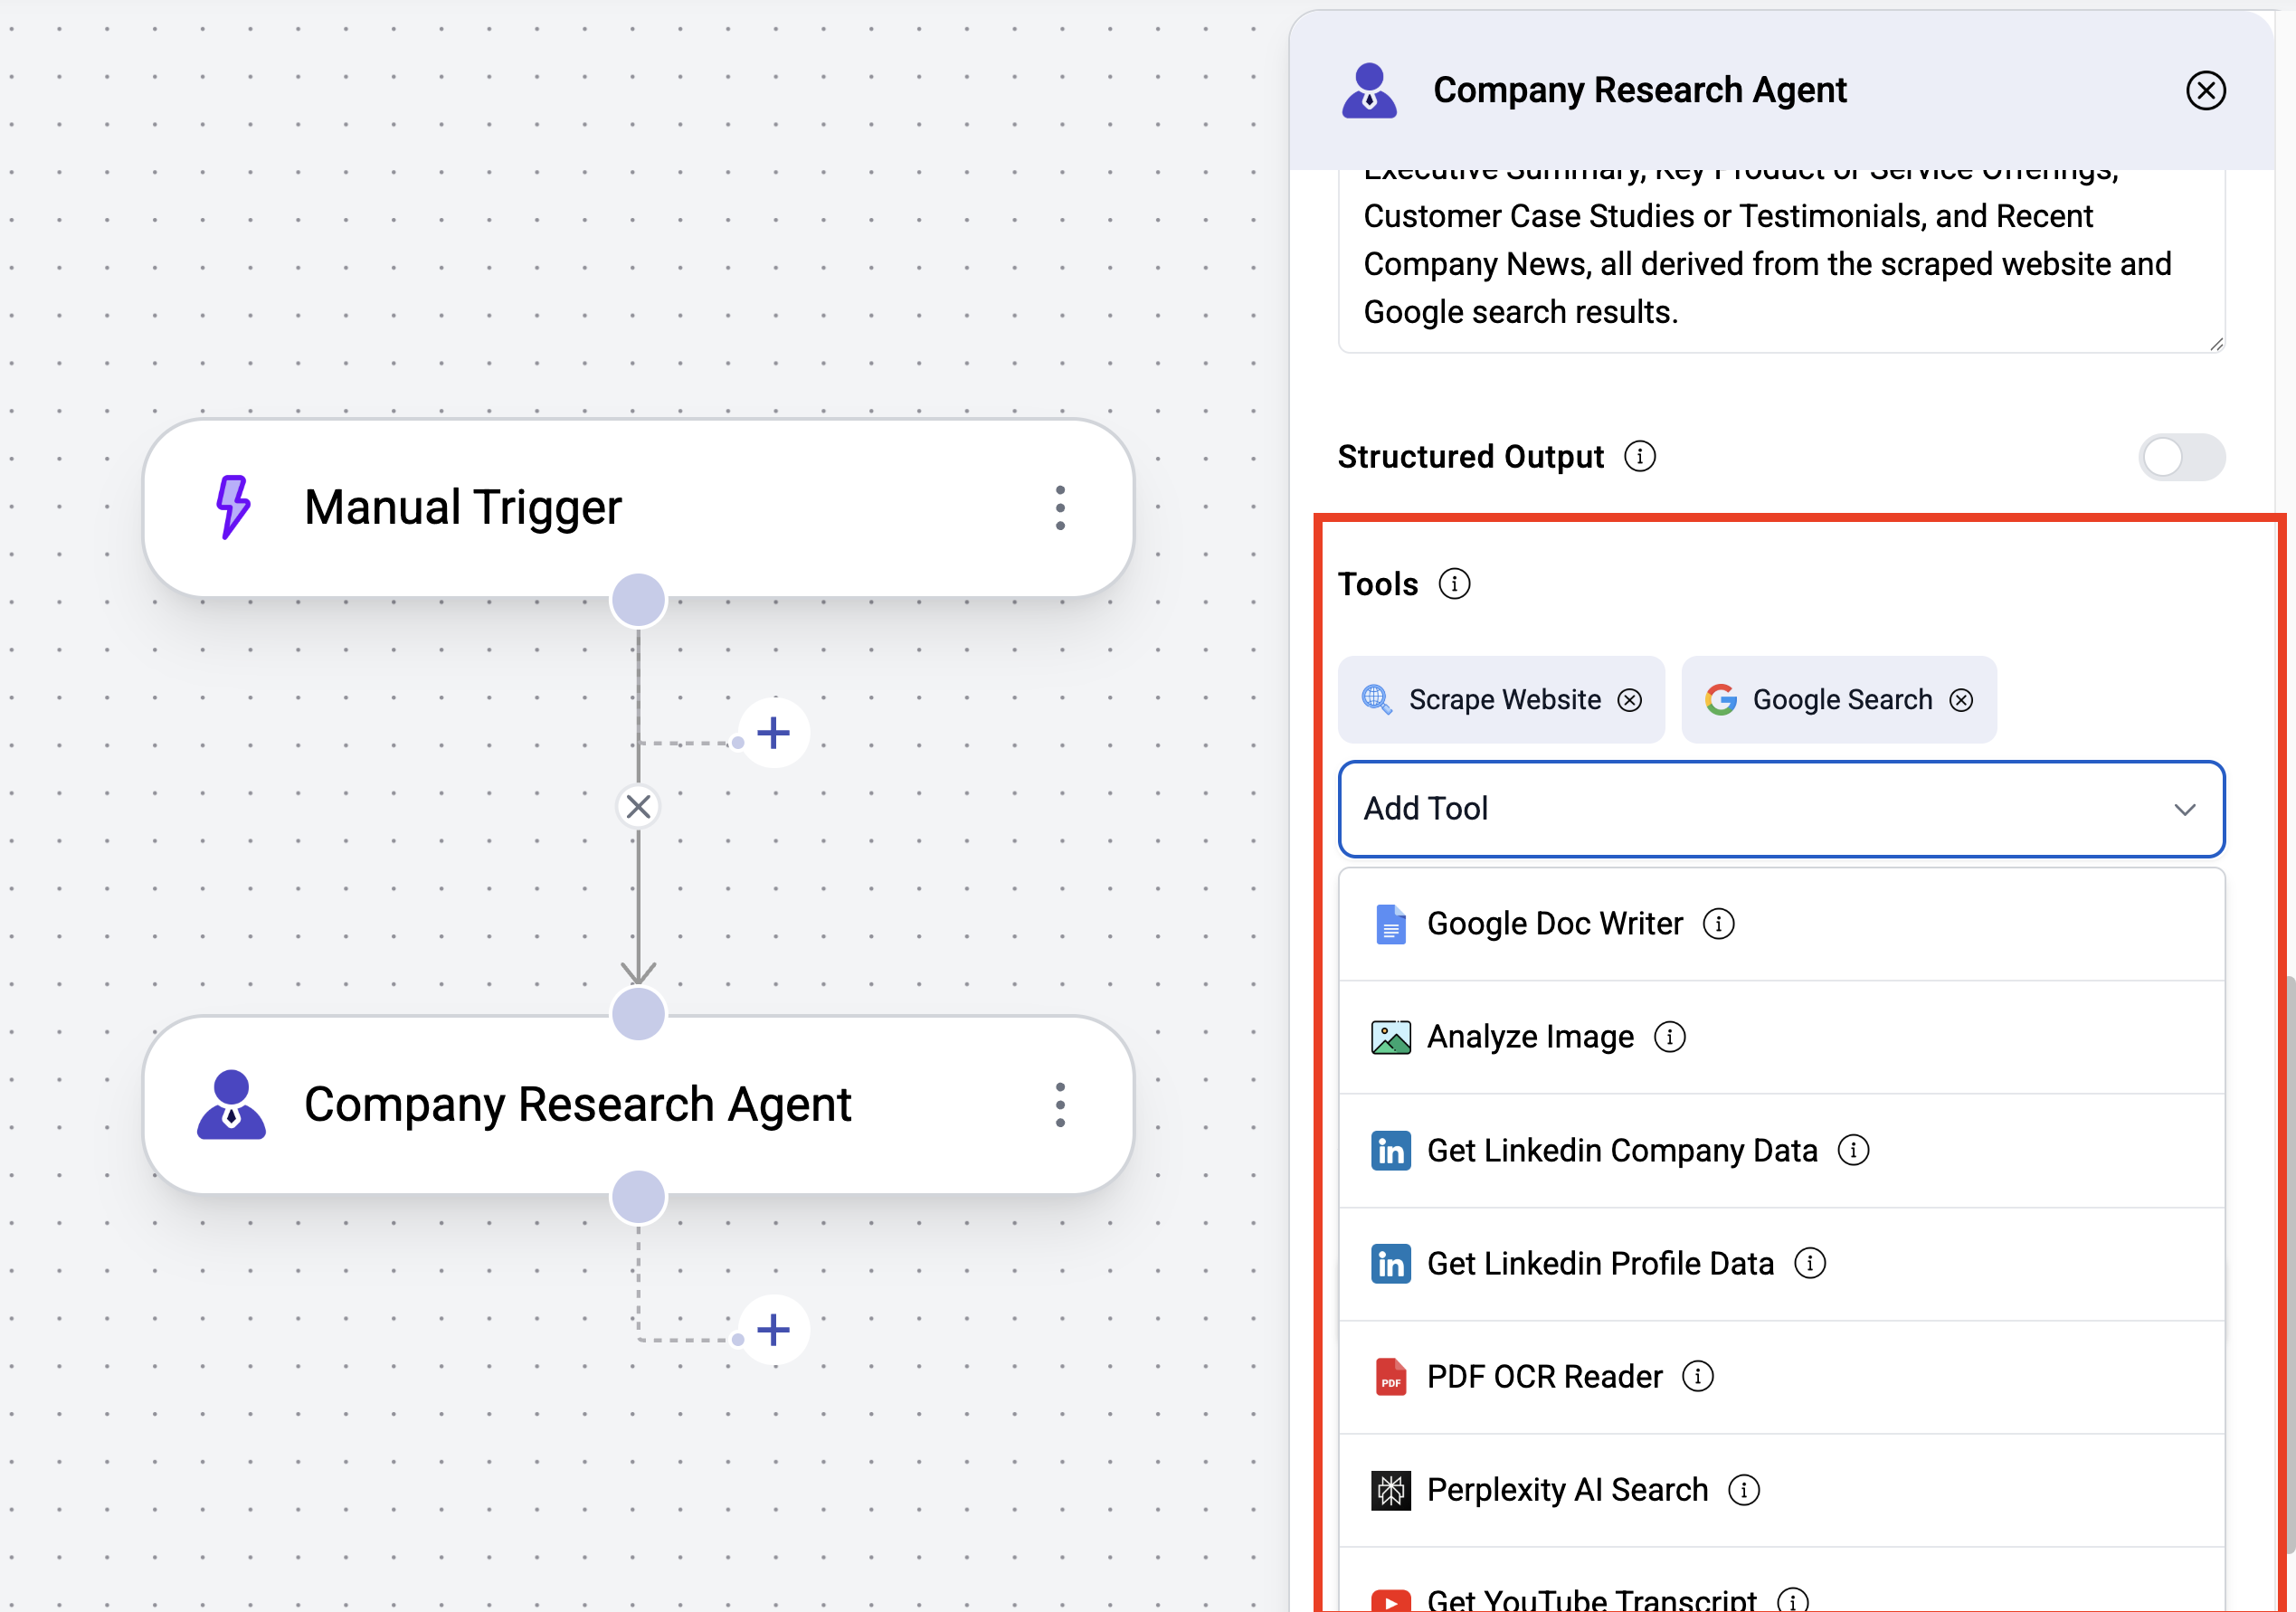
Add Tools
- Add or remove tools as required. For this example, you can add the
Scrape WebsiteandGoogle Searchtools.
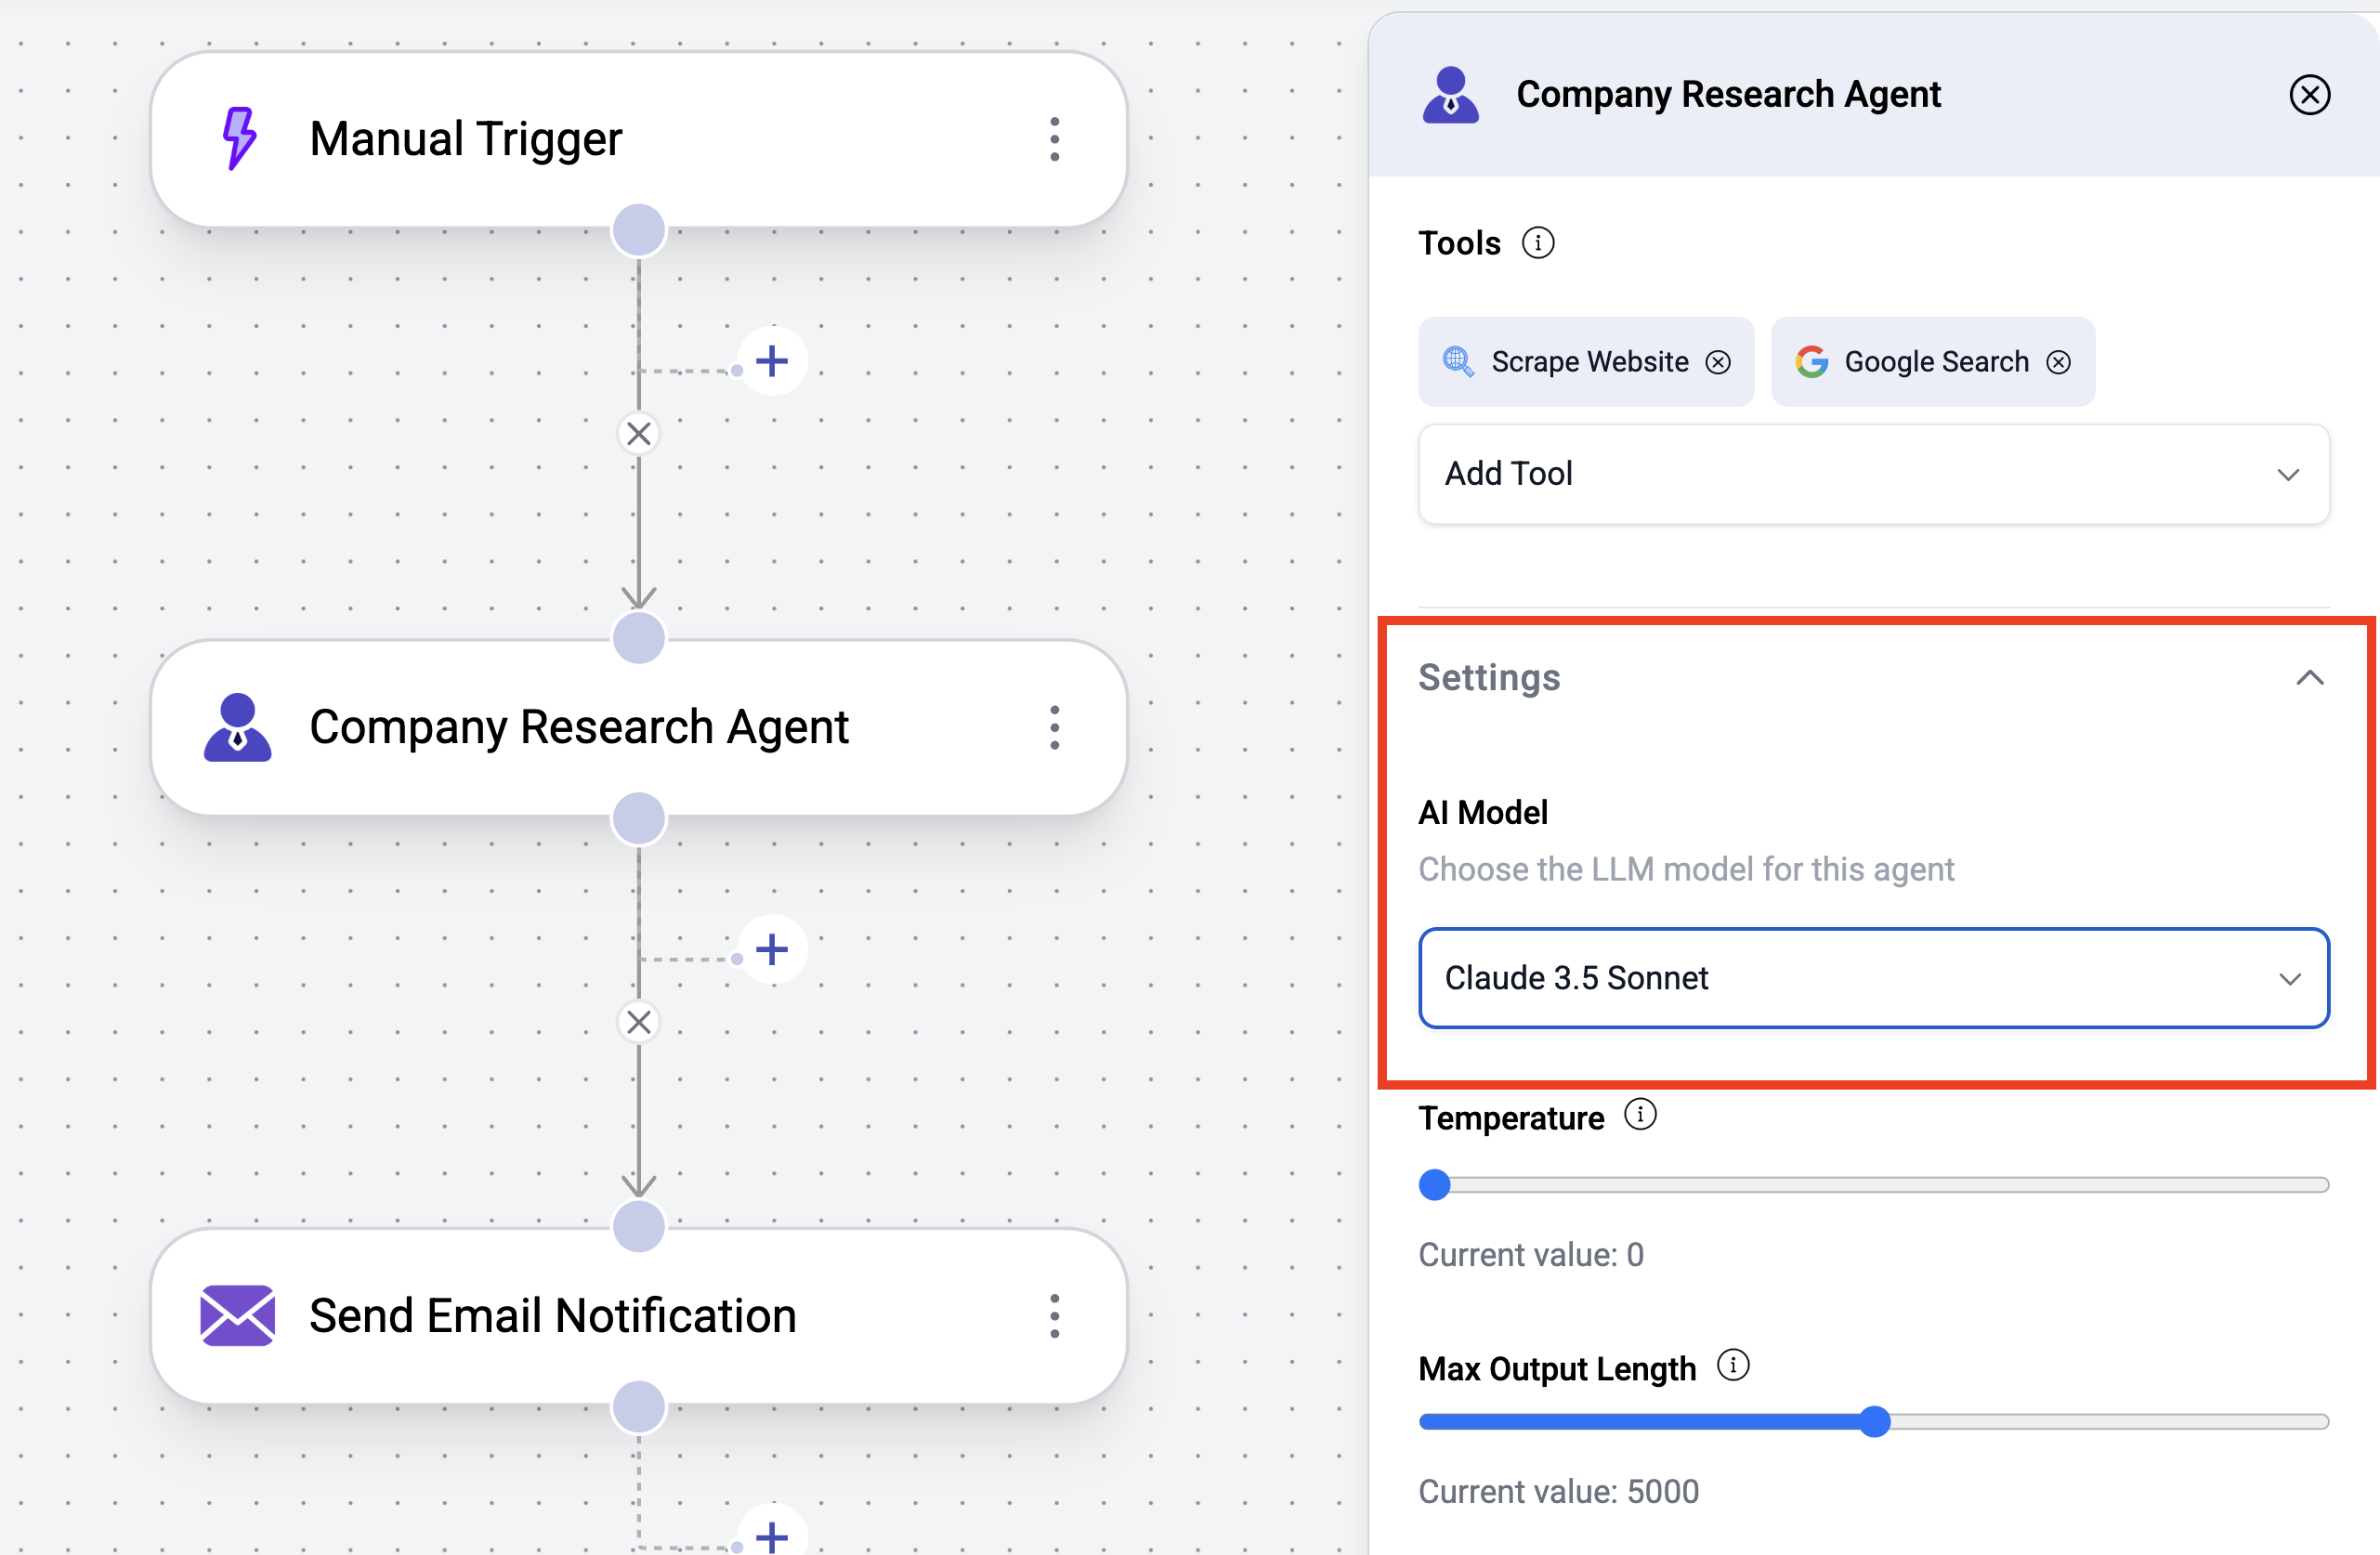
Update LLM Model
- You can change the LLM model under settings.
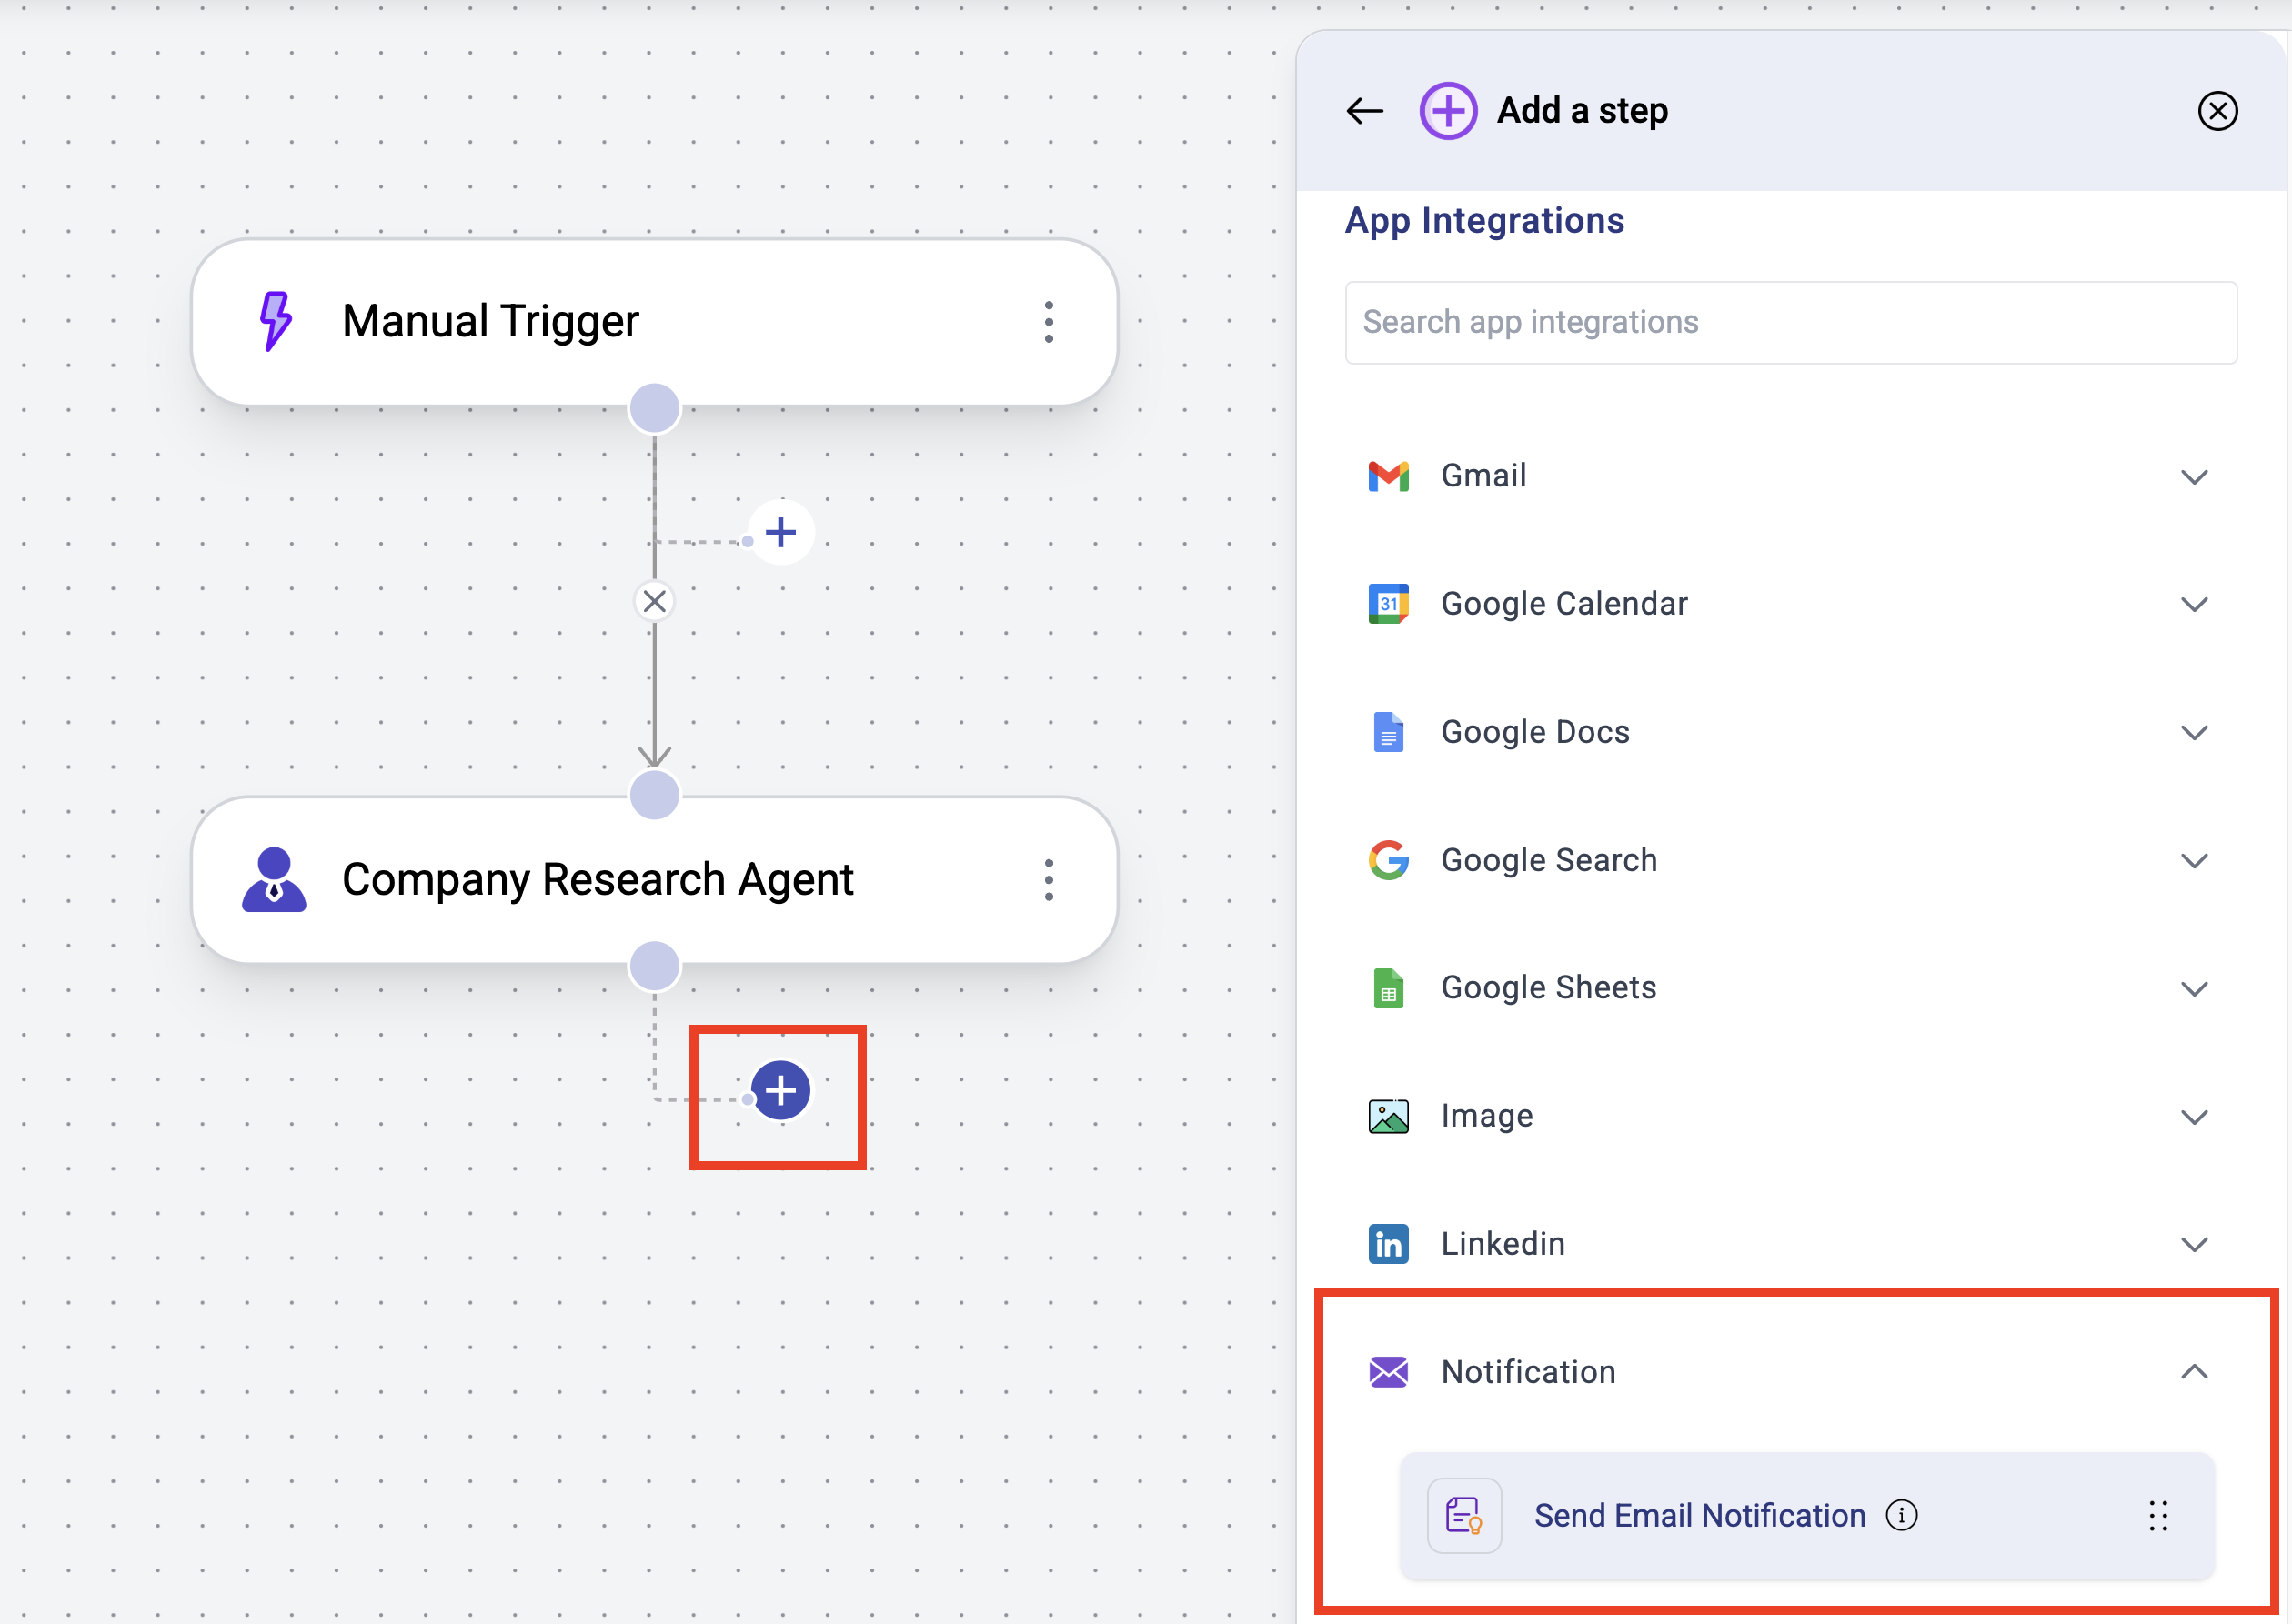
Add Email Integration
- Click the
+button to add a new step. - Select
App Integrations - Click
Notificationand select theSend Email Notificationaction.
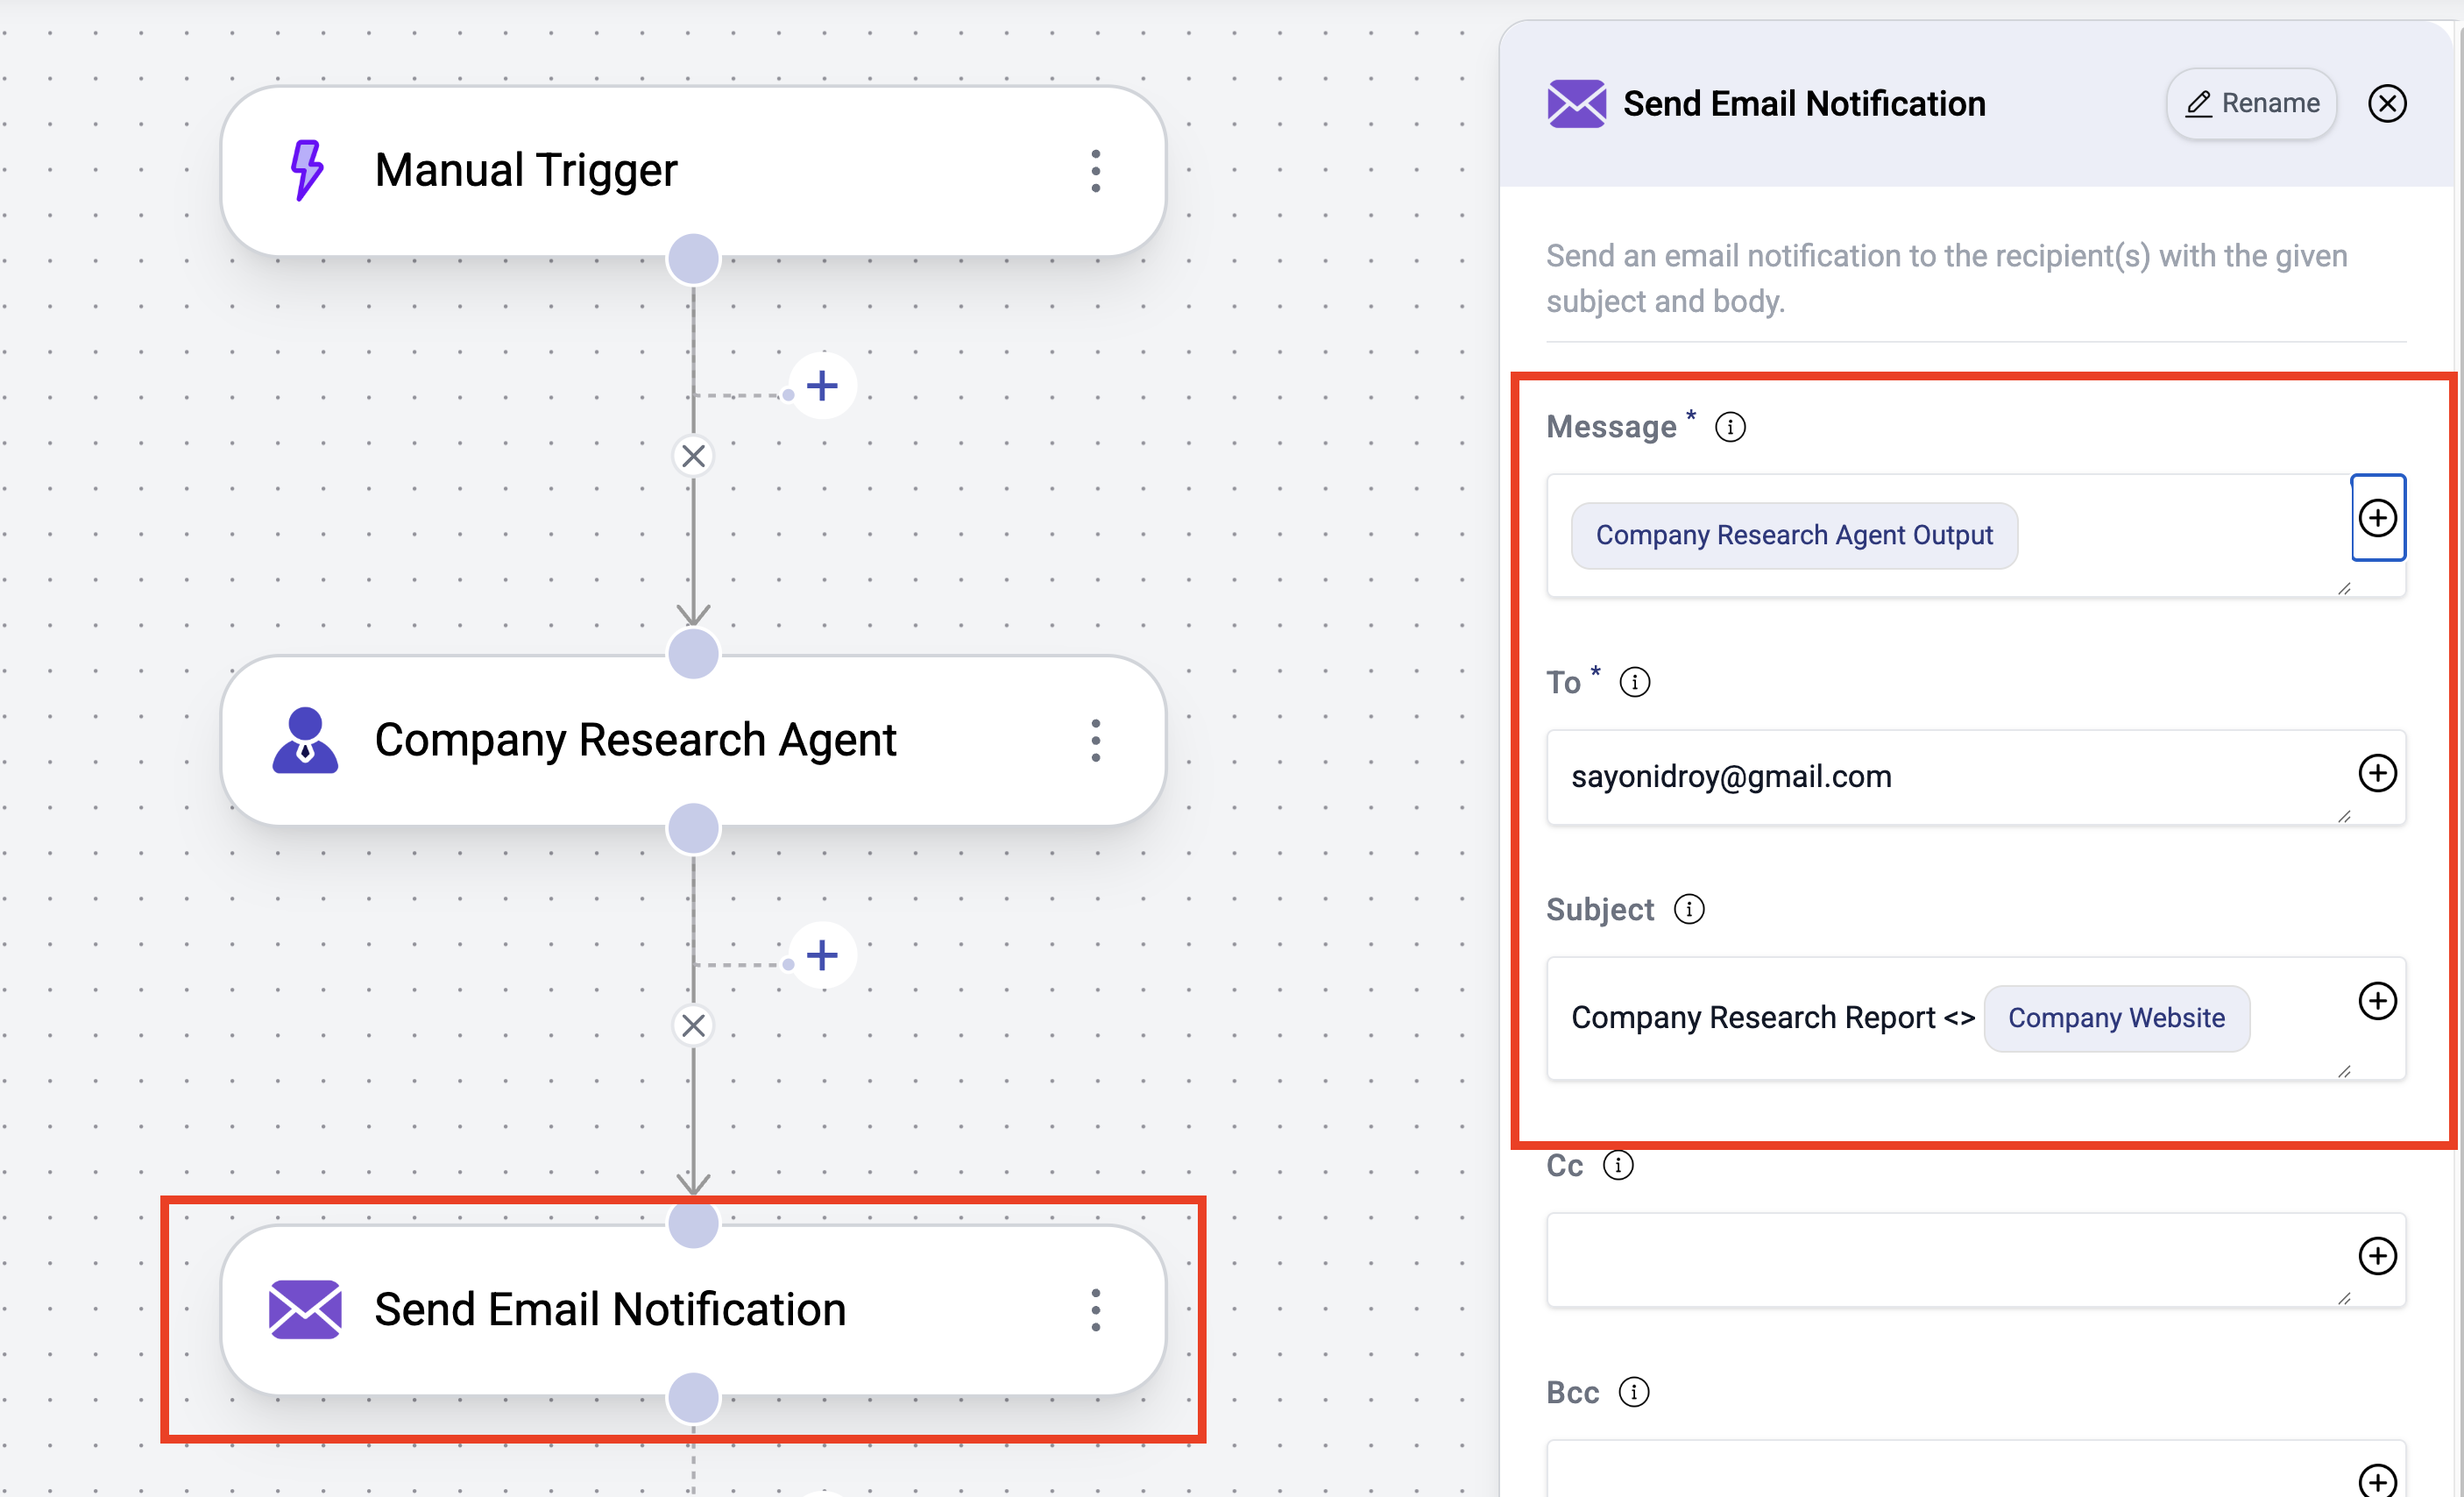
- Configure the
Send Email Notificationnode by clicking on it - Set the email
Messageto the report generated by theCompany Research Agentby clicking the+button - Add your email id in the
Tofield and add an optional Subject
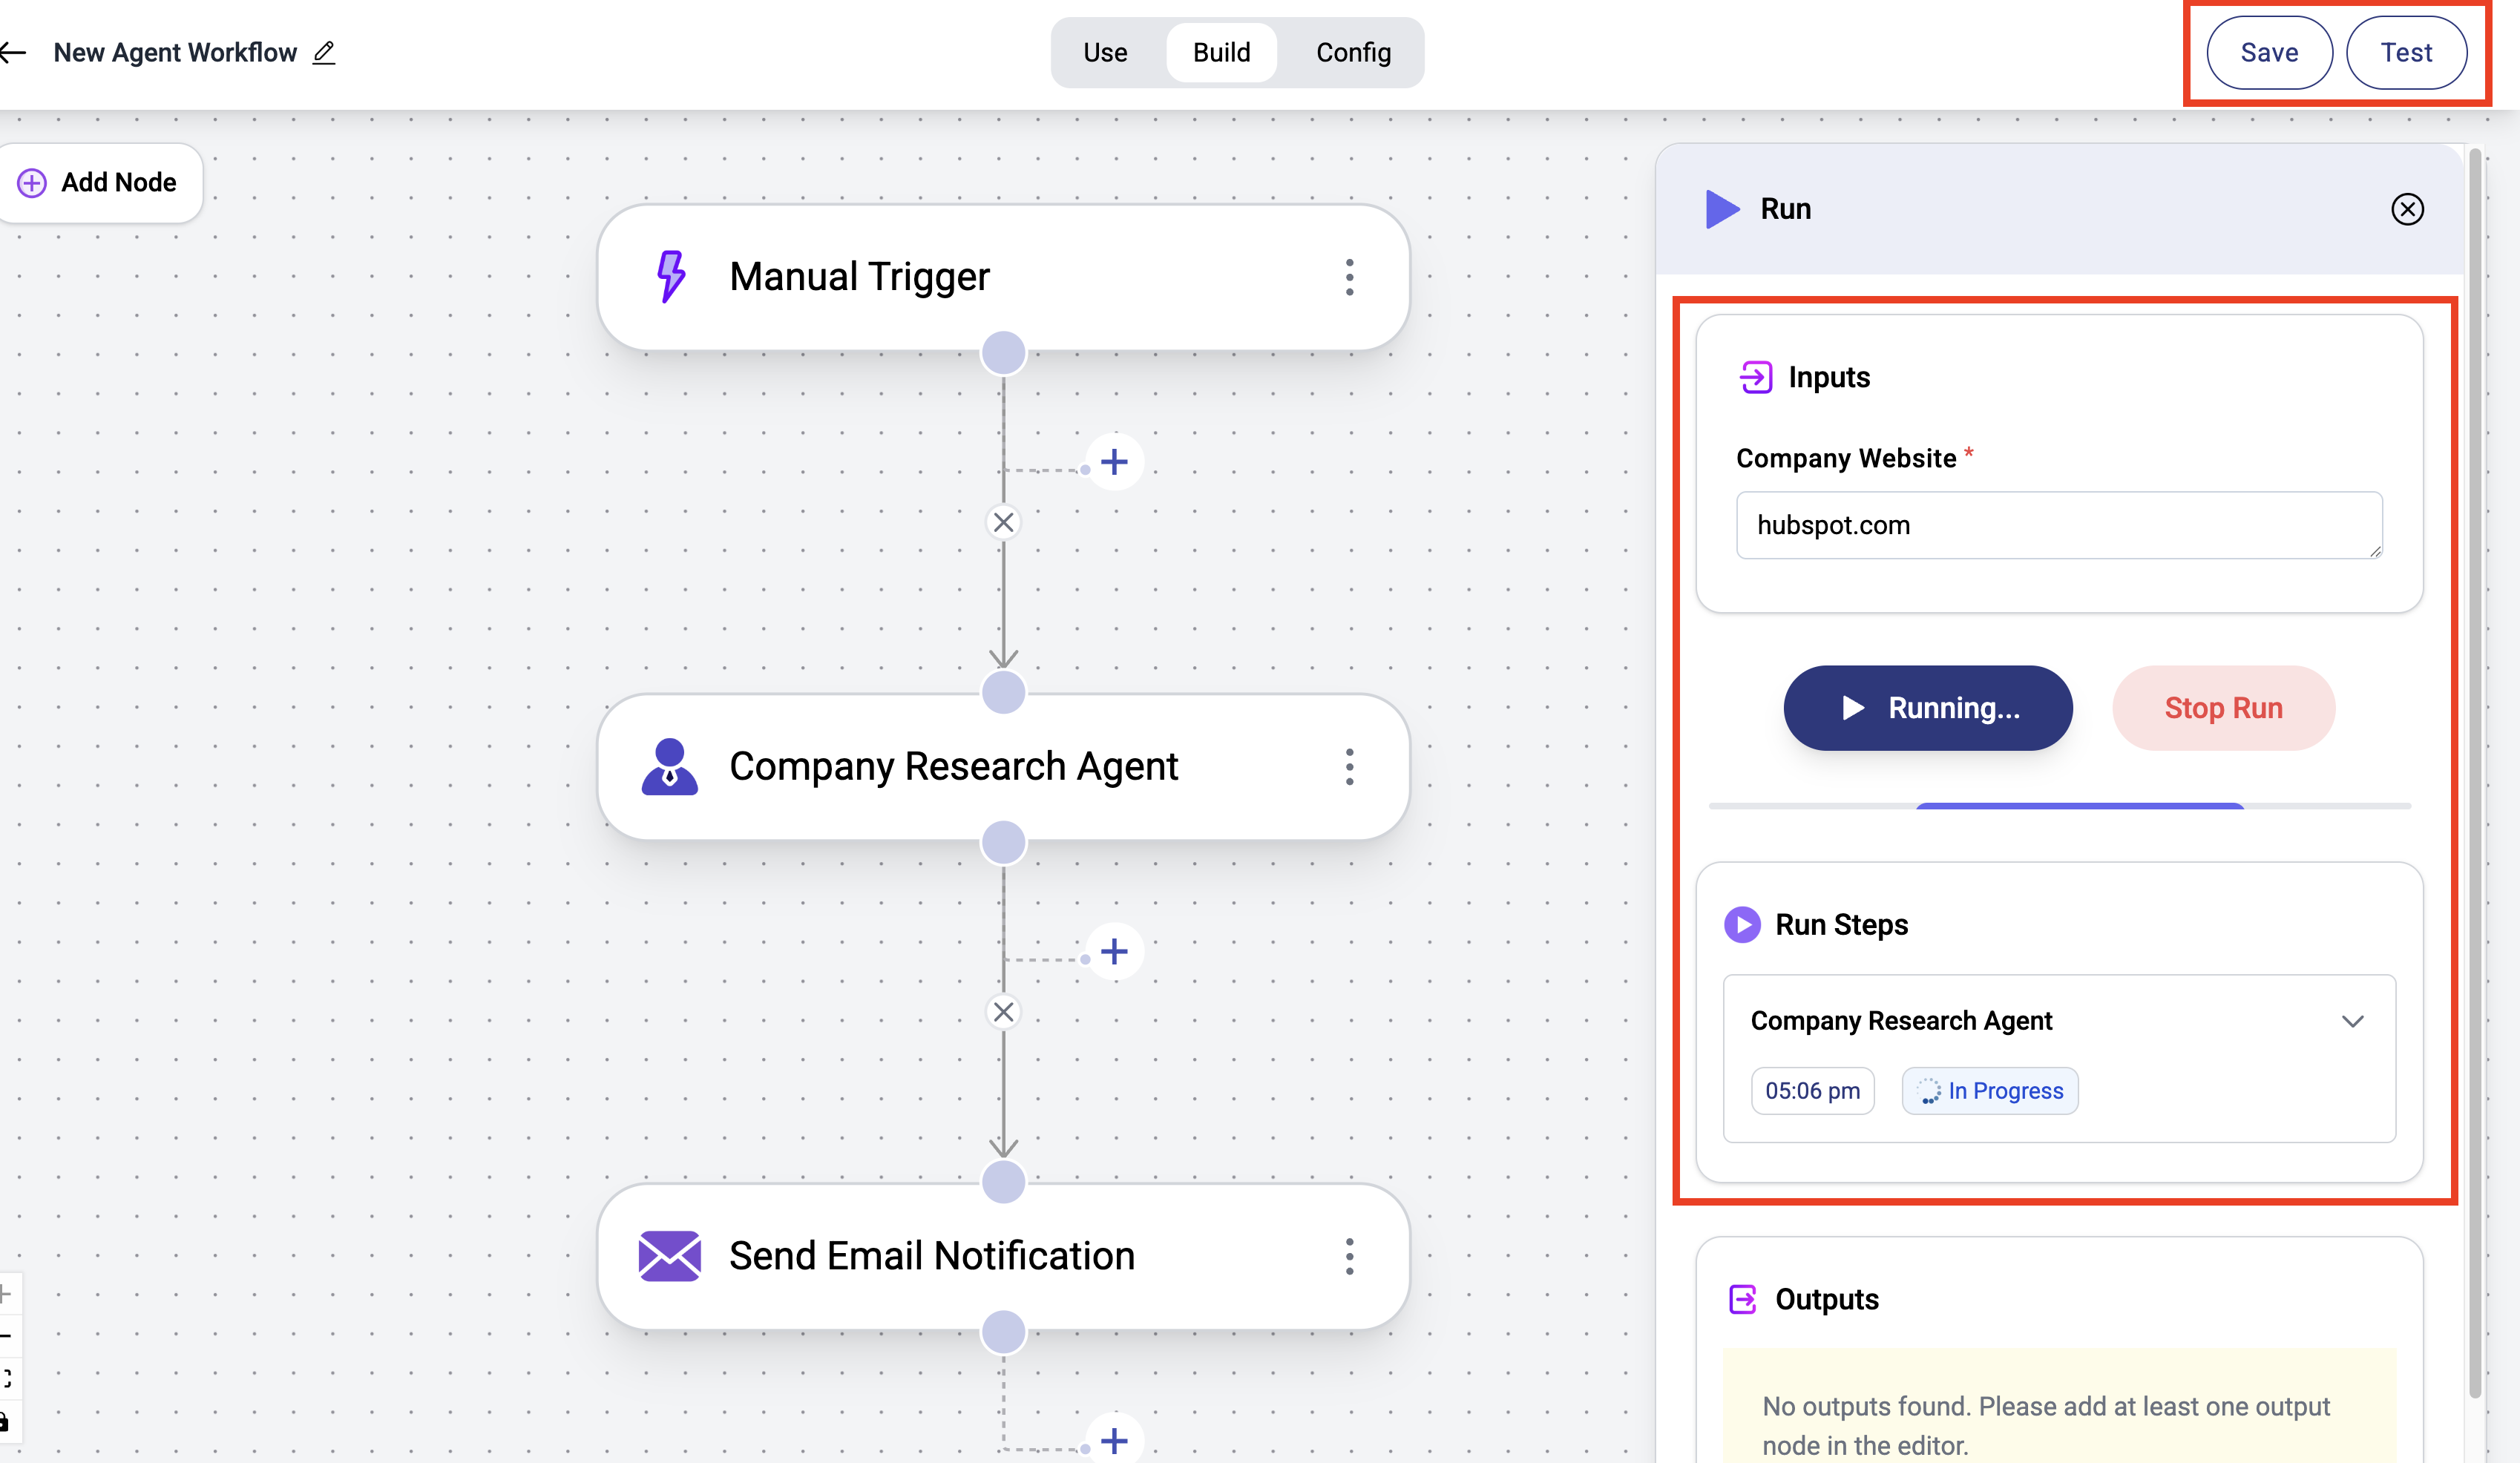
Run the agent workflow
Savethe workflowTestthe workflow by providing the company website you want to research
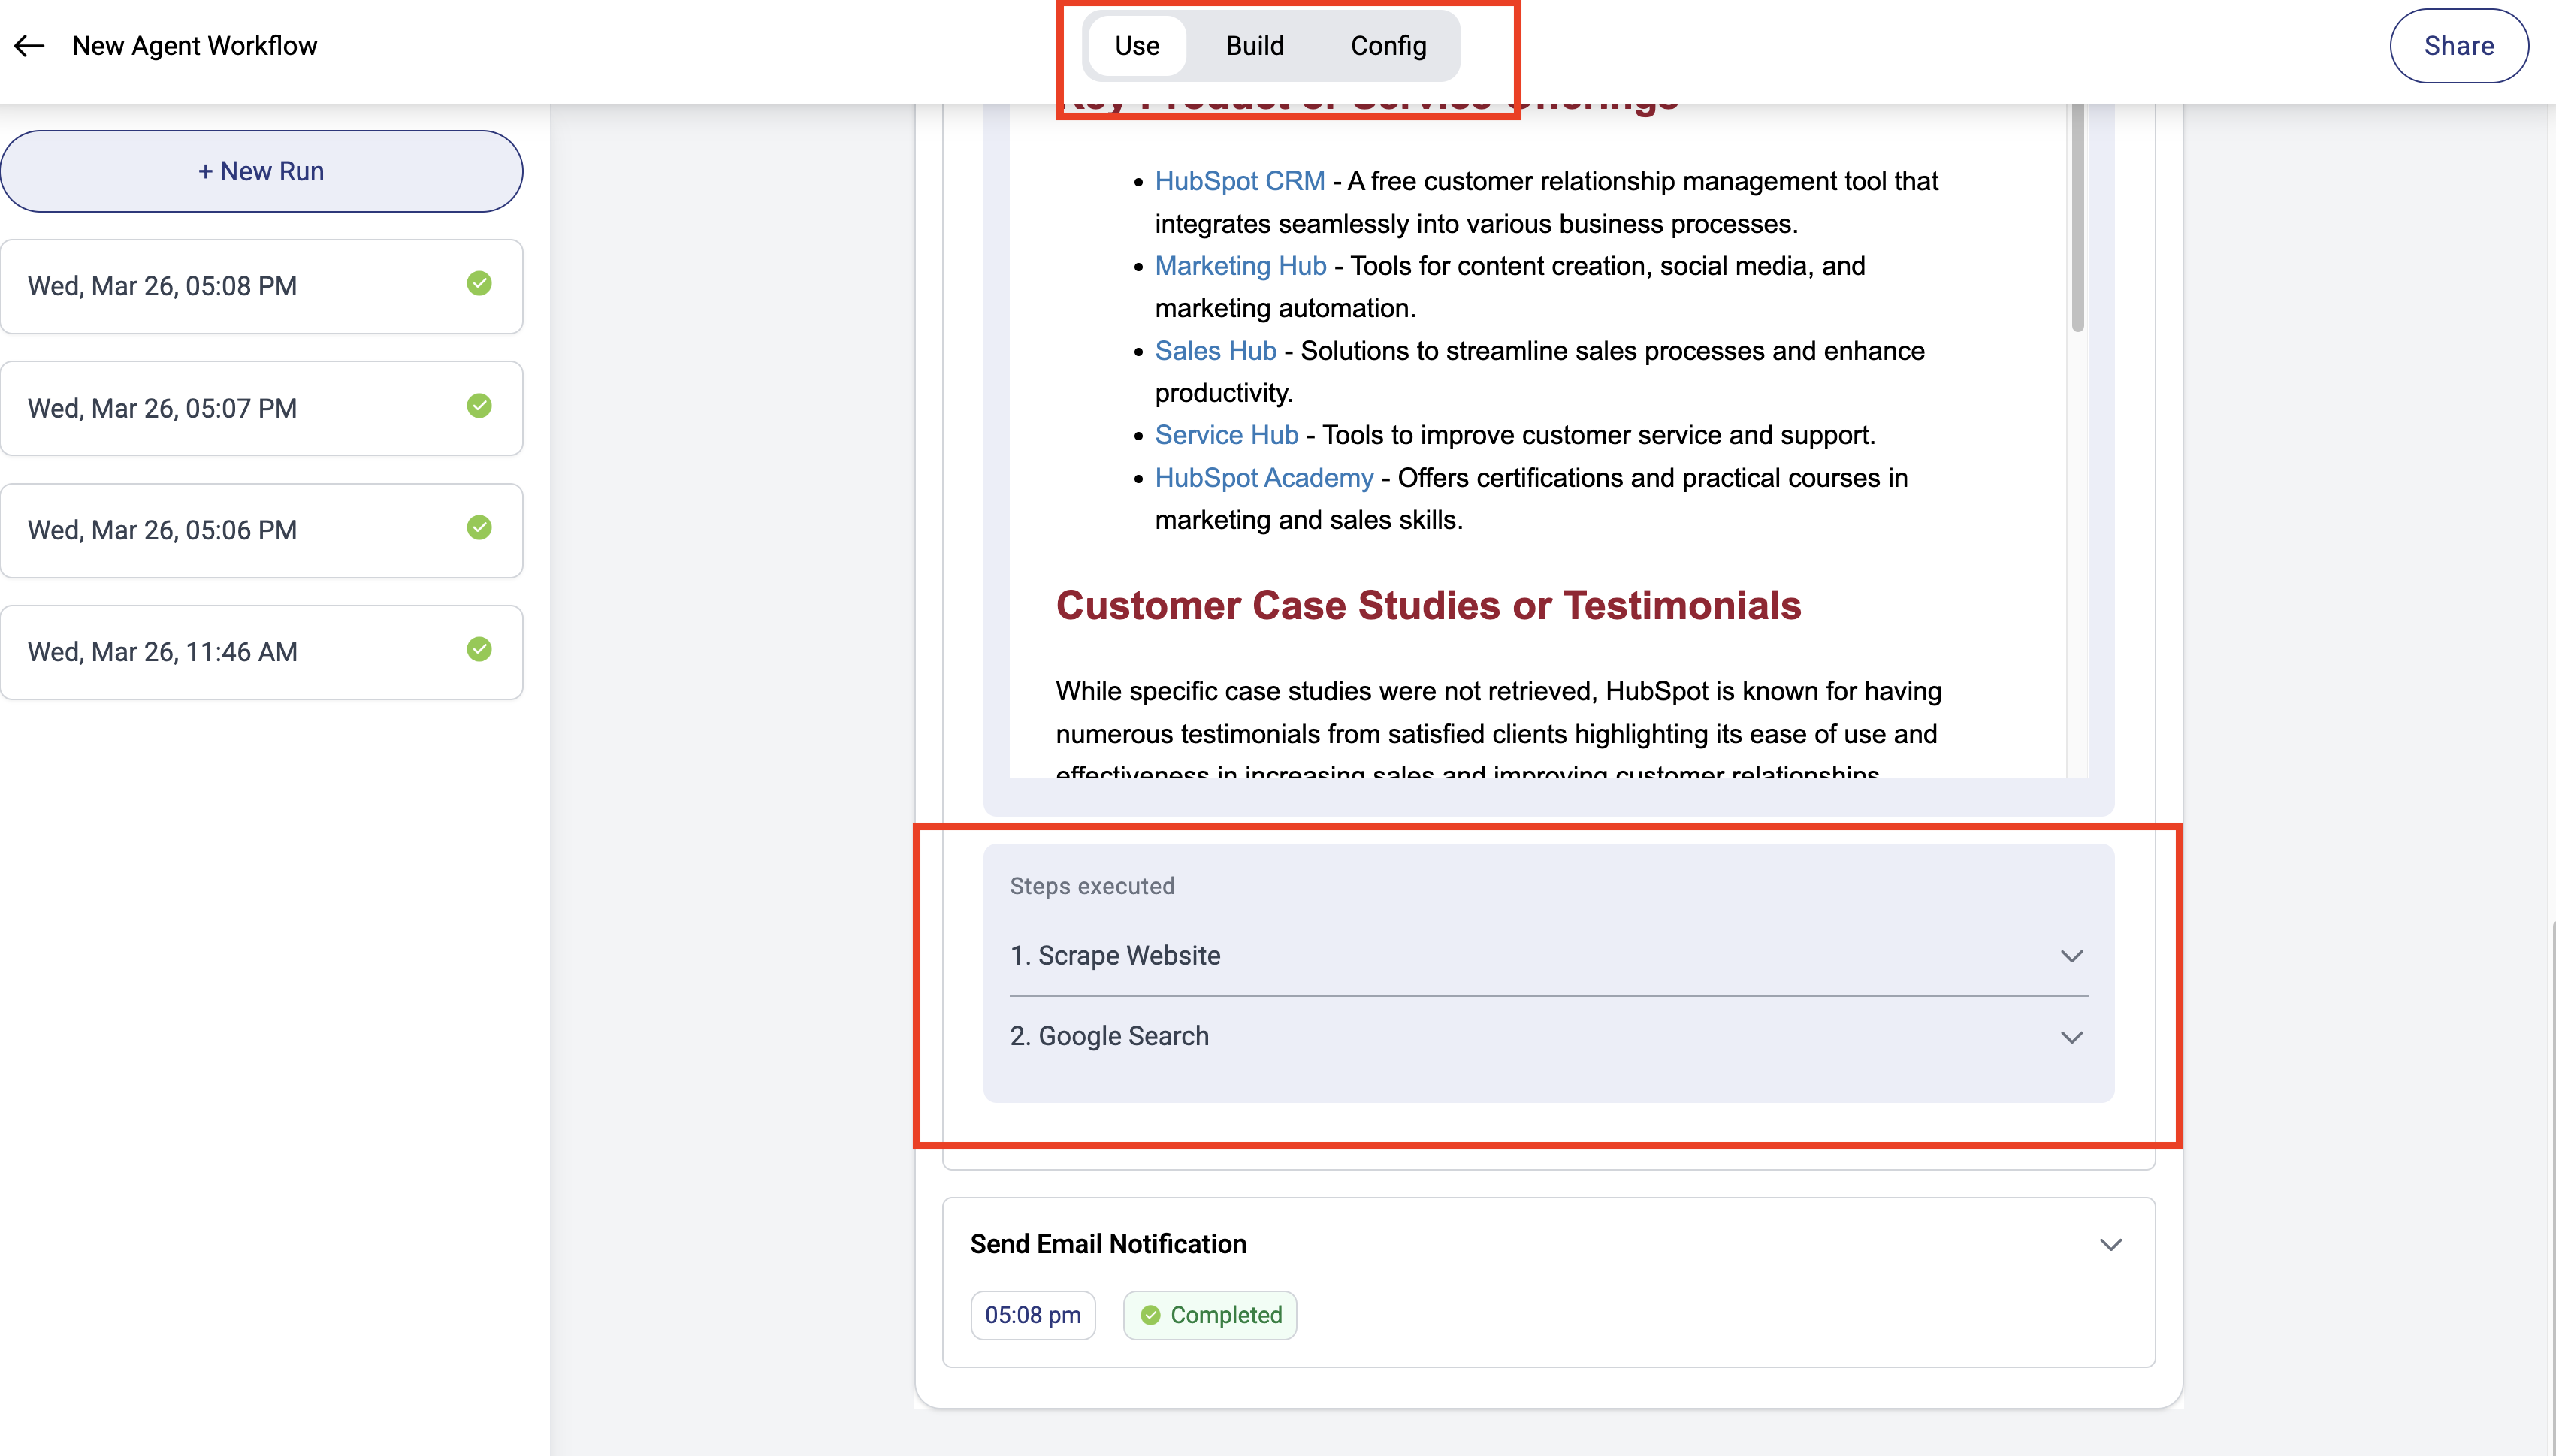
- Once the run completes, you’ll be able to see the exact steps that were taken to complete the task. And you should’ve received your first email from the AI agent!
- Customize the workflow as needed
- Run your workflow easily and see all past runs in the
Usetab
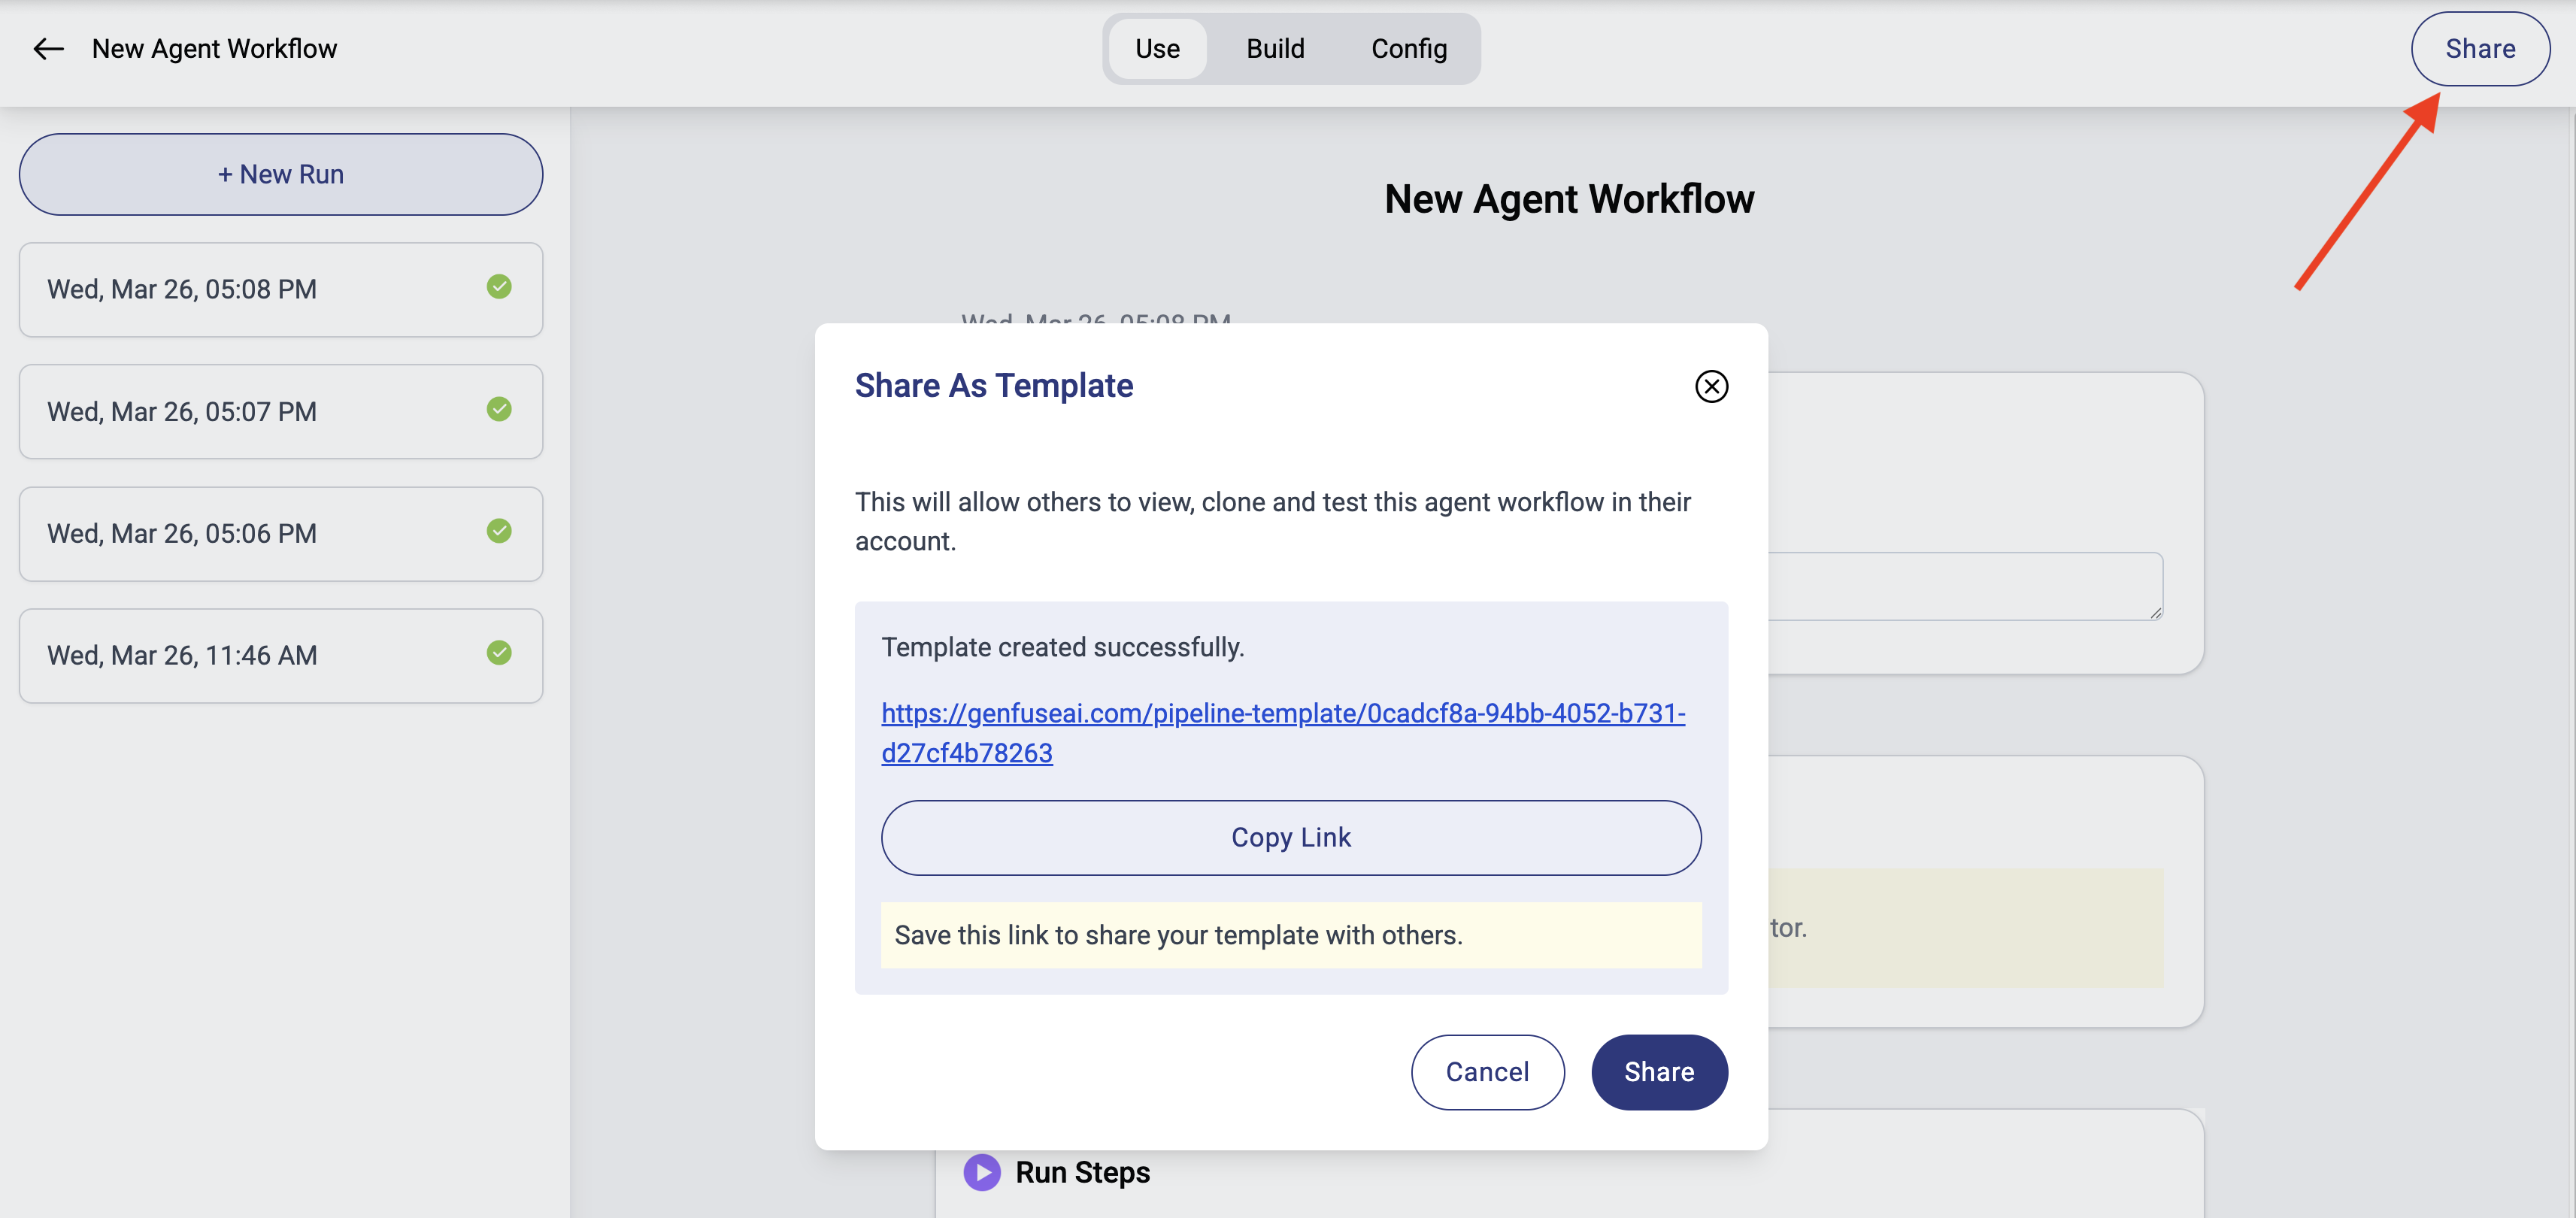
Share your workflow
Congratulations! You’ve successfully built your first agent workflow. Share it with your team by clicking theShare button. Your teammates can now clone and use this workflow.